
Crochet diamond motifs are versatile shapes that can bring color and geometric detail to blankets, shawls, scarves, garments, bags, cushion covers, and other handmade projects. Once you learn how to create a symmetrical diamond with neat points and straight sides, you can make matching motifs in different colors and combine them into larger designs.
This beginner-friendly tutorial uses US crochet terminology and works the motif in rows from one point to the opposite point. You will gradually increase to create the widest section, then decrease to form the final point. The pattern includes stitch counts, an optional border, blocking tips, and a joining method for larger projects.
1. Project Overview
- Difficulty: Beginner to confident beginner
- Approximate finished size: 6 inches wide by 8 inches tall
- Approximate completion time: 45–75 minutes per motif
- Construction: Worked in rows from the bottom point to the top point
- Main stitch: Single crochet
- Techniques: Increasing, decreasing, turning, edging, and blocking
- Border: Optional single crochet border
The final dimensions depend on your yarn, hook size, tension, and whether you add a border. Use the same materials and stitch tension for every motif in a larger project so the pieces fit together neatly.
2. Materials and Tools
Gather these supplies:
- Approximately 35–60 yards of medium-weight yarn
- 4.5 mm crochet hook, or the size needed for your yarn and desired fabric
- Scissors
- Yarn needle
- Measuring tape
- Stitch markers, if helpful
Choosing yarn and hook size
Medium-weight yarn is a practical choice because it makes the stitches easy to see and gives the motif enough structure to hold its shape. Cotton, acrylic, and cotton blends can all work well.
A smaller hook generally creates a denser fabric, while a larger hook usually creates a looser fabric. Your tension also affects the motif’s width, height, and drape. If the sides curl or the fabric feels stiff, try a different hook size and compare the results.
For a blanket or garment made from multiple motifs, use the same yarn weight and hook size throughout the project unless you intentionally want different-sized pieces.
3. US Crochet Abbreviations
- ch: Chain
- sl st: Slip stitch
- sc: Single crochet
- inc: Increase by working two single crochet stitches into the same stitch
- dec: Decrease by combining two stitches into one
- st: Stitch
- sts: Stitches
- rep: Repeat
- RS: Right side
- WS: Wrong side
Single crochet decrease
Insert your hook into the next stitch, yarn over, and pull up a loop. Insert your hook into the following stitch, yarn over, and pull up another loop. Yarn over and pull through all three loops on your hook. Two stitches have now become one.
Pattern notes
- The motif is worked in rows, turning at the end of each row.
- Turning chains do not count as stitches.
- Chain one at the beginning of each row, then work the first stitch into the first stitch of the previous row.
- Stitch counts refer to completed single crochet stitches, not the turning chain.
4. Gauge and Finished Dimensions
A formal gauge swatch is not essential for a small motif, but checking your gauge helps you make matching pieces.
For this pattern, aim for approximately 16 single crochet stitches and 18 rows over 4 inches. This is a guideline; your actual gauge may vary with your yarn and tension.
To check your gauge:
- Chain 22.
- Sc in the second chain from the hook and in every remaining chain, giving you 21 stitches.
- Ch 1 and turn. Sc across.
- Repeat until you have at least 18 rows.
- Lay the swatch flat without stretching it and measure the center.
If you have too many stitches across 4 inches, try a larger hook. If you have too few, try a smaller hook.
The finished motif is approximately 6 inches wide and 8 inches tall before blocking, based on the target gauge. Measure its width across the widest point and its height from the bottom tip to the top tip.
A heavier yarn or larger hook generally creates a larger motif. Finer yarn or a smaller hook usually creates a smaller one. Changing the number of rows also changes the proportions, so keep the increase and decrease sequence balanced if you want a symmetrical diamond.
5. Understanding the Diamond Shape
This motif is worked from the bottom point upward. The first row establishes the narrow starting point. Each following row adds stitches at both ends to widen the motif until it reaches its widest section. The second half mirrors the first by decreasing at both ends.
The four main points are:
- Bottom point: The starting point of the motif.
- Left point: The widest point on the left side.
- Right point: The widest point on the right side.
- Top point: The final point formed by the decrease rows.
The sides remain balanced because the increases and decreases occur at both ends of each row. Keeping the stitch count consistent is essential: missing an increase on one side can make the diamond lean, while adding too many stitches can make it look more like a square.
6. Complete Step-by-Step Crochet Diamond Pattern
The main pattern uses single crochet and balanced increases and decreases. To keep the instructions easy to follow, begin with a narrow point, expand evenly, and then mirror the shaping in reverse.
A. Start the Motif
- Make a slip knot and ch 2.
- Row 1: Sc in the second ch from the hook. You should have 1 sc.
- Ch 1 and turn.
This single stitch forms the bottom tip of the diamond.
B. Shape the Expanding Section
For each expansion row, work an increase in the first stitch and an increase in the last stitch. Work single crochet in all stitches between them.
- Row 2: Inc in the first st, sc in the last st. You should have 3 sts.
- Row 3: Inc in the first st, sc in the next st, inc in the last st. You should have 5 sts.
- Row 4: Inc in the first st, sc in each st across until one st remains, inc in the last st. You should have 7 sts.
- Row 5: Repeat the expansion method. You should have 9 sts.
- Row 6: Repeat the expansion method. You should have 11 sts.
- Row 7: Repeat the expansion method. You should have 13 sts.
- Row 8: Repeat the expansion method. You should have 15 sts.
- Row 9: Repeat the expansion method. You should have 17 sts.
- Row 10: Repeat the expansion method. You should have 19 sts.
- Row 11: Repeat the expansion method. You should have 21 sts.
For Rows 4–11, the exact sequence is: ch 1, turn, work 2 sc in the first stitch, work 1 sc in every stitch until the final stitch, then work 2 sc in the final stitch.
Each row adds two stitches, one on each side. The motif gradually widens while keeping its left and right edges balanced.
C. Form the Widest Section
Row 11 is the widest row in this version, with 21 stitches. It forms the left and right points of the diamond.
To create a longer diamond without changing its width, you may work one or two plain single crochet rows at the widest section before beginning the decreases. Each plain row should have 21 stitches.
For the basic version, work one plain row:
– Row 12: Ch 1, turn, sc in every stitch across. You should have 21 sts.
Keep this row relaxed and even. Avoid adding increases here, or the motif may begin to look square.
D. Shape the Narrowing Section
Now decrease at both ends of each row. This mirrors the expansion and brings the motif toward the top point.
- Row 13: Ch 1, turn, dec over the first 2 sts, sc across until 2 sts remain, dec over the final 2 sts. You should have 19 sts.
- Row 14: Repeat the decrease method. You should have 17 sts.
- Row 15: Repeat. You should have 15 sts.
- Row 16: Repeat. You should have 13 sts.
- Row 17: Repeat. You should have 11 sts.
- Row 18: Repeat. You should have 9 sts.
- Row 19: Repeat. You should have 7 sts.
- Row 20: Repeat. You should have 5 sts.
- Row 21: Repeat. You should have 3 sts.
- Row 22: Dec over the first 2 sts, then dec over the remaining 2 sts if working a four-stitch row is needed for your current count. For the correct three-stitch ending, instead work one decrease across the first 2 sts, then sc in the final stitch. You should have 2 sts.
- Row 23: Dec over the final 2 sts. You should have 1 st.
For a consistent and easier-to-follow finish, the decrease section should always reduce the stitch count by two per row until only one stitch remains. If your row count or stitch count differs, stop and recount before continuing.
E. Complete the Final Point
To keep the top point neat and centered, use a three-stitch decrease at the end of the narrowing sequence.
A single crochet three together (sc3tog) is worked as follows:
- Insert the hook into the first stitch, yarn over, and pull up a loop.
- Insert the hook into the second stitch, yarn over, and pull up a loop.
- Insert the hook into the third stitch, yarn over, and pull up a loop.
- Yarn over and pull through all four loops on the hook.
After Row 21, you should have 3 stitches. Work sc3tog across those three stitches to finish with one stitch at the top point. Fasten off, leaving a tail for weaving in.
Stitch Count Verification
Use this sequence to check the basic diamond:
| Section | Stitch counts |
|---|---|
| Starting point | 1 |
| Expanding rows | 3, 5, 7, 9, 11, 13, 15, 17, 19, 21 |
| Widest plain row | 21 |
| Narrowing rows | 19, 17, 15, 13, 11, 9, 7, 5, 3 |
| Final point | 1, using sc3tog |
Each expansion row adds two stitches. Each narrowing row removes two stitches until three remain, when the final three-stitch decrease forms the top point. The matching increases and decreases help keep the left and right sides balanced.
With the target gauge of approximately 16 stitches and 18 rows over 4 inches, this 23-row motif will be roughly 5–6 inches wide and about 5 inches tall, depending on tension. To make a taller diamond, add plain rows between the expansion rows and mirror the same number of plain rows during the narrowing section. This lengthens the sides without increasing the maximum width.
7. Optional Border
A single crochet border can make the edges look more finished and help the motif hold its shape.
- Attach the yarn at one of the side points.
- Ch 1 and work sc along the first side, spacing stitches evenly along the row ends.
- At the top point, work 3 sc into the point stitch to help the corner remain flat.
- Continue down the next side, placing stitches evenly along the row ends.
- At the bottom point, work 3 sc into the point stitch.
- Continue around the remaining two sides.
- Join with a sl st to the first sc and fasten off.
The number of stitches along the row ends depends on your row gauge. Spread them evenly rather than forcing one stitch into every row end. If the border pulls inward, add a few stitches along the sides. If it ripples, remove a few stitches where necessary.
For the cleanest result, block the motif before adding a border if the sides are uneven. If you prefer a raw edge, simply fasten off, weave in the yarn ends, and block the motif carefully.
8. Blocking and Shaping
Blocking helps straighten the sides, sharpen the four points, and make multiple motifs more consistent.
- Lay the motif on a flat surface suitable for the yarn.
- Gently shape it into a diamond, aligning the top and bottom points vertically.
- Adjust the left and right points so they sit at the same height.
- Straighten the sides without stretching the stitches excessively.
- Measure the width at the widest point and the height from tip to tip.
- Pin the motif in place if the yarn and blocking method permit it.
- Allow it to dry completely before removing the pins.
Choose a blocking method that suits your yarn. Some fibers tolerate damp blocking, while others require special care. Avoid direct heat or steam on fibers that may be damaged by it.
If the motif will be used in a blanket or garment, block all pieces to the same dimensions before joining them.
9. Making Multiple Matching Motifs
For larger projects, consistency is more important than achieving an exact generic size.
- Use the same yarn weight and hook size for every motif.
- Maintain similar stitch tension from the first row to the last.
- Follow the same increase and decrease sequence.
- Count stitches at the end of each row.
- Measure completed motifs and compare their widest points and heights.
- Block motifs to a consistent size when suitable for the yarn.
Making larger or smaller motifs
To make a wider diamond, add more expansion rows before the widest section, increasing two stitches per row. Then mirror the expansion sequence with matching decreases.
To make a taller diamond without making it wider, add plain rows between the expansion rows and repeat the same number of plain rows in reverse during the narrowing section.
For a smaller motif, use finer yarn and a suitable smaller hook, or stop the expansion sequence at a lower stitch count and mirror the decreases. Keep the increases and decreases symmetrical so the four points remain balanced.
10. Joining Diamond Motifs
Diamond motifs can be joined into blankets, shawls, scarves, bags, cushion covers, and garments. Slip-stitch joining creates a relatively low-profile seam, while single crochet joining creates a more visible raised line.
Slip-stitch joining
- Lay two blocked motifs flat with corresponding sides aligned.
- Match the top, bottom, and side points before joining.
- Insert the hook through corresponding edge stitches on both motifs.
- Yarn over and pull through both edges and the loop on the hook to make a slip stitch.
- Continue along the shared side, joining corresponding stitches evenly.
- Keep the yarn tension relaxed so the seam does not pucker.
- Fasten off and weave in the ends securely.
If the edge stitch counts do not match exactly, distribute the difference gradually along the side rather than crowding extra stitches into one small area.
Planning a larger layout
Arrange the motifs on a flat surface before joining them. Alternating the direction of the diamonds can create zigzag patterns, repeated geometric shapes, or a more varied arrangement.
A blanket made from diamonds may have a zigzag outer edge rather than a rectangle. Plan the layout in advance and use half motifs, carefully shaped border sections, or a border designed to fill the outer gaps. Do not expect every diamond arrangement to produce straight edges automatically.
11. Color and Design Variations
Once you understand the basic shaping, you can personalize the motif in several ways.
- Solid-color diamond: Use one color for a simple geometric look.
- Two-color motif: Use one color for the expansion section and another for the narrowing section.
- Striped diamond: Change colors every few rows for horizontal stripes.
- Contrasting border: Add a single crochet border in a complementary color.
- Different yarn weights: Choose a new hook and make a gauge swatch to estimate the new size.
- Larger or smaller motifs: Adjust the number of expansion rows or use a different yarn weight.
- Alternating blanket colors: Arrange diamonds in a repeating color sequence for a coordinated design.
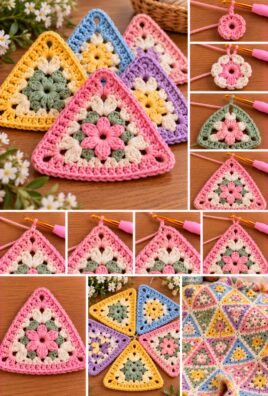
- Mixed geometric motifs: Combine diamonds with triangles or squares, planning the dimensions carefully before joining.
When changing colors, finish the final stitch of the old color with the new color if you want a cleaner transition. Secure yarn ends by weaving them through several stitches on the wrong side.
Keep these variations separate from the main pattern until you are comfortable making a consistent basic diamond.
12. Troubleshooting
| Problem | Likely cause | How to fix it |
|---|---|---|
| The motif looks like a square instead of a diamond | Too many plain rows at the widest section or an insufficiently pointed start and finish | Reduce extra plain rows and make sure the motif starts and ends with one stitch. |
| The top and bottom points do not align | Increases or decreases were missed on one side | Check the stitch count at the end of every row and compare both sides. |
| One side is longer than the other | Stitch tension differs or shaping is uneven | Check the increase and decrease placement and block the motif gently. |
| The widest section is too narrow | The expansion section ends too early | Add more increase rows, then mirror the new shaping with matching decreases. |
| The widest section is too broad | There are too many increase rows | Stop the expansion earlier and mirror the shorter sequence. |
| The edges curl | The hook may be too small or tension too tight | Try a larger hook and check whether gentle blocking helps. |
| The sides ripple | The tension is too loose or there are too many stitches | Check the stitch counts and avoid adding stitches except at the planned increases. |
| The stitch count is incorrect | An increase, decrease, or stitch was missed | Count the stitches before beginning the next row. Correct the row before continuing. |
| The points look blunt or uneven | The first or final stitches are loose, or the final shaping is incorrect | Tighten the starting loop gently and use the specified final decrease. |
| Different motifs finish at different sizes | Yarn, hook size, tension, or row counts vary | Use the same materials, count each row, and block motifs consistently. |
| Joining creates gaps or puckering | The edges are not aligned or the joining tension is uneven | Match corresponding stitches and distribute any stitch-count difference gradually. |
| The border distorts the shape | Too many or too few stitches were worked along the row ends | Adjust the stitch spacing and check that each point lies flat. |
13. Frequently Asked Questions
Is this diamond motif suitable for beginners?
Yes. The motif uses single crochet, simple increases, decreases, and turning. The most important skill is counting stitches consistently so the sides remain symmetrical.
How do I make the diamond larger?
Add expansion rows, increasing by two stitches per row, and mirror the sequence with decreases. You can also use a different yarn weight, but make a gauge swatch to understand how the dimensions will change.
How can I keep all four points symmetrical?
Increase at both ends of each expansion row and decrease at both ends of each narrowing row. Count the stitches after every row and block the motif gently if needed.
Do I need to block every motif?
Blocking is not always essential, but it is helpful when joining many motifs into a blanket or garment. If your yarn responds well to blocking, it can help standardize their dimensions and straighten the sides.
What is the easiest way to join diamond motifs?
Slip-stitch joining is a practical option for beginners. Align the sides and points first, then work through corresponding edge stitches with consistent tension.
Can I use a different yarn weight?
Yes. Choose an appropriate hook and make a gauge swatch. A heavier yarn usually creates a larger motif, while a finer yarn usually creates a smaller one.
How do I prevent the edges from curling?
Check your hook size and stitch tension. Avoid pulling the yarn too tightly, and use a suitable blocking method to help the motif lie flat.
Can this pattern be used for a blanket or garment?
Yes. Make multiple matching motifs and join them into the desired layout. Plan the arrangement before joining, especially if you want a rectangular blanket, because diamond layouts can leave uneven outer edges.
14. Quick Pattern Summary
Materials
- Medium-weight yarn, approximately 35–60 yards per motif
- 4.5 mm crochet hook, adjusted for gauge
- Scissors, yarn needle, and measuring tape
Abbreviations
- ch: Chain
- sl st: Slip stitch
- sc: Single crochet
- inc: Two sc in the same stitch
- dec: Combine two stitches into one
- sc3tog: Combine three stitches into one
- st or sts: Stitch or stitches
Gauge and dimensions
- Target gauge: Approximately 16 sc stitches and 18 rows over 4 inches
- Approximate finished dimensions: About 5–6 inches wide and about 5 inches tall for the basic 23-row motif, depending on tension
Starting point
- Ch 2.
- Row 1: Sc in the second ch from the hook. You have 1 st.
Expansion
- Row 2: Increase to 3 sts.
- Row 3: Increase to 5 sts.
- Continue increasing by two stitches per row until Row 11 has 21 sts.
Widest section
– Row 12: Sc across for 21 sts.
Narrowing
– Rows 13–21: Decrease by two stitches per row, finishing Row 21 with 3 sts.
Final point
- Work sc3tog across the remaining 3 sts to finish with 1 st.
- Fasten off and weave in the ends.
Optional border
- Work sc evenly along the sides.
- Work 3 sc at each point to help the corners lie flat.
- Join with a sl st and fasten off.
Blocking and joining
- Align the four points and straighten the sides.
- Block motifs to consistent dimensions when appropriate.
- Join corresponding edges using slip stitches, keeping the tension even.
Conclusion
Crochet diamond motifs are a useful foundation for a wide range of handmade projects, from colorful blankets to scarves, bags, and garments. Once you master the balanced increases and decreases, you can easily customize the width, height, yarn, and colors to suit your design.
Take your time counting stitches and checking the four points. Consistent shaping and careful blocking will help your motifs look neat and fit together beautifully in your next crochet project.
Leave a Comment