
ADVERTISEMENT
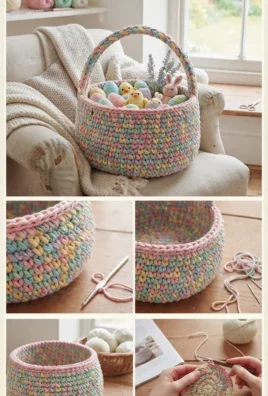
A handmade crochet Easter basket is an enchanting, festive, and highly practical seasonal project that brings pastel charm, sturdy storage, and delightful holiday spirit to any room. Featuring a structured circular base, thick textured walls in a dreamy multicolored pastel palette, a reinforced solid pink rim, and a sturdy braided handle filled with handmade eggs and little plush toys, this basket is as rewarding to craft as it is to display.
1. Project Overview
All measurements and times are approximate:
- Skill level: Intermediate
- Completion time: 6 to 9 hours
- Finished size: Approximately 10 inches in diameter by 7 inches deep, with a sturdy braided handle reaching 6 inches high
- Construction: Worked starting from a flat circular base expanding outward, building straight up into sturdy vertical walls using tight single or half-double crochet stitches, finished with a reinforced rim band, and completed with a separate braided handle
- Main stitches: Magic ring, chain, slip stitch, single crochet, half double crochet, and increases
- Suggested uses: Easter egg hunt basket, spring table centerpiece, holiday gift holder, toy storage, and nursery decor
The final dimensions will depend on your yarn weight, hook size, and personal stitch tension.
ADVERTISEMENT
2. Materials and Supplies
- Yarn: Sturdy medium worsted weight yarn (Category 4) held double, or super bulky t-shirt yarn / cotton cord yarn for maximum rigidity:
- Color A (Body): Pastel Multicolored Variegated Yarn (blend of pink, mint, yellow, and blue) (approx. 250 g)
- Color B (Rim & Handle Accent): Soft Pastel Pink (approx. 100 g)
- Crochet hook: 5.0 mm (US H/8) or 6.0 mm (US J/10) to maintain an extremely dense, rigid fabric that holds its shape without sagging
- Tapestry needle: Blunt-ended yarn needle for weaving in ends and securing handle attachments
- Stitch marker: Essential for tracking round beginnings on the circular base and walls
- Scissors & measuring tape: For clean cuts and accurate sizing
3. US Crochet Abbreviations & Stitch Meanings
- ch: Chain stitch
- sl st: Slip stitch
- sc: Single crochet
- hdc: Half double crochet
- inc: Single crochet increase (work 2 single crochets into the same stitch)
- st(s): Stitch or stitches
- sp: Space
- ch-sp: Chain space
- MR: Magic ring
- FO: Fasten off
Special Technique: Working in the Back Loops Only for the Basket Rim Transition
When transitioning from the flat circular base to the vertical walls of the basket, working a single round in the back loops only (BLO) creates a sharp, defined 90-degree corner, preventing the base from curling or slouching.
4. Skills to Know Before Starting
- Maintaining Rigid Tension: Crochet tightly so the basket walls remain stiff and self-supporting.
- Working in Continuous Spirals vs. Joined Rounds: Using joined rounds with turning chains for structured flat bases, and continuous or joined rounds for the walls.
- Braiding Structural Handles: Creating a thick, multi-strand braid to form a sturdy carrying handle that won’t stretch out under weight.
5. Complete Step-by-Step Crochet Pattern
Part A: The Flat Circular Base (Pastel Variegated Yarn / Color A)
Round 1: Make a MR in variegated pastel yarn, work 6 hdc into the ring [6 sts]. Sl st to join.
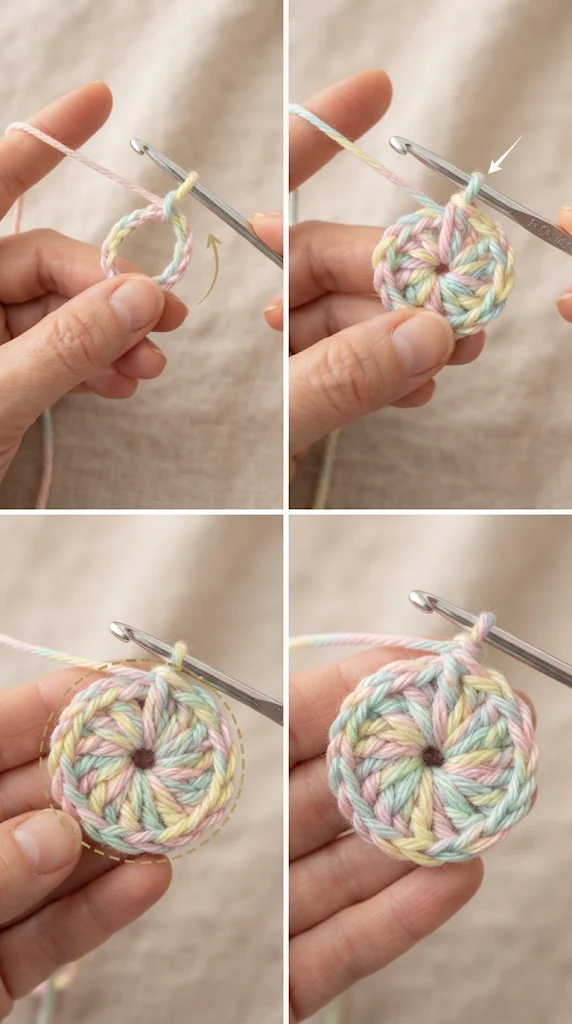
Round 2: Ch 2, work 2 hdc in each st around [12 sts]. Sl st to join.
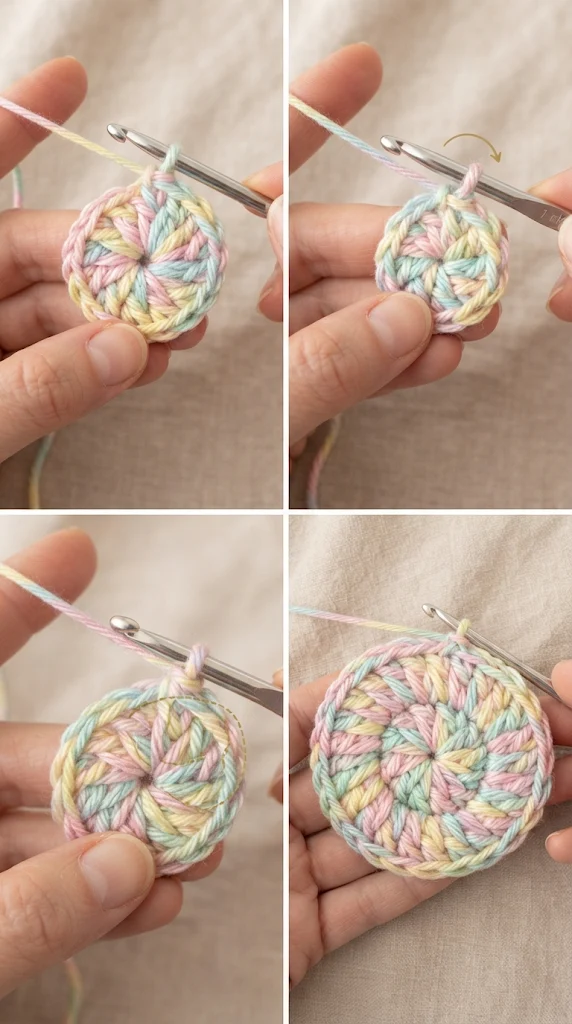
Round 3: Ch 2, work (1 hdc, inc) 6 times around [18 sts]. Sl st to join.
Round 4: Ch 2, work (2 hdc, inc) 6 times around [24 sts]. Sl st to join.
ADVERTISEMENT
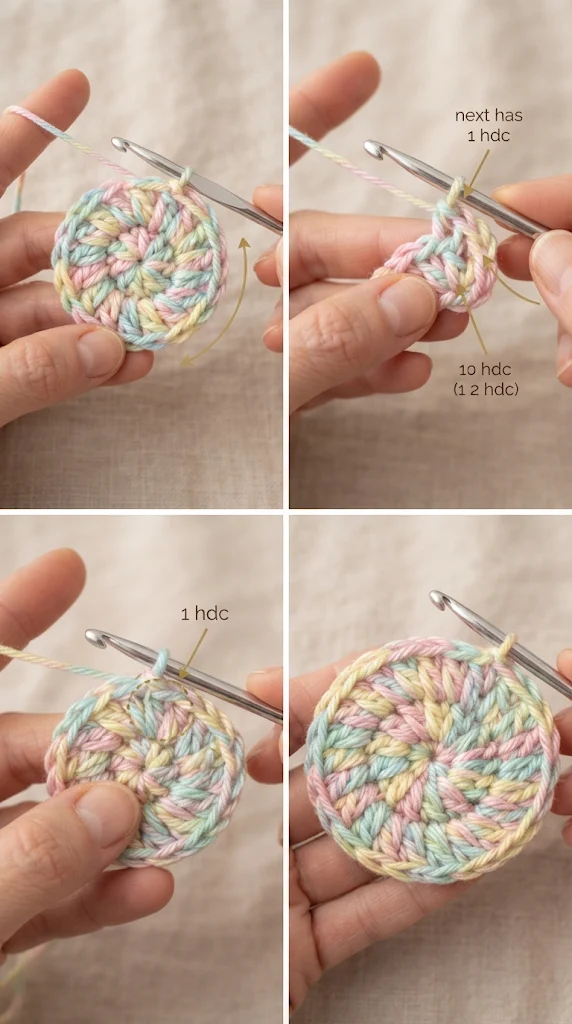
Round 5: Ch 2, work (3 hdc, inc) 6 times around [30 sts]. Sl st to join.
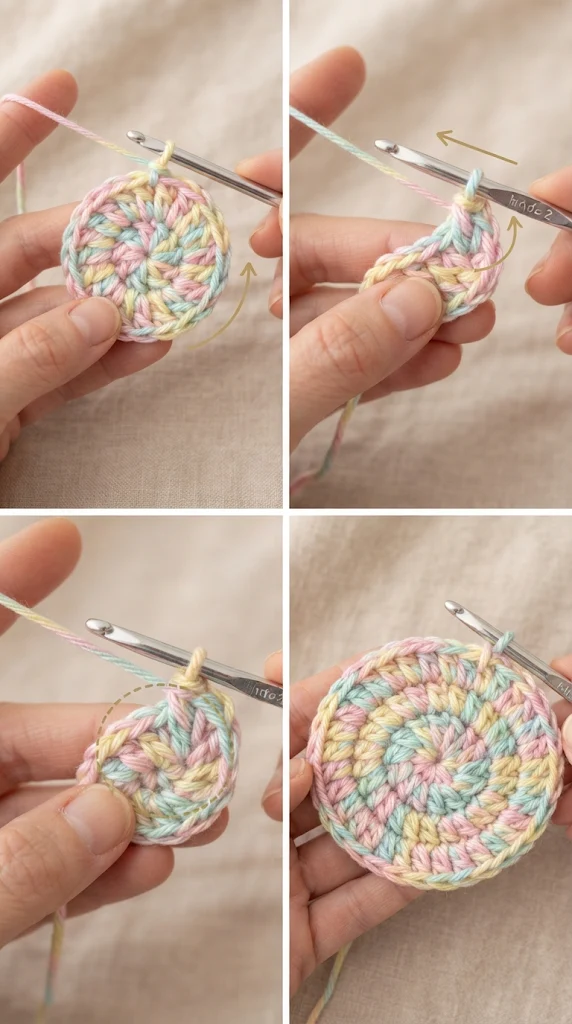
Rounds 6–10 (Expanding Base): Continue the established circle increase pattern, adding 6 increases per round ((4 hdc, inc), (5 hdc, inc), etc.) until the flat base reaches roughly 10 inches in diameter. Sl st to join.
Part B: The Basket Walls (Pastel Variegated Yarn / Color A)
- Round 1 (Corner Transition): Ch 1, working in back loops only (BLO) around, work 1 sc in each stitch across the entire perimeter [total stitch count matches your final base round]. Sl st to join. This creates the sharp corner edge.
- Rounds 2–16 (15 Vertical Rounds): Ch 1, work 1 hdc (or tight single crochet) in each stitch around. Sl st to join at the end of each round. This builds the tall, sturdy sides of the basket.
- Fasten off Color A and weave in the tail.
Part C: The Reinforced Rim Band (Pastel Pink Yarn / Color B)
- Round 1: Join Pastel Pink yarn to any stitch on the top rim. Ch 1, work 1 hdc in each stitch around the entire rim edge [matching stitch count]. Sl st to join.
- Rounds 2–3 (2 rounds): Ch 1, work 1 hdc in each stitch around to create a thick, polished pink border. Fasten off and weave in tails.
Part D: The Braided Carrying Handle (Pastel Pink & Variegated Yarn)
- Strand Foundation: Create 3 long strands of yarn (combining pink and variegated strands). Each strand should be roughly 36 inches long.
- Braiding: Secure the top ends together with a tight knot, then braid the three thick strands firmly together into a dense, robust braid about 16 to 18 inches long. Secure the bottom end with a knot.
- Attaching the Handle: Position both ends of the finished braid securely to opposite interior sides of the basket rim. Use a tapestry needle and matching pink yarn to sew through multiple rows of the basket wall, reinforcing the attachment heavily so it can support heavy contents.
6. Assembly and Finishing Touches
- Inspection: Check that the basket base lies flat and the vertical walls stand stiffly on their own.
- Handle Check: Tug gently on the braided handle to ensure the interior anchor stitching is secure.
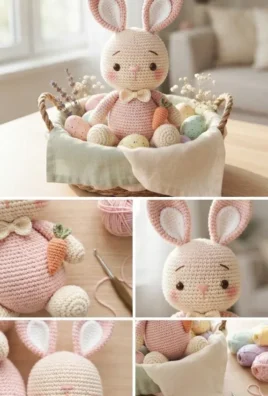
- Filling: Fill your completed Easter basket with handmade amigurumi eggs, little plush bunnies, or spring lavender sprigs.
7. Troubleshooting Common Problems
- The basket walls flare outward like a bowl: You added too many increases. The walls must be worked straight up with zero increases per round.
- The basket is too flimsy and slumps over: Your hook was too large or your yarn tension too loose. Switch down a hook size and use t-shirt yarn or hold worsted yarn double.
- The base curls upward: You missed the back-loop-only transition round. Make sure to work one round in the BLO to establish a firm bottom corner.
8. Frequently Asked Questions
1. Can I use t-shirt yarn for this basket?
Yes! T-shirt yarn or fabric yarn is actually ideal because it creates an extremely rigid, professional-looking basket that requires zero extra stiffener.
2. How do I clean the finished Easter basket?
Spot clean minor marks with a damp cloth and mild soap, or hand wash gently in cool water and reshape while damp to dry flat.
3. Can I make the basket larger?
Yes. Simply work extra circular increase rounds for a wider base before transitioning to the vertical wall rounds.
Leave a Comment