
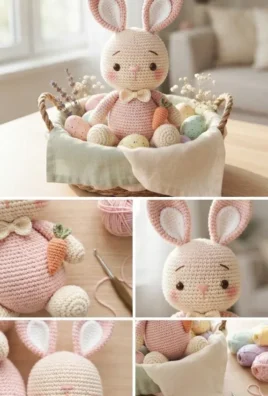
A handmade crochet Easter egg amigurumi is a delightful, quick, and charming spring project that brings pastel cheer, playful striping, and embroidered floral details to any seasonal display or holiday basket. Featuring smooth rounded shapes, sweet color combinations in mint, yellow, pink, lavender, and sky blue, and optional embroidered daisies or polka dots, these festive eggs are as fun to craft as they are to gift.
Following your preferred style, this pattern is completely text-based with zero images and zero tables, providing clear, descriptive, and structured instructions in English from start to finish.
1. Project Overview
All measurements and times are approximate:
- Skill level: Easy / Beginner-Friendly
- Completion time: 1 to 2 hours per egg
- Finished size: Approximately 3.5 inches tall by 2.5 inches wide (standard chicken egg size)
- Construction: Worked in continuous spiral rounds starting from the narrow top tip, expanding downward to shape the egg, and tapering slightly at the bottom base before stuffing and closing
- Main stitches: Magic ring, chain, slip stitch, single crochet, increase, and invisible decrease
- Suggested uses: Easter basket fillers, spring table centerpieces, egg hunt toys, nursery mobiles, and festive garland decorations
The final dimensions will depend on your yarn weight, hook size, and personal stitch tension.
2. Materials and Supplies
- Yarn: Soft medium worsted weight yarn (Category 4) or DK cotton-acrylic yarn in assorted pastel colors:
- Pastel Palette: Mint Green, Soft Pastel Yellow, Baby Pink, Lavender, and Sky Blue (approx. 15 to 20 g per egg)
- Embroidery Accent: White and Yellow embroidery floss or scrap yarn for stitching daisy petals and French knots
- Crochet hook: 3.0 mm (US C/2) or 3.25 mm to keep stitches tight and prevent fiberfill from poking through
- Stuffing: Premium polyester fiberfill (approx. 15 g per egg)
- Tapestry needle: Blunt-ended yarn needle for embroidering details, weaving ends, and closing the final rounds
- Stitch marker: Essential for tracking the first stitch of continuous spiral rounds
- Scissors & straight pins: For cleanly cutting yarn tails and holding embroidery placement
3. US Crochet Abbreviations & Stitch Meanings
- ch: Chain stitch
- sl st: Slip stitch
- sc: Single crochet
- inc: Single crochet increase (work 2 single crochets into the same stitch)
- dec: Invisible single crochet decrease (pick up front loops of next 2 stitches and crochet them together)
- st(s): Stitch or stitches
- MR: Magic ring
- FO: Fasten off
Special Technique: The Invisible Decrease for Amigurumi
Insert your crochet hook into the front loop only of the first stitch, then immediately insert it into the front loop only of the adjacent stitch. Yarn over, draw through both front loops, yarn over again, and draw through the remaining two loops. This creates a seamless, bump-free surface curve ideal for egg shapes.
4. Skills to Know Before Starting
- Continuous Spiral Rounds: Work without joining rounds with a slip stitch; place your stitch marker in the first stitch of every round.
- Color Striping: Alternating yarn colors every 2 to 3 rounds creates clean, horizontal pastel stripes.
- Surface Embroidery: Adding simple lazy-daisy stitches or French knots onto finished amigurumi surfaces.
5. Complete Step-by-Step Crochet Pattern
Part A: The Solid or Striped Easter Egg (Worked from Top Down)
- Round 1: Make a MR in your chosen pastel color, work 6 sc into the ring [6 sts].
- Round 2: Work inc in each st around [12 sts].
- Round 3: Work (1 sc, inc) 6 times around [18 sts].
- Round 4: Work (2 sc, inc) 6 times around [24 sts].
- Round 5: Work (3 sc, inc) 6 times around [30 sts].
- Round 6: Work 1 sc in each st around [30 sts]. (Note: If making a striped egg, switch colors every 2 to 3 rounds).
- Rounds 7–9 (3 rounds): Work 1 sc in each st around [30 sts].
- Round 10: Work (3 sc, dec) 6 times around [24 sts].
- Rounds 11–12 (2 rounds): Work 1 sc in each st around [24 sts].
- Round 13: Work (2 sc, dec) 6 times around [18 sts].
- Round 14: Work 1 sc in each st around [18 sts].
- Pack the egg firmly with polyester fiberfill, shaping it into an oval curve.
- Round 15: Work (1 sc, dec) 6 times around [12 sts].
- Round 16: Work dec 6 times to close [6 sts].
- Fasten off, leaving a short tail, weave the yarn tail through the front loops of the remaining 6 stitches, pull tight to seal, and bury the tail inside.
6. Optional Surface Embroidery Decorations
- Embroidered Daisy: Thread your tapestry needle with white yarn or floss. On a lavender or mint egg, stitch five straight stitches radiating outward from a central yellow French knot to form a charming daisy flower.
- Polka Dots: Use cream or yellow yarn to stitch tiny French knots scattered evenly across a sky-blue or pink egg body to create a speckled painted-egg look.
7. Troubleshooting Common Problems
- The egg looks too round or spherical: Ensure you include the straight middle rounds (Rounds 7–9) without increases to elongate the amigurumi into an authentic egg shape.
- Stuffing peeks through stitches: Your tension may be too loose or your hook too large. Switch down by half a millimeter for tighter stitch walls.
- Embroidery pulls the fabric inward: Do not pull your embroidery thread too tight; keep tension relaxed so the stitches lay flat against the curved amigurumi surface.
8. Frequently Asked Questions
1. Can I use blanket yarn for a giant Easter egg?
Yes! Using super bulky chenille blanket yarn with a 6.0 mm hook will produce a large, soft plush egg pillow in minutes.
2. How do I wash these crocheted Easter eggs?
Hand wash gently in cool water with mild soap, press out excess moisture, and lay flat to dry.
3. Are these eggs suitable as baby toys?
Yes, provided you do not use small hard beads or buttons for decoration. Embroidered facial features or floral stitches make them completely safe and soft for infants.
Leave a Comment