
A crochet lavender flower bundle brings a soft, timeless touch to any space. With delicate purple buds and slender green stems, these handmade flowers look beautiful in a decorative vase, on a desk, in a reading corner, or as a thoughtful handmade gift. Unlike fresh lavender, a crocheted arrangement can be enjoyed for years with minimal maintenance.
In this beginner-friendly tutorial, you will create a bundle of seven lavender stems using textured crochet buds, green stems, and optional leaves. The flowers are made with simple stitches and assembled into a natural-looking arrangement that works beautifully for home decoration.
1. Project Overview
- Project name: Crochet Lavender Flower Bundle
- Skill level: Beginner to easy intermediate
- Construction: Textured flower spikes attached to crocheted green stems
- Recommended yarn: Lightweight category 2 or medium-weight category 3 yarn
- Fiber: Cotton, acrylic, or a cotton-acrylic blend
- Recommended hook: 3 mm for category 2 yarn or 3.5 mm for category 3 yarn
- Flower colors: Lavender, purple, violet, or lilac
- Stem color: Green
- Estimated finished stem length: 8–10 inches
- Estimated flower spike length: 2.5–3 inches
- Number of stems: Seven
- Estimated completion time: 5–8 hours
- Estimated yarn requirement: Approximately 100–150 yards in total, depending on yarn thickness and the number of leaves
- Optional support: Seven short pieces of floral wire, each approximately 8–10 inches long
- Optional stuffing: A small amount of fiberfill for the flower tips
These dimensions, quantities, and completion times are estimates. Your results will vary according to yarn, hook size, tension, and stem construction.
2. Materials and Supplies
Gather the following materials before beginning:
- Purple or lavender yarn for the flower buds
- Green yarn for the stems and optional leaves
- A crochet hook appropriate for your yarn
- Scissors
- Yarn needle
- Measuring tape
- Seven pieces of floral wire, if using supported stems
- Floral tape, if desired
- A small amount of polyester fiberfill, optional
- Stitch markers, optional
- Ribbon for tying the bouquet
- A decorative vase or wrapping paper, optional
Choosing the right yarn
Smooth cotton or acrylic yarn works well for small lavender buds because it helps the stitches remain visible and makes the flower texture easier to control.
Lightweight yarn creates smaller buds and a delicate flower spike. Thicker yarn produces larger, more prominent buds. Use the same yarn weight and hook for all seven flower spikes to keep them consistent.
Choosing a crochet hook
A smaller hook generally creates a firmer fabric, which helps the buds hold their shape. However, the stitches should not be so tight that inserting the hook becomes difficult.
For a decorative flower, aim for a compact texture that does not reveal large gaps between stitches.
Using floral wire safely
Floral wire can help the stems hold their shape, especially when displayed in a vase. Choose wire suitable for lightweight decorative stems and cover it completely with crochet fabric or floral tape.
Bend or cover the ends so no sharp tips remain exposed. Keep wire, cut ends, and small components away from young children and pets.
For a wire-free version, use a tightly crocheted cord. It will be softer and safer to handle, but it may bend rather than stand upright unsupported.
3. US Crochet Abbreviations and Techniques
This pattern uses standard US crochet terminology.
| Abbreviation | Meaning |
|---|---|
| ch | Chain |
| sl st | Slip stitch |
| sc | Single crochet |
| hdc | Half double crochet |
| dc | Double crochet |
| st | Stitch |
| sts | Stitches |
| sp | Space |
| rep | Repeat |
| FO | Fasten off |
Basic crochet stitches
Chain (ch): Yarn over and pull through the loop on your hook.
Slip stitch (sl st): Insert the hook into the indicated stitch, yarn over, and pull through both the stitch and the loop on your hook.
Single crochet (sc): Insert the hook into the stitch, yarn over and pull up a loop, then yarn over and pull through both loops.
Half double crochet (hdc): Yarn over, insert the hook, yarn over and pull up a loop, then yarn over and pull through all three loops.
Double crochet (dc): Yarn over, insert the hook, yarn over and pull up a loop, yarn over and pull through two loops, then yarn over and pull through the remaining two loops.
Fasten off (FO): Cut the yarn, leaving a tail, and pull the tail through the active loop to secure it.
Understanding textured buds
The lavender buds in this pattern are made by working a small group of stitches into one chain. These groups create raised, compact clusters along the flower spike.
The buds are worked on a short foundation chain, then folded slightly around a supported or crocheted stem. This produces a textured flower section rather than a flat strip.
4. Design and Construction Overview
The bouquet contains seven matching lavender stems. Each stem consists of a narrow green support, a textured purple flower spike, and optional green leaves.
The flower spike is crocheted separately as a short strip with repeated bud clusters. The strip is then wrapped around the top of the stem and sewn securely along its base.
The stem is made as a narrow crocheted tube around floral wire, or as a tightly crocheted cord for a wire-free arrangement. The same construction is used for all seven stems.
Once the flowers are assembled, arrange the stems at slightly different heights and tie them together with ribbon.
5. Complete Crochet Lavender Bud Pattern
Make one flower spike for each of the seven stems.
Flower spike dimensions
The finished flower section should measure approximately 2.5–3 inches long. The width will depend on the yarn, hook, and tension, but the strip should remain narrow enough to wrap around the stem.
Step 1: Make the foundation chain
Using lavender or purple yarn, make a chain of 16.
This chain provides 15 working chains after the loop on your hook. The first chain beneath the hook is not worked into for this strip.
Step 2: Make the first bud
Insert your hook into the second chain from the hook.
Work the following stitches into that same chain:
- One single crochet.
- One half double crochet.
- One double crochet.
- One half double crochet.
- One single crochet.
This group creates a small raised cluster. The double crochet forms the tallest part of the bud, while the single crochets keep the edges compact.
Step 3: Repeat the bud pattern
Skip the next chain and work the same five-stitch group into the following chain.
Continue along the foundation chain using this sequence:
- Work one bud group into the current chain.
- Skip the next chain.
- Work another bud group into the following chain.
Repeat along the remaining chain, keeping the groups close together.
The clusters should form a textured row with raised centers and narrower gaps between buds.
Step 4: Finish the flower strip
After working the final bud group, cut the yarn and leave a tail approximately 8–10 inches long.
Pull the tail through the active loop to fasten off.
Lay the strip flat and gently curve it lengthwise. The raised bud clusters should sit along the outer surface.
Step 5: Shape the flower spike
Roll the strip gently around the top of the green stem, positioning the first and last bud groups so they meet without overlapping excessively.
Use the yarn tail and a yarn needle to sew the base of the strip around the stem. Take small stitches through the lower edges of the bud groups and around the stem covering.
Secure the beginning and end of the strip so that it cannot unwind.
Pattern note: This bud-strip method creates a textured lavender-like flower section, but the exact number of visible buds and the finished length depend on yarn, hook size, and tension. Make one sample first and adjust the foundation length if necessary before making the remaining six.
6. Making Multiple Flower Spikes
Make seven flower spikes using the same pattern.
For a classic lavender arrangement, use one shade of purple for all seven stems. Alternatively, use three coordinated shades, such as deep violet, medium lavender, and pale lilac.
To keep the flower spikes consistent:
- Use the same hook and yarn weight.
- Begin each strip with the same foundation-chain length.
- Repeat the same bud-group sequence.
- Compare each finished strip with the first before attaching it to a stem.
- Weave in short starting ends, but leave the long finishing tail available for sewing the flower to the stem.
Make sure all seven flower sections are similar in length and thickness.
7. Crocheting the Green Stems
You can make the stems using floral wire covered with crochet fabric or make soft, wire-free crocheted cords.
Option A: Supported stems
For a firmer decorative stem, use floral wire that is appropriate for lightweight craft projects.
Step 1: Prepare the support
Cut seven pieces of wire approximately 8–10 inches long.
Bend the cut ends inward or cover them securely so that no sharp tips remain exposed. Do not use a wire piece with a sharp end protruding from the stem.
Step 2: Make a narrow green covering
Using green yarn, chain 4.
Insert the hook into the second chain from the hook and work one single crochet into each chain across.
You should have 3 single crochet stitches.
Chain 1 and turn. Work one single crochet into each of the 3 stitches across.
Repeat this short row until the strip is long enough to wrap around the wire, leaving enough length for the flower spike and base.
The strip should fit around the wire without stretching or leaving large gaps.
Step 3: Wrap the strip around the wire
Place the wire along the center of the green strip. Fold the strip around it lengthwise.
Use the yarn needle and green yarn to sew the long edges together, enclosing the wire completely.
Keep the stitches close enough to prevent the wire from showing. Do not push the needle into the wire or leave sharp ends exposed.
Step 4: Finish the stem
Secure the lower end with several small stitches and weave in the yarn tail. The top end should be firm enough to support the flower spike.
Repeat until you have seven matching stems.
Option B: Wire-free crocheted stems
For a softer version, chain 45–55 using green yarn, depending on your desired length.
Slip stitch back along the chain, working one slip stitch into each chain. Keep the stitches even and avoid pulling them so tightly that the cord becomes difficult to work into.
Fasten off and leave a tail for attaching the flower spike.
This creates a narrow crocheted cord. It is suitable for a soft decorative bundle, but it may bend or droop when placed in a vase.
8. Optional Crochet Leaves
Leaves add a natural touch to the lavender bundle. Make two leaves for each stem, for a total of 14 leaves if you want the full arrangement.
Leaf pattern
Using green yarn:
- Chain 7.
- Starting in the second chain from the hook, work 1 slip stitch.
- Work 1 single crochet in the next chain.
- Work 1 half double crochet in the next chain.
- Work 1 double crochet in the next chain.
- Work 1 half double crochet in the next chain.
- Work 1 single crochet in the final chain.
This forms one tapered side of the leaf.
To give the leaf a more balanced outline, work along the opposite side of the foundation chain:
- Chain 1 and turn the work so the unused loops of the foundation chain are accessible.
- Work 1 single crochet into the first available loop on the opposite side.
- Work 1 half double crochet in the next loop.
- Work 1 double crochet in the next loop.
- Work 1 half double crochet in the next loop.
- Work 1 single crochet in the next loop.
- Work 1 slip stitch into the final loop to finish the base.
Fasten off, leaving a tail long enough to sew the leaf to the stem.
Repeat until you have the desired number of leaves.
Attaching the leaves
Position one leaf about 1–2 inches below the flower spike, angling it slightly upward. Place the second leaf lower on the stem and angle it in the opposite direction.
Use the yarn tails to sew the base of each leaf securely to the green covering. Weave in the ends so they do not show.
9. Attaching the Lavender Spikes to the Stems
The flower spikes should be firmly attached so they do not slide down or rotate.
- Position the flower strip around the top of the stem.
- Check that the buds face outward and that the strip sits evenly around the stem.
- Thread the finishing tail onto a yarn needle.
- Sew through the lower edge of the flower strip and around the stem covering.
- Secure the base at several points, rather than fastening only one edge.
- Pass the needle through a few stitches on the underside of the flower strip to hide the yarn tail.
- Gently tug the flower spike to check that it remains secure.
For supported stems, make sure the wire remains fully enclosed. For wire-free stems, keep the flower attachment compact so the soft cord does not twist excessively under the flower’s weight.
Repeat for all seven stems.
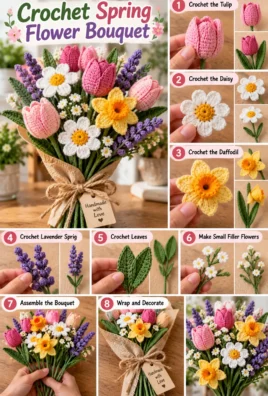
10. Assembling the Lavender Bundle
Once all seven flower stems are complete, arrange them into a balanced bouquet.
Step 1: Arrange the central stems
Place three of the tallest stems in the center or toward the back. Their flower spikes should sit slightly higher than the surrounding flowers.
Step 2: Add the outer stems
Position the remaining four stems around the central three. Angle them outward slightly to create a fuller arrangement.
Step 3: Check the height
Adjust the stems so the flower spikes do not all sit at exactly the same height. Small differences make the bouquet look more natural.
Step 4: Add the leaves
If you made leaves, turn them outward so they remain visible between the stems. Distribute them evenly rather than placing them all on one side.
Step 5: Secure the bouquet
Gather the stems together and wrap green yarn, floral tape, or ribbon around the lower section.
If using floral tape, follow the product instructions and make sure any wire remains concealed. A ribbon creates a softer, decorative finish.
Step 6: Display the bouquet
Place the bundle in a narrow-necked vase or wrap it in paper for a handmade gift. If the stems are wire-free and flexible, choose a vase that supports them rather than expecting them to stand upright independently.
11. Finishing and Shaping
Before displaying the bouquet, inspect each flower and stem.
- Gently separate the raised buds with your fingers.
- Check that the flower strip is firmly sewn around the stem.
- Straighten supported stems carefully without bending them sharply.
- Adjust the leaves so they face outward.
- Weave in any visible yarn ends.
- Trim loose yarn only after the ends have been secured.
If the flower strips look too flat, gently curve them around the stem and sew the base more closely. Avoid flattening the raised stitches while shaping.
Blocking is usually unnecessary for the small textured buds. If you need to shape the leaves, follow the yarn care instructions and use a gentle method that will not damage the fibers or any internal support.
12. Compact Pattern Summary
- Flower spikes: Make seven.
- Foundation: Chain 16.
- Bud group: Work 1 sc, 1 hdc, 1 dc, 1 hdc, and 1 sc into the same chain.
- Spacing: Skip one chain between bud groups and work the next group into the following chain.
- Flower length: Approximately 2.5–3 inches, depending on yarn and tension.
- Stems: Make seven green stems approximately 8–10 inches long using a crocheted covering around floral wire, or use wire-free crocheted cords.
- Optional leaves: Make two leaves per stem using a chain of 7 and the specified stitches.
- Attachment: Sew each flower strip securely around the top of its stem.
- Bouquet: Arrange three stems centrally and four around the outside, then tie the bundle with ribbon or yarn.
13. Customization Ideas
Use different shades of purple
Combine deep violet, medium lavender, and pale lilac to create a soft gradient effect. Keep the same bud pattern for every flower so the arrangement remains coordinated.
Make shorter or longer stems
Adjust the length of the green stem covering or cord. Longer stems work well in tall vases, while shorter stems suit small desk arrangements.
Create a smaller bundle
Make three or five stems for a compact arrangement. You can also shorten the flower foundation chain to make smaller spikes, though the number of buds will change.
Make a fuller bouquet
Add more stems and arrange them at varied heights. Increase the yarn quantity accordingly.
Add leaves
Use two or more leaves per stem for a fuller, greener appearance. Keep them small enough that they do not overwhelm the flower spikes.
Choose a wire-free design
Use crocheted cords instead of supported stems for a softer arrangement. This version is easier to bend and handle, but the stems may not remain upright without a vase or other support.
Change yarn weight
Finer yarn creates smaller buds, while thicker yarn makes larger, more prominent flower spikes. Changing yarn weight also affects the hook size, finished dimensions, and amount of yarn required.
14. Troubleshooting
The buds look too large or too far apart
Your yarn may be too thick for the hook, or the spacing between groups may be too wide. Try finer yarn or reduce the gap between the bud groups.
The flower spike looks flat
The strip may not be curved closely enough around the stem. Position the raised side outward and sew the base securely so the buds form a compact cluster.
The flower section becomes too wide
Your stitches may be loose, or the yarn may be thicker than intended. Try a smaller hook and make a sample strip before completing all seven flowers.
The spike curls or twists
The strip may have uneven tension or may be sewn too tightly on one side. Smooth the strip and sew its base evenly around the stem.
The stem is too floppy
A wire-free cord is naturally flexible. Use a tightly crocheted cord or switch to a supported stem with fully enclosed floral wire.
The flower slides off the stem
The base may not have enough attachment stitches. Sew through several points along the bottom of the flower strip and around the stem covering.
The leaves look uneven
Check that each leaf begins with the same number of chains and uses the same stitch sequence. Compare the leaves before attaching them.
Yarn ends are visible
Thread each tail onto a yarn needle and weave it through several stitches on the underside of the flower or stem. Secure the tail before trimming it.
The bouquet looks unbalanced
Move the tallest flowers toward the center or back and distribute the shorter stems around the outside. Rotate the bouquet as you adjust it to check the shape from every side.
The stems are different lengths
Measure each stem before attaching the flowers. Trim or adjust the crocheted covering so the finished stems fall within the same approximate length range.
15. Care and Display
Crochet lavender flowers are easy to maintain, but the best care method depends on the yarn and any additional materials.
- Dust removal: Use a soft brush or gently shake the bouquet outdoors to remove loose dust.
- Spot cleaning: If needed, dab the yarn with a lightly damp cloth and mild detergent, provided the yarn and other materials permit it.
- Avoid soaking supported stems: If the bouquet contains wire, floral tape, or adhesives, do not immerse it in water unless all materials are suitable for washing.
- Protect the colors: Keep the flowers away from prolonged direct sunlight if the yarn may fade.
- Store carefully: Keep the bouquet in a dry place and avoid crushing the flower spikes.
If the stems contain wire, inspect them occasionally to ensure that no sharp ends have become exposed.
16. Frequently Asked Questions
Is crochet lavender suitable for beginners?
Yes. The flower buds use basic crochet stitches, and the stems are made from simple rows or a narrow cord. Sewing the flower strip neatly around the stem may require a little practice.
What yarn works best for tiny lavender buds?
Lightweight cotton or acrylic yarn works well because it creates defined stitches and compact clusters. Choose a hook that produces a dense fabric.
How do I make the flower spikes look fuller?
Use a slightly longer foundation chain, keep the bud groups close together, and curve the strip around the stem before sewing it in place. Make a sample first to check the desired density.
How can I make the stems longer?
Increase the length of the crocheted covering or cord. Measure all seven stems before attaching the flower spikes so the bouquet remains balanced.
Can I make the bouquet without wire?
Yes. A crocheted cord makes a soft, wire-free stem. Keep in mind that it may bend or droop and may need support from a vase.
How many stems should I include?
Seven stems create a balanced example bouquet. Three or five stems make a smaller arrangement, while nine or more can create a fuller display.
How do I attach the flowers securely?
Sew the lower edge of each flower strip around the stem at several points. Hide the yarn ends inside the crocheted fabric and check that the flower does not slide or rotate.
Can I use different shades of purple?
Absolutely. Mixing lavender, violet, lilac, and pale purple creates visual depth while maintaining the appearance of a coordinated bouquet.
17. Conclusion
A handmade crochet lavender bundle is a lovely way to bring lasting floral charm into your home. With textured purple buds, slender green stems, and optional leaves, you can create a decorative arrangement that suits your personal style.
Take your time keeping the buds consistent, securing each flower to its stem, and arranging the seven stems at balanced heights. With a little patience, you can make a thoughtful handmade gift or a beautiful everlasting bouquet for your favorite space.

Leave a Comment