
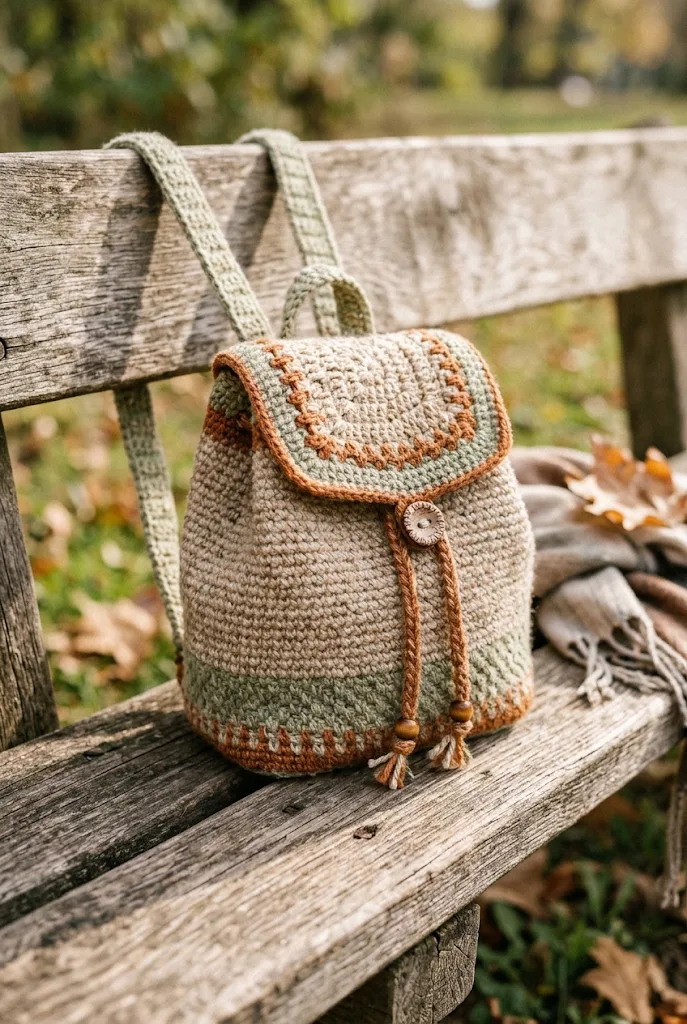
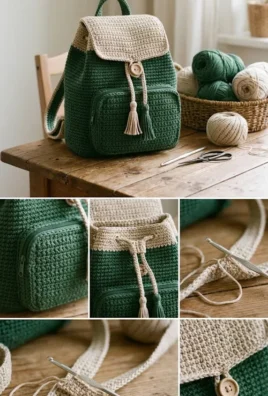
A handmade crochet mini backpack is the ultimate fusion of modern bohemian style and practical utility. Sized perfectly to carry daily essentials like a phone, keys, small wallet, and lip balm, this compact bag features a sturdy oval base, a textured main body, a secure top flap, an adjustable drawstring closure, and comfortable shoulder straps.
Whether you are crafting a stylish festival companion or a versatile everyday bag, this comprehensive, step-by-step pattern will guide you through each piece and stitch count with complete clarity and zero tables.
Hero Preview
1. Project Overview
All measurements and times are approximate:
- Skill level: Intermediate
- Completion time: 5 to 8 hours
- Finished size: Approximately 8.5 inches wide, 9.5 inches tall, and 3.5 inches deep at the base
- Construction: Worked starting from a flat oval base in continuous rounds, extending upwards to form the cylindrical body, with the front flap, drawstring cord, and adjustable straps crocheted and attached separately
- Main stitches: Chain, slip stitch, single crochet, half double crochet, and back-loop-only stitches for clean bottom-to-side transitions
- Suggested uses: Everyday compact purse, festival daypack, summer outing bag, casual travel carry-on, or a bespoke handmade gift
Finished dimensions can be altered by adjusting your yarn thickness or adding rounds to the base and body.
2. Materials and Supplies
- Yarn:
- Primary Body Yarn: Medium worsted weight cotton or sturdy cotton-blend yarn (Category 4), or braided cord/macramé yarn (approx. 250–300 g) in an earthy neutral tone such as warm taupe, sand, olive green, or terracotta
- Cotton is highly recommended over acrylic because it resists stretching under the weight of personal belongings
- Crochet hook: 4.0 mm (US G/6) or 4.5 mm (US 7) to keep the stitches dense and structural
- Hardware & Fasteners (Optional but recommended):
- One magnetic snap closure or 1-inch wooden/metal button for the flap
- Two small metal D-rings (1-inch width) for strap attachment
- Two slide buckles for adjustable strap lengths
- Tapestry needle: Large blunt needle for weaving in sturdy yarn tails and assembling parts
- Stitch markers: Essential for tracking the turn corners of the oval base and the start of rounds
- Scissors & measuring tape: For clean cuts and monitoring dimensions
3. US Crochet Abbreviations & Stitch Meanings
- ch: Chain stitch
- sl st: Slip stitch
- sc: Single crochet
- hdc: Half double crochet
- inc: Increase (work 2 single crochets in the same stitch)
- dec: Decrease (work an invisible single crochet decrease across 2 stitches)
- BLO: Back loop only (insert hook into the back loop only of the stitch to create a distinct structural ridge)
- st(s): Stitch or stitches
- sk: Skip
- FO: Fasten off
Special Technique: Working Back Loop Only (BLO) for Base Edges
When transitioning from the flat oval bottom to the vertical sides, working in the back loop only creates a crisp 90-degree fold line. This helps the backpack sit upright on flat surfaces without bulging awkwardly.
4. Skills to Know Before Starting
- Crocheting Around Both Sides of a Chain: Establishing an oval base by crocheting across the foundation chain loops, making rounded increases at the terminal chain, and working back across the bottom side of the foundation loops.
- Maintaining Firm Tension: Keep yarn pulled snug to create a dense fabric that does not require an interior fabric lining.
- Eyelet Row Construction: Alternating stitches with chain spaces creates natural eyelets around the top rim for threading the drawstring smoothly.
- Invisible Needle Join: Fastening off pieces with a needle pass to mimic the top loops of adjacent stitches for seamless edges.
In-Progress Crafting
5. Understanding the Backpack Design
The mini backpack is assembled from six distinct components:
- Oval Base: Forms the flat, sturdy bottom of the bag.
- Main Body Tube: Built seamlessly upward from the base with a textured stitch pattern, culminating in an eyelet round for the drawstring.
- Top Flap: Crocheted in flat back-and-forth rows with gentle decreases to form a curved shield that folds over the top opening.
- Drawstring Cord: A durable, braided chain cord threaded through the top eyelets to cinch the bag securely.
- Shoulder Straps (Make 2): Long, dense ribbed bands attached to the lower corners and upper back of the body.
- Carry Handle: A short, sturdy arched handle centered at the top back seam for grab-and-go convenience.
6. Gauge and Structural Alignment
Gauge is not strictly vital, but dense stitch walls prevent the backpack from sagging when loaded:
- A swatch of 16 single crochet stitches across 18 rows using a 4.0 mm hook should measure roughly 4 × 4 inches (10 × 10 cm).
- If your fabric feels loose or floppy, size down to a 3.5 mm hook or switch to a stiffer cotton or tubular cord yarn.
7. Complete Step-by-Step Crochet Pattern
Part A: The Oval Base
- Foundation Chain: Ch 21.
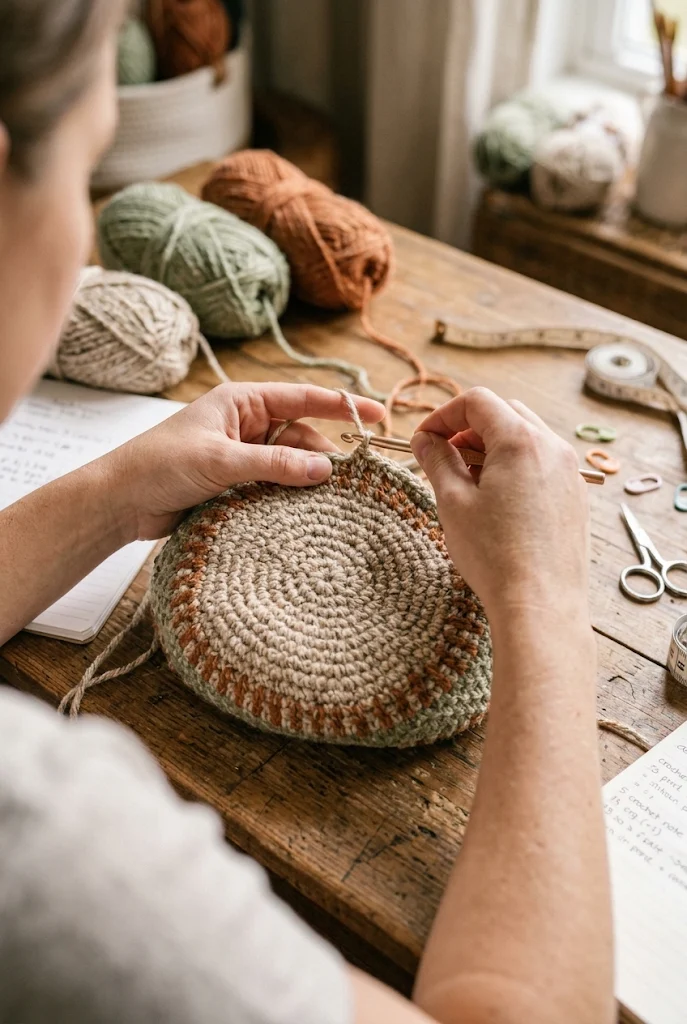
- Round 1: Starting in the 2nd chain from hook, work 19 sc along the chain. In the last chain, work 3 sc to round the curve. Working along the opposite side of the foundation chain, work 18 sc, then work 2 sc in the final chain space [42 sts]. Do not join; continue working in continuous rounds.
- Round 2: Work inc in next st, 18 sc, inc in each of the next 3 sts, 18 sc, inc in each of the last 2 sts [48 sts].
- Round 3: 1 sc, inc in next st, 18 sc, (1 sc, inc) 3 times, 18 sc, (1 sc, inc) 2 times [54 sts].
- Round 4: 2 sc, inc in next st, 18 sc, (2 sc, inc) 3 times, 18 sc, (2 sc, inc) 2 times [60 sts].
- Round 5: 3 sc, inc in next st, 18 sc, (3 sc, inc) 3 times, 18 sc, (3 sc, inc) 2 times [66 sts].
- Base should measure approximately 8.5 inches by 3.5 inches. Sl st into the next stitch to even out the edge.
Part B: The Main Body
- Round 6 (Transition Round): Working in BLO only, work 1 sc in each st around [66 sts].
- Rounds 7–32 (26 rounds): Working under both regular loops, work 1 sc in each st around [66 sts]. Maintain steady, tight tension so the sides build upright.
- Round 33 (Eyelet / Drawstring Round): 2 sc, ch 1, skip 1 st, *work 5 sc, ch 1, skip 1 st; repeat from * around to last 3 sts, 3 sc [66 sts including chain spaces].
- Round 34: Work 1 sc in each st and 1 sc in each ch-1 space around [66 sts].
- Round 35: Work 1 sl st in each st around to create a clean, reinforced upper rim. Fasten off and weave in the tail.
Part C: The Top Flap
Worked in flat rows, turning at each step.
- Row 1: Leaving a long starting tail, ch 21. Starting in 2nd ch from hook, work 1 sc in each ch across [20 sts]. Ch 1, turn.
- Rows 2–14 (13 rows): Work 1 sc in each st across [20 sts]. Ch 1, turn.
- Row 15 (Decrease Row): Work 1 dec, 16 sc, 1 dec [18 sts]. Ch 1, turn.
- Row 16: Work 1 sc in each st across [18 sts]. Ch 1, turn.
- Row 17 (Decrease Row): Work 1 dec, 14 sc, 1 dec [16 sts]. Ch 1, turn.
- Row 18 (Buttonhole Row – Optional): 6 sc, ch 4, skip 4 sts (creates button loop), 6 sc [16 sts]. Ch 1, turn. (Omit button loop if using an internal magnetic clasp).
- Row 19: Work 1 sc in each st across and 4 sc inside the ch-4 loop [16 sts].
- Border Trim: Do not turn; rotate flap 90 degrees and work a round of neat sc down the left side, across the top edge, and up the right side. Sl st to first st, FO, leaving a long 18-inch sewing tail.
Part D: Shoulder Straps (Make 2)
- Foundation Chain: Ch 71.
- Row 1: Starting in 2nd ch from hook, work 1 hdc in each ch across [70 sts]. Ch 1, turn.
- Row 2: Work 1 hdc in the third loop (back horizontal bar) of each st across [70 sts].
- Row 3: Repeat Row 2 to achieve a dense, knit-like, non-stretch ribbed strap [70 sts].
- FO, leaving long tails on both ends for stitching onto the bag. (Repeat for second strap).
Part E: Top Grab Handle & Drawstring Cord
- Handle: Ch 26. Starting in 2nd ch from hook, work 1 sl st in each ch across [25 sts]. Ch 1, turn and work 1 sl st back across the opposite side of the chain loops. FO with long tails.
- Drawstring: Using two strands of yarn held together for durability, make a firm chain of 110 stitches (approx. 28 inches long). Fasten off both ends and tie tight overhand knots with short frayed tassels on each tip.
8. Construction and Reference Specifications
- Base: Oval foundation, 5 expansion rounds, ending with 66 stitches.
- Body: 30 vertical rounds (including 1 BLO transition round, 26 plain rounds, 1 eyelet round, and 2 finish rounds), maintaining 66 stitches throughout.
- Flap: 19 rows starting at 20 stitches, decreasing to 16 stitches with a finished border trim.
- Straps: 2 pieces, 3 rows of third-loop half double crochet, measuring approximately 22–24 inches long.
- Handle: 1 piece, double-sided slip-stitched cord measuring roughly 6 inches long.
- Drawstring: 1 piece, double-strand chained cord measuring roughly 28 inches long.
9. Color and Styling Variations
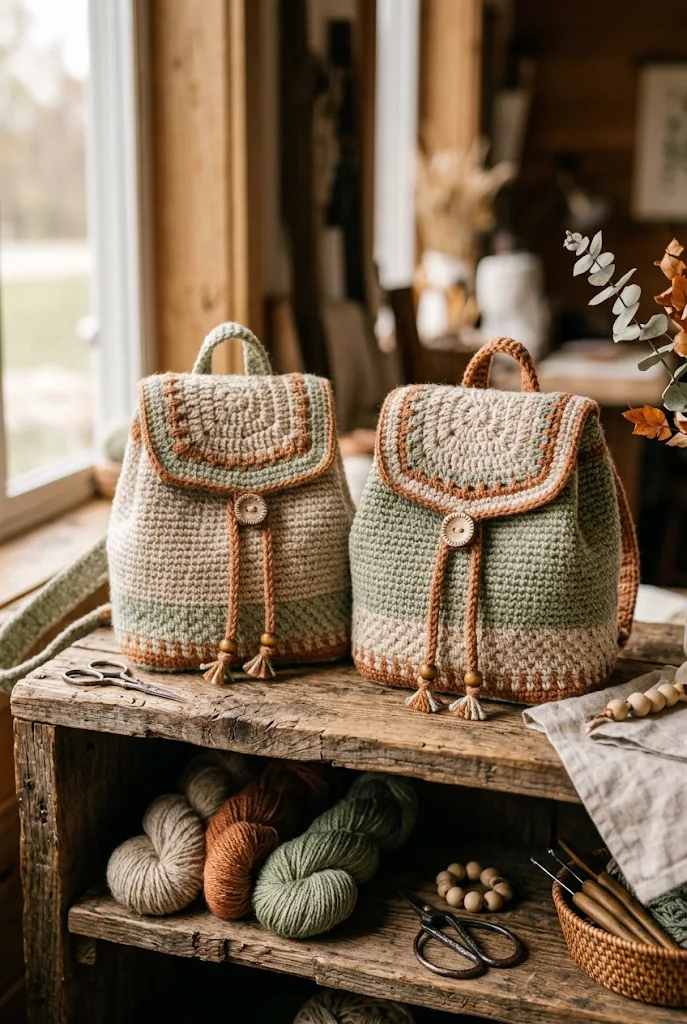
- Earthy Boho: Muted clay, terracotta, or warm taupe with brass metal hardware.
- Coastal Minimalist: Crisp natural ecru with a genuine tan leather strap and wooden toggle button.
- Color Block Chic: Contrast the oval base in deep charcoal, the main body in cream, and the flap in mustard yellow or sage green.
- Two-Tone Textured: Alternate rows of camel and off-white along the body using the grit stitch for extra surface dimension.
10. Assembly and Finishing Touches
- Sewing the Flap: Center the flat straight edge of the flap across the back of the backpack rim along Round 32 (just below the eyelet round). Use straight pins to secure it and whipstitch through both thicknesses twice with your tapestry needle for lasting durability.
- Attaching the Handle: Center the top grab handle on the back directly over the flap seam and stitch both ends down firmly.
- Affixing the Straps:
- Stitch the top ends of both straps side by side on the back, nestled just beneath the handle.
- Angle the lower ends of the straps outward toward the bottom corners of Round 6 (the transition ridge) and sew down with reinforced box stitches.
- Threading the Drawstring: Start from the front center of Round 33. Weave the cord in and out of the ch-1 eyelet spaces all the way around so that both tassel ends emerge together at the center front.
- Fastening Hardware: Attach the magnetic clasp (or sew a wooden button on the front of the body to align with the flap’s buttonhole loop).
Finished Keepsake Display
11. Troubleshooting Common Problems
- The backpack body curls or flares outward: You may have accidentally increased beyond Round 5. Count your stitches on Rounds 6 through 32 regularly; every round must maintain exactly 66 stitches.
- The base feels too flimsy to support weight: Insert a trimmed piece of thin, flexible craft plastic or plastic canvas cut to the shape of the oval base into the bottom before using the bag.
- The straps stretch too much under weight: Using half double crochets worked in the third loop significantly reduces elasticity, but if you need zero stretch, crochet straps using thermal single crochet or a non-stretch braided cord.
- The drawstring is difficult to cinch: Make sure the chain spaces in Round 33 are loose enough, or lightly rub the cord with beeswax to reduce friction against cotton stitches.
12. Frequently Asked Questions
1. Is cotton yarn mandatory, or can I use acrylic?
Cotton, linen, or corded yarn is strongly recommended. Acrylic yarn stretches out of shape permanently when loaded with heavy objects like phones and wallets.
2. Can I add an interior fabric lining?
Yes. Cut two rectangular pieces of cotton fabric matching the backpack’s body measurements, sew the side and bottom seams, hem the top, and hand-stitch the lining just beneath the eyelet round on the inside.
3. How do I make the straps adjustable?
Sew metal D-rings to the bottom corners of the backpack, loop the straps through slide buckles, pass them through the D-rings, and weave them back through the buckles just like commercial backpacks.
4. Can this pattern be made larger for a laptop or school bag?
Yes. Increase the foundation chain by multiples of 4 (e.g., chain 33 or 41), add extra expansion rounds to the base, and add 15 to 20 additional vertical rounds to the body.
This chic crochet mini backpack combines stylish craftsmanship with everyday practicality. Enjoy styling it with your favorite casual outfits, and customize it with unique yarn tones or leather accents to make it truly your own!
Leave a Comment