
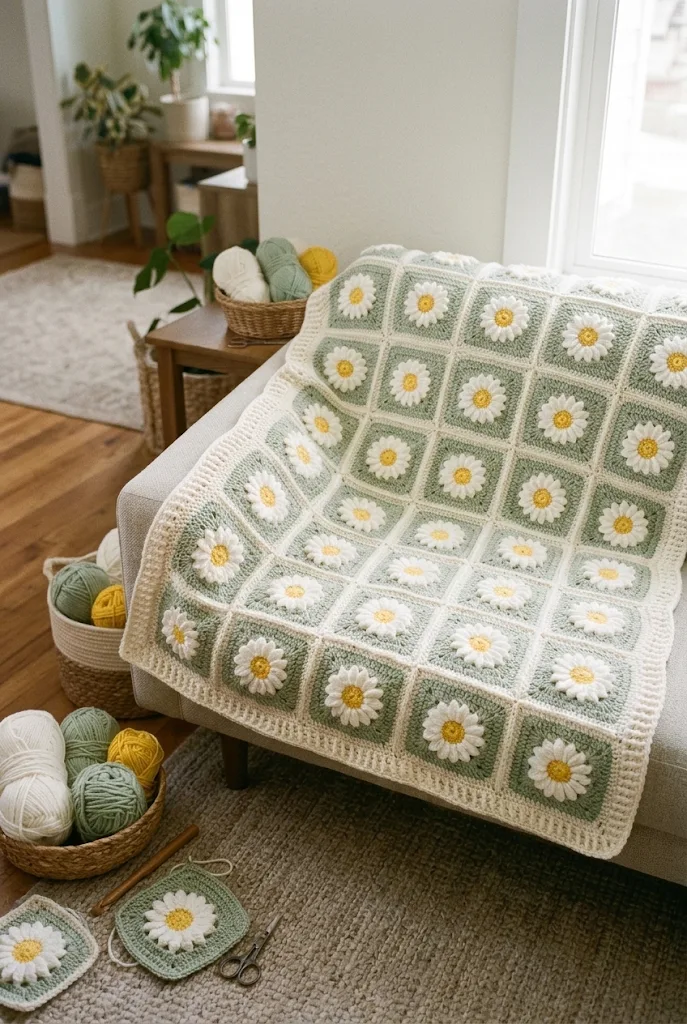
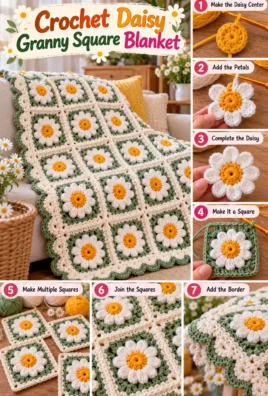
A handmade crochet daisy blanket is a fresh, uplifting piece that combines the timeless charm of granny squares with tactile botanical texture. Centered around dimensional daisy blossoms with raised petals, framed in soothing sage green, and bordered by a classic ribbed edge, this blanket creates a serene, garden-inspired aesthetic in any living room or nursery.
This comprehensive, step-by-step pattern details every stitch, round, join, and finishing technique in a clean, descriptive format with no tables.
Hero Preview
1. Project Overview
All measurements and times are approximate:
- Skill level: Intermediate
- Completion time: 20 to 30 hours for a full throw (approximately 20 to 25 minutes per square)
- Finished size: Approximately 42 × 54 inches (107 × 137 cm), based on a layout of 35 squares (5 columns by 7 rows) plus a wide border
- Construction: Individual floral motif squares worked in the round from the yellow center outward, joined together using a flat slip-stitch or mattress seam, and completed with an all-around ribbed border
- Main stitches: Magic ring, slip stitch, chain, single crochet, double crochet, half double crochet, and 4-dc cluster / puff stitches
- Suggested uses: Living room sofa throw, nursery crib blanket, spring picnic wrap, or an heirloom wedding and housewarming gift
Final measurements will vary depending on your yarn choice, hook size, and stitch tension.
2. Materials and Supplies
- Yarn: Soft medium worsted weight yarn (Category 4) in smooth acrylic, cotton blend, or anti-pilling yarn:
- Color A (Daisy Center): Mustard or sunny yellow (approx. 100 g)
- Color B (Daisy Petals): Crisp white or soft off-white (approx. 250 g)
- Color C (Square Frame): Sage green / eucalyptus (approx. 400 g)
- Color D (Joining & Border): Warm cream or ivory (approx. 300 g)
- Crochet hook: 4.5 mm (US 7) or 5.0 mm (US H/8) for flexible drape
- Tapestry needle: Large blunt needle for weaving in tails and seaming
- Scissors: Small craft scissors
- Stitch markers: For holding squares together while joining
- Blocking board & rust-proof T-pins: Essential for squaring floral motifs prior to seaming
3. US Crochet Abbreviations & Stitch Meanings
- ch: Chain stitch
- sl st: Slip stitch
- sc: Single crochet
- hdc: Half double crochet
- dc: Double crochet
- tr: Treble crochet
- st(s): Stitch or stitches
- sp: Space
- ch-sp: Chain space
- MR: Magic ring
- FO: Fasten off
Special Stitch: 4-Double Crochet Cluster / Bobble Petal (cl)
Yarn over, insert hook into indicated stitch, yarn over and pull up a loop, yarn over and pull through 2 loops (2 loops remain on hook). Repeat this step 3 more times in the exact same stitch (5 loops on hook). Yarn over and pull through all 5 loops on the hook, then chain 1 to close the petal securely. This creates a plump, raised 3D petal that lifts off the background.
4. Skills to Know Before Starting
- Puff / Cluster Definition: When working petals, pull up loops to an even height before pulling through to keep every petal uniform.
- Squaring the Circle: Transitioning from a 16-petal circle into a 4-sided square uses taller treble crochet stitches at corners and shorter single/half double crochets along edges.
- Corner Spacers: Placing
[ch 2]in corners ensures sharp 90-degree turns without pulling or puckering. - Blocking Before Assembly: Steam or wet blocking each motif before joining makes assembly faster, cleaner, and perfectly flat.
In-Progress Crafting
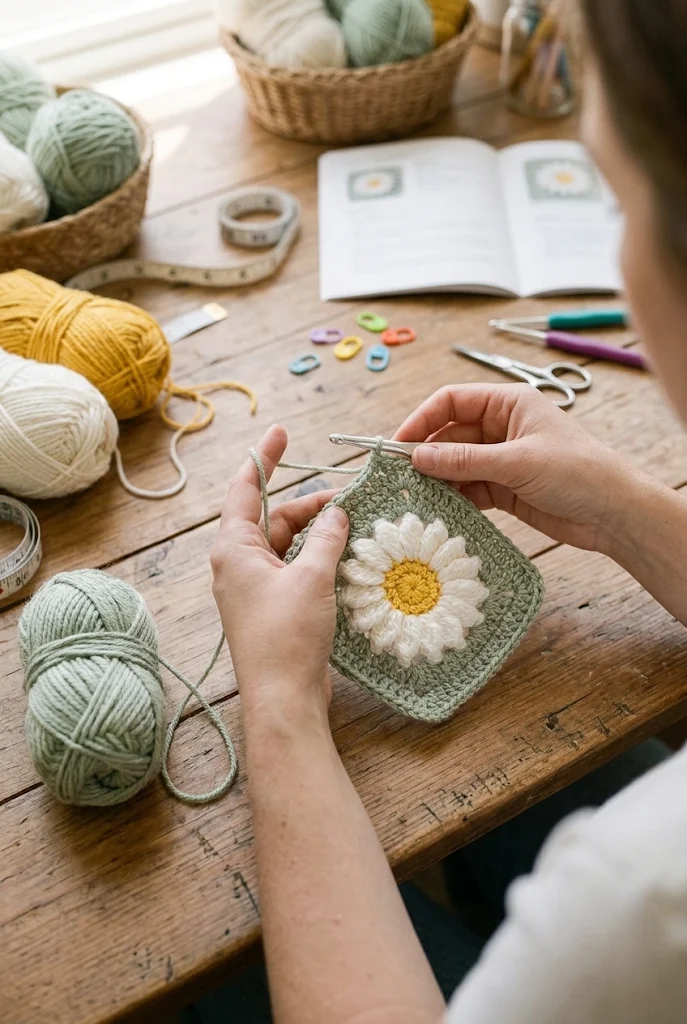
5. Understanding the Blanket Layout
This blanket is built modularly:
- Motif Count: 35 identical floral squares (arranged in 5 columns and 7 rows).
- Square Breakdown:
- Round 1 forms the 16-stitch golden flower center.
- Round 2 creates 16 textured white petals around the core.
- Round 3 and Round 4 square off the flower using sage green.
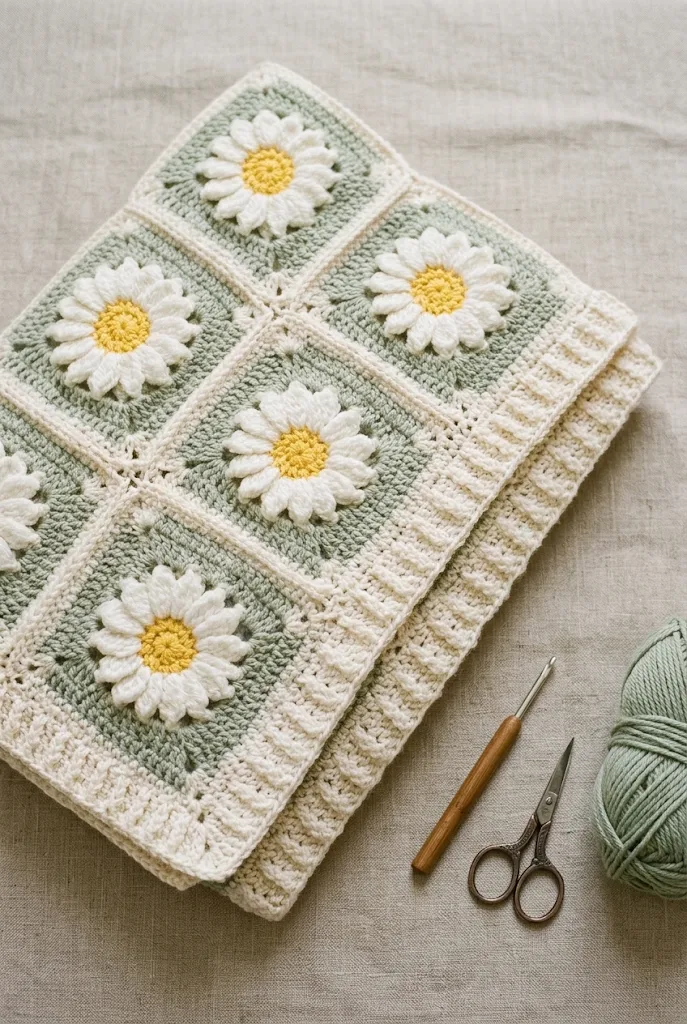
- Seaming: Cream yarn joins the squares with subtle decorative gridlines.
- Outer Border: Multiple rounds of cream ribbing frame the entire perimeter.
6. Gauge and Sizing Calibration
- Each completed 4-round motif measures approximately 6 × 6 inches (15 × 15 cm) after light blocking.
- A 35-square layout yields a center panel measuring roughly 30 × 42 inches.
- The 6-round textured border adds approximately 3 inches on every side, bringing the finished throw to roughly 42 × 54 inches.
- If your squares are turning out significantly smaller or wavy, adjust your hook size up or down by 0.5 mm.
7. Complete Step-by-Step Crochet Pattern
Part A: The Daisy Flower Motif (Make 35 Squares)
Round 1: Flower Core (Mustard Yellow)
- Make a Magic Ring (or chain 4, sl st to first ch to form ring).
- Ch 2 (counts as first hdc), work 15 hdc into the ring [16 sts].
- Pull ring tight. Sl st to top of starting ch-2 to close.
- Fasten off yellow yarn and weave in the starting ring tail tightly.
Round 2: The Daisy Petals (White Yarn)
- Join white yarn with a slip stitch into any hdc from Round 1.
- Ch 2, work 3 incomplete dc into the same st, pull through all loops, ch 1 to secure (first petal made).
- Ch 1 for spacing.
- Work 1 cluster petal
[4-dc cluster, ch 1]into each of the remaining 15 stitches around. - At the end of the round, you will have 16 distinct petals separated by 16 ch-1 spaces.
- Sl st into the top of the first petal to join. Fasten off white yarn.
Round 3: Squaring the Flower (Sage Green Yarn)
- Join sage green yarn with a slip stitch in any
ch-1space between two petals. - First Corner: Ch 4 (counts as 1 tr), work
[1 tr, ch 2, 2 tr]into the same space. - First Side: Ch 1, 3 dc in next ch-sp, ch 1, 3 hdc in next ch-sp, ch 1, 3 dc in next ch-sp.
- Second Corner: Ch 1, work
[2 tr, ch 2, 2 tr]in next ch-sp. - Repeat the side and corner sequence around the remaining edges.
- On final side: 3 dc in next ch-sp, ch 1, 3 hdc in next ch-sp, ch 1, 3 dc in next ch-sp, ch 1.
- Sl st to top of beginning ch-4 to close. Do not fasten off.
Round 4: Framing the Square (Sage Green Yarn)
- Sl st into the corner
ch-2space. - Ch 3 (counts as first dc), work
[1 dc, ch 2, 2 dc]into the corner space. - Work 1 dc into each dc, hdc, and ch-1 space along the edge (15 dc per side).
- Work
[2 dc, ch 2, 2 dc]in each corner space around. - Sl st into top of starting ch-3 to close. Fasten off sage green yarn, leaving an 8-inch tail for weaving.
Part B: Joining the Squares (Cream Yarn)
- Layout: Lay out all 35 squares on a clean flat surface in a 5 × 7 grid, facing right side up.
- Method: Use the Flat Slip Stitch join or Mattress Stitch with cream yarn.
- Horizontal Seams: Join all horizontal rows first, working continuously across the rows.
- Vertical Seams: Join all vertical columns next, crossing perpendicular joins neatly with a small chain or slip stitch.
Part C: The Textured Ribbed Border (Cream Yarn)
- Round 1 (Foundation): Join cream yarn in any outer corner. Ch 1, work sc evenly around the entire blanket edge, placing 3 sc in each corner. Sl st to close.
- Round 2: Ch 3 (counts as dc), work dc in each stitch around, placing
[2 dc, ch 2, 2 dc]in each corner. Sl st to close. - Rounds 3–5 (Front Post / Back Post Ribbing):
- Ch 2, *work 1 Front Post double crochet (FPdc) around next st, work 1 Back Post double crochet (BPdc) around following st; repeat from * across straight sides.
- In each corner
ch-2space, work[2 dc, ch 2, 2 dc]. - Sl st to join at the end of each round.
- Round 6 (Clean Finish): Ch 1, work 1 sc in each st around, placing 3 sc in corners. Sl st to first st, fasten off, and weave all remaining tails into the back of the work.
8. Construction and Reference Specifications
- Total motifs: 35 squares (5 columns × 7 rows).
- Square size: 6 × 6 inches (15 × 15 cm) each.
- Round 1 stitch count: 16 half double crochets in yellow.
- Round 2 stitch count: 16 three-dimensional cluster petals in white.
- Rounds 3 & 4: 4 corners and straight edges in sage green, squaring the flower.
- Border: 6 rounds of cream single crochet, double crochet, and post ribbing.
9. Color and Layout Variations
- Meadow Bloom: Alternate sage green square frames with dusty olive and soft moss green.
- Sunset Daisy: Use blush pink, coral, and terracotta for the square frames instead of sage green.
- Classic Cottagecore: Keep all square frames in soft oatmeal or cream, adding contrast through an olive green outer border.
- Monochrome Botanical: Use soft grey background frames with pure white petals and deep charcoal centers.
10. Assembly and Finishing Touches
- Blocking Squares: Pin each individual square to 6 × 6 inches on foam mats. Lightly steam with an iron held 2 inches above the fabric (do not touch the yarn directly), and let dry completely before joining.
- Checking Tension: Ensure seams remain supple; tight seaming stitches can cause the blanket to buckle between squares.
- Inspecting Centers: Verify that all starting magic rings are securely knotted and woven in two opposite directions so flowers never open up in the wash.
Finished Keepsake Display
11. Troubleshooting Common Problems
- The daisy petals curl inward: You may be chaining too tightly between petals. Relax your chain tension between clusters or add a half hook size for Round 2.
- The square looks round rather than square: Verify that your corner stitches use full treble crochets
[tr]and that your side centers use half double crochets[hdc]. The difference in stitch height creates the flat edges. - The blanket buckles along the seams: Your joining stitches are too tight. Switch to a hook one half-size larger when slip-stitching squares together.
- Border waves along edges: You placed too many single crochets on Round 1 of the border. Skip every 6th or 7th stitch along the raw edges to keep the frame flat.
12. Frequently Asked Questions
1. Can I make this blanket larger for a queen or king bed?
Yes. Make 70 squares (7 × 10 grid) for a twin-size bed, or 108 squares (9 × 12 grid) for a queen-size bed. Follow the same assembly and border steps.
2. Which yarn is best for everyday use and washing?
A high-quality anti-pilling acrylic or a 50/50 cotton-acrylic blend holds its shape well, resists fuzzing, and machine-washes easily without stretching out of shape.
3. Do I have to fasten off between every round?
Yes. Fastening off allows each round to sit in its distinct color zone (yellow center, white petals, sage frame), creating crisp floral contrast.
4. How do I care for the finished blanket?
Machine wash on a delicate cycle in cool water inside a mesh laundry bag, then lay flat to dry to preserve the raised petal texture.
This crochet daisy flower blanket pairs classic granny square craftsmanship with dimensional botanical texture. Its gentle sage, sunny yellow, and clean white tones bring timeless, handmade warmth to any room.
Leave a Comment