
A handmade crochet bralette is an iconic summer essential that blends bohemian charm with tailored comfort. Featuring structured curved cups, earthy color blocks in terracotta, sage green, and cream, delicate floral eyelet accents, and an adjustable corset-style lace-up closure, this crop top is equally stunning at summer festivals, beach getaways, or styled casually under an open linen shirt.
This detailed, step-by-step pattern guides you through measuring, shaping the cups, building the supportive underbust band, working the scalloped trim, and weaving the ties without relying on complicated tables.
Hero Preview
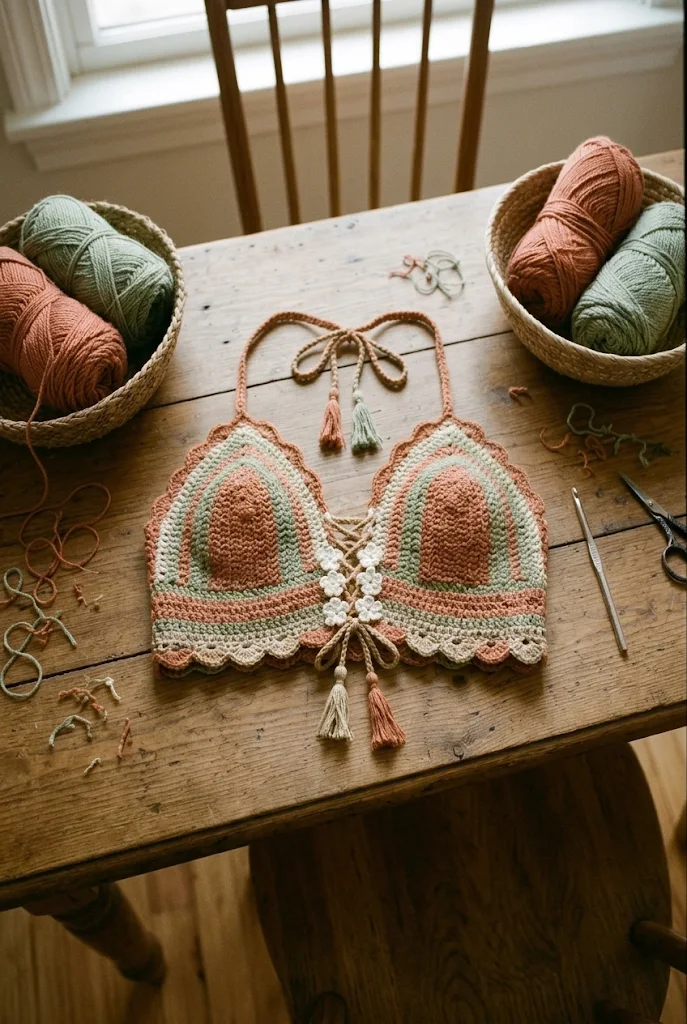
A handmade terracotta and sage green crochet bralette top on a rustic wooden craft table:
1. Project Overview
All measurements and times are approximate:
- Skill level: Intermediate
- Completion time: 4 to 7 hours
- Finished size: Written for Small/Medium (Cup size A/B to small C), with clear stitch-count modifications for larger bust sizes
- Construction: Two structured bust cups worked in vertical arching rounds, joined at the lower edge to a ribbed underbust band, and completed with neck halter ties, lace-up corset ties, and scalloped shell trims
- Main stitches: Chain, slip stitch, single crochet, half double crochet, double crochet, and shell borders
- Suggested uses: Summer festivals, beachwear, music concerts, warm-weather layering, and bespoke handmade gifts
You can adjust cup coverage and band length easily by changing your starting chain count or working extra stripe rounds.
2. Materials and Supplies
- Yarn: Soft, breathable 100% cotton or cotton-bamboo blend yarn in DK weight (Category 3) or light worsted (Category 4):
- Color A (Terracotta / Rust): Approx. 100 g for cup centers, underbust band, and tassels
- Color B (Sage Green): Approx. 50 g for middle cup arches and band stripes
- Color C (Cream / Natural Ecru): Approx. 50 g for outer shell edges, eyelet lace, and daisy accents
- Crochet hook: 3.5 mm (US E/4) or 3.75 mm (US F/5) to keep stitches dense and completely opaque
- Tapestry needle: Large blunt needle for weaving in tails and attaching daisy appliques
- Scissors: Small craft snips
- Stitch markers: Helpful for marking peak stitches and corner turns
- Measuring tape: To measure cup height and bust width accurately
3. US Crochet Abbreviations & Stitch Meanings
- ch: Chain stitch
- sl st: Slip stitch
- sc: Single crochet
- hdc: Half double crochet
- dc: Double crochet
- st(s): Stitch or stitches
- sp: Space
- ch-sp: Chain space
- Shell: 5 double crochets worked into the exact same stitch to create a rounded scallop
- BLO: Back loop only
- FO: Fasten off
Special Technique: Arch Peak Shaping [2 dc, ch 1, 2 dc]
When working amigurumi or garment cups, working two double crochets, a chain, and two more double crochets into the very top turning chain of the foundation strip expands the cup outward and upward simultaneously. This forms a gentle, natural 3D cone curve that fits comfortably over the bust.
4. Skills to Know Before Starting
- Working Across Both Sides of a Center Chain: Start by working down the foundation chain, make your peak increases at the apex, and continue working along the unworked bottom loops of the same chain.
- Color Changes on Garment Ridges: Complete the final yarn-over of the last stitch in a row with your new color to keep transitions clean and crisp.
- Checking Gauge for Wearable Fit: Cotton yarn has minimal elasticity, so maintaining firm, consistent tension ensures the bralette holds its shape throughout the day without stretching out.
In-Progress Crafting
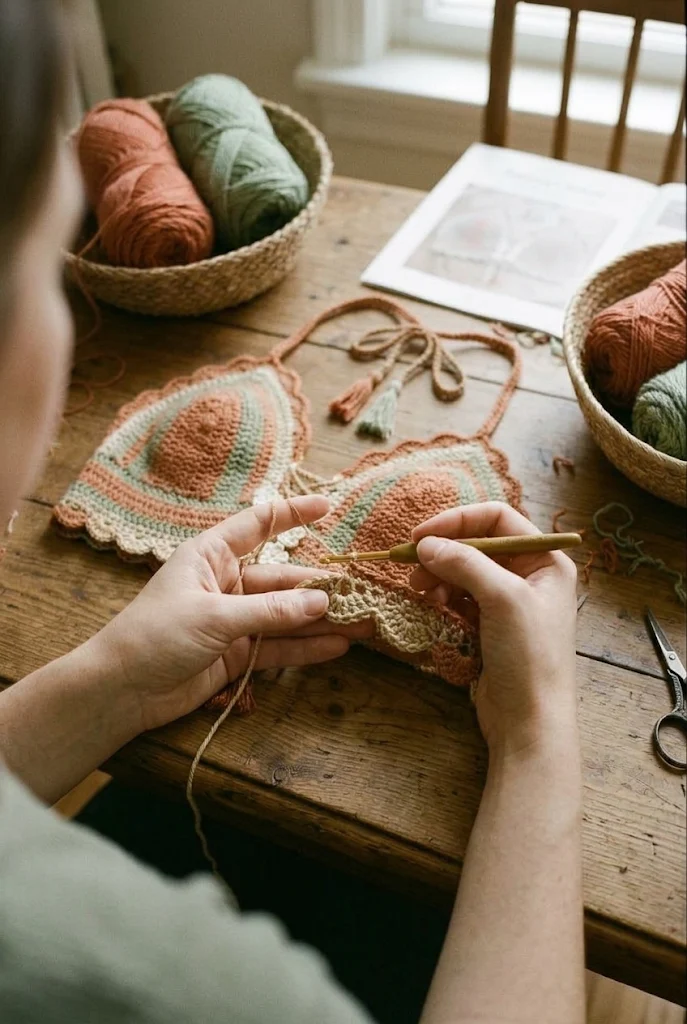
Hands crocheting the scalloped trim of the bralette cup with terracotta and sage green yarn:
5. Understanding the Bralette Anatomy
This bralette is assembled from four integrated sections:
- Bust Cups (Make 2): Crocheted from the vertical center outward using concentric bands of terracotta, sage green, and cream.
- Center Front Eyelet Border: A neat column of chain loops worked along the inner cup edges to host the corset lace-up tie and tiny daisy accents.
- Ribbed Underbust Band: Attached directly to the bottom edges of both cups, providing firm structure and torso support.
- Shell Edging & Straps: Scalloped shell borders framing the top ridges and bottom band, finished with twisted cord ties and playful tassel ends.
6. Sizing and Calibration Guide
Use these starting foundation chains to achieve your exact cup size:
- Extra Small / Small (Cup A): Chain 11 to start (approx. 5 inches wide and tall).
- Small / Medium (Cup B / Small C – Model Size): Chain 13 to start (approx. 6 inches wide and tall).
- Large (Cup C / D): Chain 15 to start (approx. 7 inches wide and tall).
- Extra Large (Cup DD+): Chain 17 to start (approx. 8 inches wide and tall), adding 2 extra outer rounds.
Measure from the bottom fold of the bust to the center apex to determine your ideal starting chain height.
7. Complete Step-by-Step Crochet Pattern
Part A: The Molded Bust Cups (Make 2 Alike)
Starting in Color A (Terracotta):
- Foundation Chain: Ch 14 (for Small/Medium).
- Round 1: Starting in the 3rd chain from the hook, work 1 dc in each of the next 11 chains. In the final chain space, work
[2 dc, ch 1, 2 dc]to form the peak. Working down the opposite side of the foundation chain loops, work 1 dc in each of the next 11 chains [26 dc total, 1 ch-1 peak space]. Ch 2, turn. - Round 2: Work 1 dc in each st up the side to the peak space (13 dc). In the peak
ch-1space, work[2 dc, ch 1, 2 dc]. Work 1 dc in each st down the opposite side (13 dc) [30 dc total]. Ch 2, turn. - Rounds 3–4 (2 rounds): Repeat Round 2 in Terracotta, working 1 dc in each st along the sides and
[2 dc, ch 1, 2 dc]into the peak space. At the end of Round 4, switch to Color B (Sage Green) on the final yarn-over. Ch 2, turn.
Switching to Color B (Sage Green):
- Round 5: In Sage Green, work 1 dc in each st to peak, work
[2 dc, ch 1, 2 dc]in peak space, work 1 dc in each st down the opposite side. Ch 2, turn. - Round 6: Repeat Round 5 in Sage Green. Switch to Color C (Cream) on the final yarn-over. Ch 2, turn.
Switching to Color C (Cream):
- Round 7: In Cream, work 1 dc in each st to peak,
[2 dc, ch 1, 2 dc]in peak space, work 1 dc in each st down the other side. Switch to Color A (Terracotta) on the final yarn-over. Ch 2, turn.
Finishing with Color A (Terracotta):
- Round 8: In Terracotta, work 1 dc in each st to peak,
[2 dc, ch 1, 2 dc]in peak space, work 1 dc in each st down the side. Do not fasten off; rotate to work across the bottom edge. - Base Round: Work 1 row of sc evenly across the raw bottom edge of the cup (placing roughly 2 sc per double crochet row post). Fasten off. Repeat for the second cup.
Part B: Center Front Eyelet Edge & Mini Daisy Appliques
- Eyelet Loops: Reattach Cream yarn at the bottom inner edge of one cup. Work along the vertical inner center:
*1 sc, ch 2, skip 1 st; repeat from *up the inner edge to create 4 or 5 clean lacing eyelets. Fasten off and repeat on the opposite cup’s inner edge. - Mini Daisies (Make 4 to 6):
- With Cream yarn: In a MR, work
*(sl st, ch 2, 2 dc, ch 2, sl st) into the ring; repeat from *5 times to form 5 petals. - Pull ring tight and fasten off, leaving an 8-inch tail. Sew these dainty flowers along the eyelet border edge.
- With Cream yarn: In a MR, work
Part C: Supportive Underbust Band
- Joining Cups: Lay both cups flat side-by-side with inner eyelet edges aligned.
- Row 1 (Band Foundation): Join Color A (Terracotta) at the outer bottom corner of the right cup. Ch 2, work dc evenly across the bottom of the right cup, chain 2 across the central gap, and continue working dc evenly across the bottom of the left cup. Ch 2, turn.
- Rows 2–3 (Terracotta): Work 1 dc in each st across. On final st of Row 3, switch to Color B (Sage Green). Ch 2, turn.
- Rows 4–5 (Sage Green): Work 1 dc in each st across. Switch to Color C (Cream). Ch 2, turn.
- Row 6 (Cream): Work 1 dc in each st across. Switch to Color A (Terracotta). Ch 2, turn.
- Row 7 (Terracotta): Work 1 dc in each st across. Fasten off.
Part D: Scalloped Shell Trim
- Top Cup Trim (Terracotta / Cream): Join yarn at the outer bottom corner of the cup arch.
*Skip 1 st, work 5 dc in the next st (shell made), skip 1 st, sl st in next st; repeat from *up the outer edge, over the peak, and down the inner edge. - Bottom Band Trim: Join Color C (Cream) at the bottom corner of the underbust band. Work the identical shell sequence
[skip 1, 5 dc, skip 1, sl st]across the entire lower hem. Fasten off.
Part E: Straps, Corset Ties & Tassels
- Halter Neck Straps (Make 2): Join Color A (Terracotta) to the peak of each cup. Chain 85 to 100 stitches (approx. 20 inches). Starting in 2nd ch from hook, work sl st in each ch back to the peak. Fasten off securely.
- Corset Front Lacing Tie: With Color A or double-stranded Cream yarn, make a sturdy chain of 140 stitches. Weave the cord through the front eyelet loops in a crisscross lace-up pattern.
- Back Ties (Make 2): Attach yarn to the outer edges of the underbust band, chain 90 stitches, and slip stitch back.
- Tassels: Cut twelve 6-inch strands of Sage Green and Terracotta yarn. Fold in half, slip through the cord ends, wrap, and knot tightly to create playful fringe tassels.
8. Construction and Reference Specifications
- Cup dimensions: Approximately 6 inches wide and 6.5 inches high (Medium size).
- Underbust band height: 7 rows of double crochet, measuring roughly 2.5 inches wide.
- Underbust band width: Fits ribcage circumferences from 28 to 36 inches thanks to the adjustable back ties.
- Neck halter straps: Approximately 20 inches long each for secure tying.
- Corset lace cord: Approximately 28 to 32 inches long to allow custom bust cinching.
- Daisy motifs: 4 to 6 five-petal floral appliques sewn along the center opening.
9. Color and Styling Variations
- Sun-Drenched Retro: Mustard yellow center, terracotta middle bands, and creamy off-white trim.
- Desert Rose: Dusty rose center, warm taupe middle bands, and vanilla cream shell edges.
- Ocean Breeze: Sky blue center, sage green middle bands, and bright white trims.
- Monochrome Minimalist: Solid natural cotton throughout, relying purely on the shell stitches and ribbed textures for subtle elegance.
10. Assembly and Finishing Touches
- Steam Blocking: Pin the completed bralette flat on a blocking mat. Hover a handheld garment steamer 2 inches above the piece to relax cotton stitches and define the scalloped edges. Let dry completely.
- Weaving In Tails: Thread all color-change tails along the wrong side of the dense double crochet posts, working back and forth in three opposing passes to lock them in place.
- Lacing the Corset: Thread the front tie through both eyelet columns from top to bottom, cinching gently and tying a bow at the base.
Finished Keepsake Display
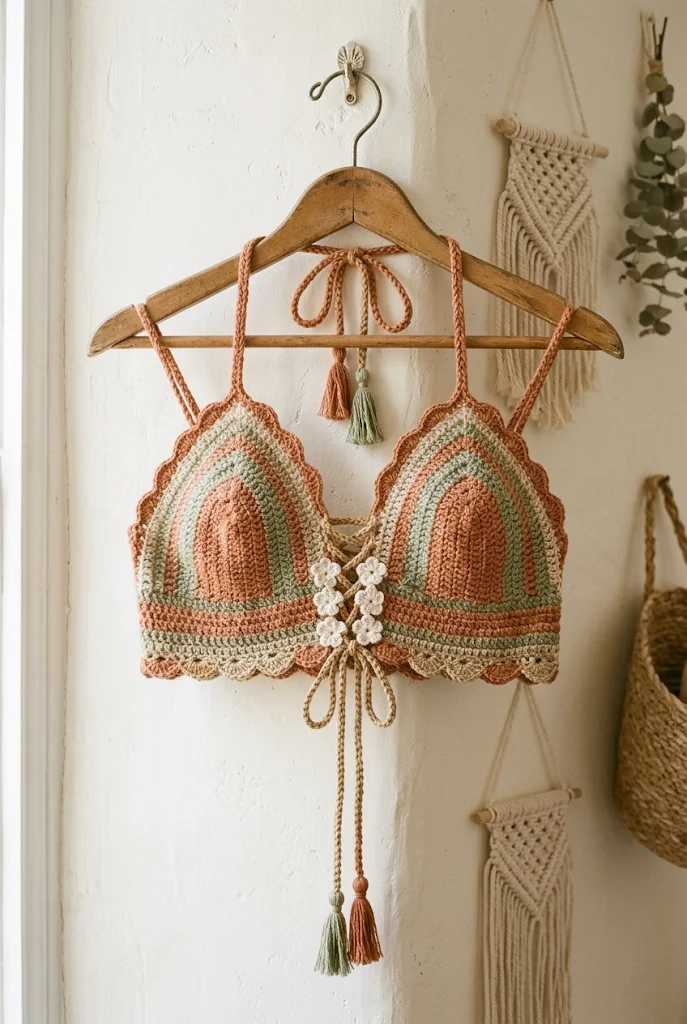
A finished boho crochet bralette top hanging gracefully in a warm, naturally lit room:
11. Troubleshooting Common Problems
- The cups look flat instead of curved: Ensure you work
[2 dc, ch 1, 2 dc]into the peak space on every round. These increases create the natural 3D cup curvature. - The underbust band bunches or flares: If the band flares, your foundation row contains too many stitches across the cup bases. Place exactly 2 single crochets around each double crochet side post.
- The top stretches out after wear: Cotton yarn can relax slightly over time. Simply pull the back and front corset ties tighter for a renewed custom fit.
- The stitches look see-through: Drop down half a hook size (e.g., from 4.0 mm to 3.5 mm) to produce a tightly woven, opaque fabric.
12. Frequently Asked Questions
1. Can I insert bra cups or padding inside this top?
Yes. You can easily hand-sew lightweight fabric bra cup inserts onto the inside wrong side of the cups with matching thread for added modesty and support.
2. Is acrylic yarn suitable for this top?
100% cotton, bamboo, or linen blends are much better suited for wearables. Acrylic retains heat, does not breathe well in warm weather, and tends to stretch out permanently under tension.
3. How do I wash and care for this crochet top?
Hand wash in cool water using mild detergent. Gently press out excess moisture between clean towels without wringing, then lay flat to dry.
4. Can I make this top longer into a full tank top?
Yes. Continue adding rows to the underbust band until you achieve your preferred waist or hip length, then finish with the scalloped shell border along the bottom hem.
This boho crochet bralette top combines thoughtful tailoring with relaxed festival style. Its adjustable ties, comfortable cotton feel, and warm earth-toned stripes make it a versatile summer staple that you’ll reach for season after season.
Leave a Comment