
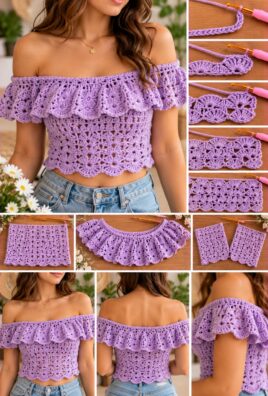
A crochet lace top is a lovely addition to a handmade wardrobe. Its openwork texture creates a light, airy fabric that is ideal for warm weather, vacations, and layering over a camisole or tank top. You can choose soft neutrals for a classic look or bright colors for a playful summer style.
This beginner-friendly pattern uses two matching rectangular panels with a repeating lace stitch. The panels are joined at the shoulders and sides, leaving openings for the neckline and arms. The simple construction makes the top easier to customize in length and width while preserving the decorative lace texture.
1. Project Overview
Skill level: Beginner to confident beginner
Requires chains, double crochet, skipped stitches, and simple seams.
Construction: Two matching panels
The neckline and armholes are created by leaving sections of the shoulder and side seams open.
Estimated finished length: Approximately 20–24 inches (51–61 cm)
Length depends on the selected size, gauge, and number of rows.
Estimated completion time: 10–18 hours
Your pace, yarn, and finishing details affect the total.
- Recommended yarn: Lightweight category 3 yarn, such as a cotton blend or soft acrylic blend.
- Recommended hook: Approximately 4.5–5 mm, depending on the yarn and gauge.
- Sizes: XS, S, M, L, XL, and 2XL.
- Construction: Two identical panels worked flat in rows.
- Stitch pattern: Repeating double crochet and chain spaces.
- Estimated yarn requirement: Approximately 500–1,000 yards (457–914 meters), depending on size, yarn, and garment length.
All measurements, yarn quantities, and completion times are estimates. Crochet garments can stretch and drape differently depending on the fiber, stitch tension, and amount of openwork. Make a gauge swatch before starting the full top.
2. Materials and Supplies
| Material | Recommendation |
|---|---|
| Yarn | Lightweight category 3 yarn |
| Crochet hook | Approximately 4.5–5 mm |
| Scissors | For cutting yarn |
| Tapestry needle | For seams and weaving in ends |
| Measuring tape | For gauge and fit |
| Stitch markers | Helpful for marking seams |
| Blocking mat and pins | Optional, depending on the yarn |
Choosing yarn for a lace top
Cotton and cotton blends are popular for summer garments because they provide clear stitch definition and a cool feel. Soft acrylic blends can also work well and may be lighter or easier to care for, depending on the construction.
The fiber, hook size, and stitch openness affect the final result:
- A larger hook creates more open fabric and may increase drape.
- A smaller hook creates denser fabric and may reduce the openness of the lace.
- Cotton may relax or lengthen with wear, depending on the yarn.
- Soft blends can create a more flowing garment but may stretch differently from pure cotton.
Choose yarn that feels comfortable against your skin and follow the care instructions on its label. Make a gauge swatch using the actual lace pattern, because a solid-stitch swatch will not accurately predict the dimensions of an openwork garment.
3. US Crochet Abbreviations and Lace Stitch Techniques
| Abbreviation | Meaning |
|---|---|
| ch | Chain |
| sl st | Slip stitch |
| sc | Single crochet |
| dc | Double crochet |
| sk | Skip |
| sp | Space |
| st | Stitch |
| sts | Stitches |
| rep | Repeat |
| RS | Right side |
| WS | Wrong side |
| FO | Fasten off |
Understanding the lace stitch
The main fabric uses double crochet stitches separated by chain spaces. The gaps create a lightweight mesh-like texture that allows air to pass through the garment.
The stitch pattern has two parts:
- Foundation row: Double crochet stitches are separated by chain-1 spaces, with one foundation chain skipped between them.
- Repeat rows: Work a double crochet into each double crochet from the previous row, with one chain between them.
The beginning chain-3 counts as one double crochet. Do not work an additional double crochet into the same position. At the end of each row, count the double crochet positions and check that the chain spaces remain evenly distributed.
4. Gauge and Fit
For this pattern, aim for the following approximate gauge after gently blocking a sample:
- 10 lace repeats measure approximately 4 inches (10 cm) across.
- 8 rows measure approximately 4 inches (10 cm) vertically.
A repeat is the space from one double crochet position to the next repeated double crochet position. Because the lace is open, measure the swatch without stretching it.
How to make a gauge swatch
- Chain 34.
- Work the foundation row using the lace stitch instructions below.
- Continue the repeat rows until you have approximately 10 rows.
- Fasten off and block the swatch according to your yarn’s care instructions.
- Measure the width and height of the lace fabric.
If 10 repeats are wider or narrower than 4 inches, adjust the hook size and make another swatch. If the fabric is too stiff, a larger hook may help. If it is too loose or difficult to control, try a smaller hook.
Size chart
The table below gives approximate finished garment measurements. The bust measurement is the circumference around the garment when both panels are joined, measured flat and doubled. It is not the wearer’s body measurement.
| Size | Approx. finished bust | Approx. body length | Repeats per panel |
|---|---|---|---|
| XS | 32 in (81 cm) | 19 in (48 cm) | 40 |
| S | 34.4 in (87 cm) | 20 in (51 cm) | 43 |
| M | 36 in (91 cm) | 21 in (53 cm) | 45 |
| L | 40 in (102 cm) | 22 in (56 cm) | 50 |
| XL | 44 in (112 cm) | 23 in (58 cm) | 55 |
| 2XL | 48 in (122 cm) | 24 in (61 cm) | 60 |
These estimates use a repeat width of approximately 0.4 inches and a row height of approximately 0.5 inches. Your measurements may differ, so use your blocked swatch and actual panel measurements as your guide.
Choosing the right size
Measure around the fullest part of your bust while wearing the undergarment you expect to wear with the top. Compare your body measurement with the finished bust measurement.
A closer fit may suit a top intended to be worn over a camisole. A looser fit creates more drape and ease. If you are between sizes, consider your preferred fit and the amount of stretch in your yarn.
5. Design and Construction
The top is made from two matching rectangular panels. Each panel uses the same lace pattern and the same number of repeats for its selected size.
The design is sleeveless, with a simple neckline created by joining the panels across the shoulders while leaving the center section open. The side seams are joined from the lower edge upward, leaving openings for the arms.
The construction follows these steps:
- Crochet the front panel.
- Crochet an identical back panel.
- Block both panels to the same measurements.
- Join the shoulder sections, leaving a central neckline opening.
- Join the side seams from the bottom upward, leaving armhole openings.
- Finish the neckline, armholes, and bottom hem with single crochet.
The lace pattern remains the same across both panels, so there is no complicated shaping to learn. The fit is adjusted through the number of repeats, the number of rows, and the length of the shoulder and side seams.
6. Complete Lace Stitch Pattern
The stitch repeat is worked in rows. The foundation chain must contain enough chains for the number of repeats selected for your size.
Foundation chain
Use the number of repeats from the size chart.
The foundation chain is calculated by taking three chains for each repeat and adding four extra chains. For example, a panel with 40 repeats starts with 124 chains.
| Size | Repeats | Foundation chain |
|---|---|---|
| XS | 40 | 124 |
| S | 43 | 133 |
| M | 45 | 139 |
| L | 50 | 154 |
| XL | 55 | 169 |
| 2XL | 60 | 184 |
Row 1: Foundation lace row
- Chain the number specified for your size.
- Work 1 dc into the fourth chain from the hook. The first three chains count as the first dc.
- Chain 1.
- Skip the next chain.
- Work 1 dc into the following chain.
- Repeat the sequence of chain 1, skip 1 chain, and work 1 dc into the next chain until you reach the end.
You will have one double crochet position at the beginning and one additional position for each repeat.
Row 1 check: The number of double crochet positions, including the beginning chain-3, should equal the number of repeats plus one. The number of chain spaces should equal the number of repeats.
Row 2: Lace repeat
- Chain 3 and turn. This counts as the first dc.
- Chain 1.
- Work 1 dc into the next dc stitch from the previous row.
- Repeat the sequence of chain 1 and 1 dc into the next dc across the row.
- Work the final dc into the last dc position of the previous row.
The turning chain counts as the first dc, so do not add an extra stitch into the first position.
Row 2 check: Maintain the same number of double crochet positions and chain spaces as in Row 1.
Row 3 and all remaining rows
Repeat Row 2. Continue until the panel reaches the required length for your size.
Keep the edges straight by working the final dc into the top of the previous row’s final dc position. Missing this stitch can cause the panel to narrow; adding an extra stitch can make it wider.
Why this stitch works for a lace top
The chain spaces create open gaps between the double crochet stitches. This makes the fabric lighter than a solid double crochet panel. The repeated pattern is easy to memorize, and the straight rows make the garment suitable for beginners who want to practice lace crochet without complicated shaping.
7. Front Panel Instructions
Use the foundation chain from the size chart and follow the lace stitch pattern above.
Step 1: Begin the panel
Make the foundation chain for your selected size. Work Row 1 as described, then repeat Row 2 until the panel reaches the target length.
Step 2: Check the width
Lay the panel flat without stretching it. At the approximate gauge given above, each lace repeat measures about 0.4 inches across. The panel width is therefore approximately the number of repeats multiplied by 0.4 inches.
If your panel is significantly wider or narrower, check your gauge before continuing. Do not try to correct a major width difference by randomly adding or removing stitches in the middle of a row.
Step 3: Check the length
Use the target length in the size chart as your guide. At approximately 2 rows per inch, the following row counts provide a starting point:
| Size | Approx. target length | Approx. row count |
|---|---|---|
| XS | 19 in | 38 rows |
| S | 20 in | 40 rows |
| M | 21 in | 42 rows |
| L | 22 in | 44 rows |
| XL | 23 in | 46 rows |
| 2XL | 24 in | 48 rows |
These row counts assume the stated gauge. Measure your own panel as you work, because row height can vary by yarn and tension.
Step 4: Finish the front panel
When the panel reaches the desired length, fasten off, leaving a tail long enough to weave in securely. Place the panel flat and check its width, length, and edge alignment.
Do not shape the neckline on the front panel. The neckline is created during assembly by joining only part of the shoulder edges.
8. Back Panel Instructions
Make the back panel exactly like the front panel.
Use the same foundation-chain count, lace stitch pattern, and target length. The back panel should have the same number of rows and repeats as the front so the shoulder and side seams line up correctly.
Before assembly, lay the two panels together and compare their dimensions. If one panel is longer or wider, check the stitch count and row count. Block the panels to matching measurements if the yarn allows it.
9. Joining the Shoulders, Sides, and Armholes
Use a tapestry needle and matching yarn to sew the panels together. Keep the seams flexible and avoid pulling the lace fabric tightly.
Step 1: Position the panels
Place the front and back panels together with the right sides facing inward. Align the top edges, side edges, and bottom edges.
Use stitch markers to mark the shoulder seams and side-seam openings before sewing.
Step 2: Join the shoulders
For the example construction, leave a neckline opening approximately 8–10 inches wide, depending on your size and preferred neckline.
Measure inward from each outer shoulder edge and mark the section to be sewn. Join the front and back panels along the outer shoulder sections, leaving the center unsewn for the neck opening.
Keep both shoulder seams the same length. If you prefer a wider neckline, leave more of the center unsewn; if you prefer a narrower neckline, join more of the top edge.
The neckline opening should be checked against the wearer’s head and desired fit before finishing the seam.
Step 3: Join the side seams
Starting at the bottom edge, sew each side seam upward. Leave approximately 6–8 inches open at the top for the armholes, adjusting the opening to suit your size and comfort.
Use the same opening length on both sides. Align the front and back edges carefully so the armholes are symmetrical.
Step 4: Secure the seams
Use small, even sewing stitches that catch corresponding parts of the lace edges. Avoid pulling the yarn so tightly that the fabric gathers.
At the end of each seam, secure the yarn and weave the tail through nearby stitches. Check the garment’s fit before completing the edge finishing.
10. Neckline and Edge Finishing
Single crochet creates a simple, tidy finish around the open edges.
Finish the neckline
Attach yarn at a shoulder seam and work single crochet stitches evenly around the neckline opening. Work along the row ends and around the neckline edge, spacing stitches so the fabric lies flat.
Avoid placing too many stitches along an edge, as this can cause the neckline to flare. Too few stitches may pull the edge inward.
Join with a slip stitch to the first sc and fasten off.
Finish the armholes
Attach yarn at one side seam and work single crochet evenly around the armhole opening. Join with a slip stitch and fasten off. Repeat on the other side.
Check that both armhole borders have a similar appearance and do not pull tightly against the body.
Finish the bottom hem
Attach yarn at a side seam and work one round of single crochet around the bottom edge. Join with a slip stitch and fasten off.
If you want a slightly more defined hem, add a second round of single crochet. Keep the tension relaxed enough that the bottom edge remains flat.
Weave in ends
Use a tapestry needle to weave in all loose ends on the wrong side of the fabric. Change direction as you weave so the yarn is less likely to work loose during wear or washing.
11. Blocking and Final Fit
Blocking can help even out the lace stitches and make the panels easier to assemble. The appropriate method depends on the yarn fiber.
- Check the yarn label to determine whether wet blocking or another method is suitable.
- Lay the panels on a clean surface.
- Gently shape them to the intended measurements without pulling the lace open excessively.
- Pin the edges if the fiber and blocking method permit it.
- Allow the panels to dry completely before assembly.
After sewing the panels together, try the top on over the undergarment you intend to wear with it. Check the bust, shoulder width, neckline, and armholes before completing any additional decorative finishing.
Do not force the fabric to the target measurements if doing so distorts the stitch pattern. Adjust the gauge or panel dimensions when necessary.
12. Compact Pattern Summary
- Foundation: Chain three times the chosen repeat count, plus four chains.
- Row 1: Dc in fourth chain from hook, then repeat chain 1, skip 1 chain, dc in next chain to the end.
- Row 2: Ch 3, turn; repeat chain 1 and dc into the next dc across, keeping the same number of dc positions.
- Remaining rows: Repeat Row 2 until the target length is reached.
- Front and back: Make two identical panels.
- Assembly: Sew the outer shoulder sections, leaving the center open for the neckline. Sew the side seams from the bottom upward, leaving openings for the armholes.
- Finishing: Work single crochet around the neckline, each armhole, and the bottom edge.
- Final check: Compare panel width and length before joining, and ensure both armholes and shoulder seams match.
13. Customization Ideas
Make a cropped top
Work fewer rows to shorten the panels. Measure the length before fastening off and remember that a shorter top may use less yarn.
Make a longer tunic-style top
Add rows to both panels while preserving the stitch repeat. A longer garment will require more yarn and may stretch more under its own weight.
Adjust the neckline
Leave a wider or narrower gap between the shoulder seams. Check the opening before finishing the neckline so it sits comfortably.
Choose different colors
Use one color for both panels or change colors after a set number of rows. When changing colors, maintain the same stitch count and secure the yarn ends neatly.
Create a denser or more open lace effect
A different hook size changes the gauge and the openness of the fabric. Always make a new swatch and recalculate the panel measurements before beginning the garment.
Adjust the fit
For a closer fit, choose a finished bust measurement closer to your body measurement. For a more relaxed fit, select a larger finished bust measurement. Check your gauge before changing the foundation-chain count.
14. Troubleshooting
The lace pattern does not line up
Likely cause: A chain space or double crochet has been skipped or added accidentally.
Correction: Count the double crochet positions at the end of each row and check the first and last stitches carefully.
The panel edges become uneven
Likely cause: The turning chain has been counted inconsistently, or the final stitch is missing.
Correction: Remember that the beginning chain-3 counts as one dc. Work the final stitch into the top of the previous row’s final dc position.
The garment is too wide or too narrow
Likely cause: Your gauge differs from the target gauge.
Correction: Make a gauge swatch and adjust the hook or foundation-chain count before making both panels. Do not randomly increase or decrease stitches within the lace pattern.
The fabric is too stiff or too loose
Likely cause: The hook size or yarn is unsuitable for the intended drape.
Correction: Try a different hook size and make another swatch. Choose a fabric that drapes comfortably without becoming excessively open.
The neckline stretches out of shape
Likely cause: The lace fabric has stretched or the finishing stitches are too loose.
Correction: Work an even round of single crochet around the neckline and avoid pulling the edge while wearing or washing the top.
The armholes feel uncomfortable
Likely cause: The side seams are joined too high or the openings are too small.
Correction: Unpick part of the side seams and increase the armhole openings equally on both sides. Check the fit before reattaching the finishing border.
The front and back panels do not match
Likely cause: Different row counts, tension, or stitch placement.
Correction: Compare the panels before assembly. Correct the row count or block the panels to matching measurements if the yarn permits it.
The seams look bulky
Likely cause: The joining stitches are too tight or too large.
Correction: Use smaller, evenly spaced sewing stitches and avoid bulky knots. Keep the seams flexible.
The garment is too short or too long
Likely cause: The row gauge differs from the estimate or the panel was not measured while working.
Correction: Measure the panel periodically. Add rows if it is too short, or remove rows before assembly if it is too long.
15. Care Instructions
Follow the yarn label when washing and drying your crochet lace top. Different fibers can respond differently to water, heat, and agitation.
- Wash the garment according to the recommended method.
- Handle the lace gently when wet because openwork fabric may stretch.
- Avoid wringing or pulling the top into shape.
- Dry it using the method recommended for the yarn.
- Store the garment clean and dry, folded rather than hung if hanging causes stretching.
- Check seams and edges periodically for loose stitches.
If the garment needs blocking after washing, use a method suitable for the fiber and reshape it gently without stretching the lace excessively.
16. Frequently Asked Questions
Is a crochet lace top suitable for beginners?
Yes. The repeating stitch pattern uses chains and double crochet stitches. The main skills to practice are maintaining straight edges, measuring the panels, and sewing the garment together neatly.
What yarn works best for a lace top?
Lightweight cotton blends and soft acrylic blends are practical options. Choose a yarn that feels comfortable against the skin and produces the drape you want.
How do I choose the correct size?
Measure your bust and compare it with the finished garment measurements. Consider whether you want a close fit or a relaxed fit, and check your gauge before starting.
Do I need to wear a camisole underneath?
The lace fabric is open, so many people prefer wearing a camisole or tank top underneath. The choice depends on the openness of your stitches and your personal comfort.
How can I make the top longer or shorter?
Change the number of rows in both panels. Keep the front and back panels the same length unless you intentionally want an asymmetrical design.
How do I prevent the neckline from stretching?
Finish the neckline with an even round of single crochet and avoid stretching the fabric when putting on, washing, or storing the top.
Can I adjust the pattern for a different bust measurement?
Yes. Adjust the number of repeats in the foundation chain, then make a gauge swatch to confirm the panel width. Both panels should use the same repeat count so the seams align.
Conclusion
A crochet lace top is a rewarding handmade garment that combines an airy stitch pattern with simple construction. With two matching panels, a repeating lace stitch, and neat finishing, you can create a versatile summer top in your favorite colors.
Check your gauge before starting, keep the stitch repeat consistent, and measure both panels before assembly. Taking care with the shoulder seams, armholes, and neckline will help you achieve a comfortable fit and a polished finish.
Leave a Comment