
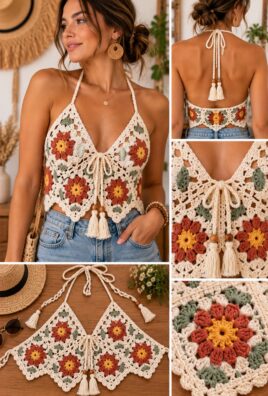
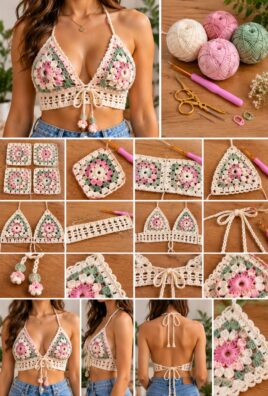
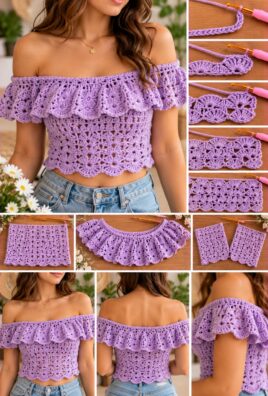
A crochet boho top adds a relaxed, handmade touch to warm-weather outfits. With a comfortable fit, simple crochet texture, adjustable straps, and a delicate scalloped edge, this sleeveless top pairs beautifully with jeans, skirts, shorts, or beachwear.
In this beginner-friendly tutorial, you’ll crochet a front panel and a back panel, shape a square neckline and armholes, join the panels, and finish the top with adjustable shoulder straps and decorative edging. The pattern uses straightforward stitches and includes stitch counts to help you keep the construction consistent.
1. Project Overview
- Skill level: Beginner to easy intermediate
- Style: Sleeveless boho top with a square neckline and scalloped trim
- Fit: Relaxed, with adjustable shoulder straps
- Approximate finished bust circumference: 36 inches (91 cm)
- Approximate finished length: 18 inches (46 cm), measured from the top of the shoulder to the lower edge
- Estimated completion time: Approximately 10–16 hours
- Yarn: Worsted-weight cotton or cotton-blend yarn, category 4
- Hook: 4.5 mm (US 7), adjusted to achieve the desired fabric
- Approximate yarn requirement: 700–900 yards (640–823 m), including straps and edging
- Main stitches: Chain, single crochet, half double crochet, and double crochet
- Construction: Two rectangular panels with shaped necklines, joined at the shoulders and sides
- Straps: Four narrow ties that can be adjusted for fit
- Decorative finish: A simple scalloped edge along the neckline, armholes, and lower hem
The finished measurements are estimates. Your actual size will depend on your yarn, hook, tension, and how closely you follow the gauge.
2. Materials and Tools
Gather the following supplies:
- Approximately 700–900 yards of worsted-weight cotton or cotton-blend yarn
- A 4.5 mm crochet hook
- Scissors
- Yarn needle
- Measuring tape
- Stitch markers
- Optional contrasting yarn for the scalloped edging
Choosing yarn for a wearable top
Cotton yarn is a good option for a summer garment because it has clear stitch definition and can feel breathable against the skin. Cotton blends may provide additional softness or flexibility, depending on their composition.
Choose a yarn with a smooth surface and a comfortable drape. Very stiff yarn can make the top feel bulky, while a very loose fabric may provide less coverage. A slightly smaller hook can create a firmer fabric, but avoid crocheting so tightly that the panels become rigid.
If you use contrasting yarn for the edging, reserve enough for the neckline, armholes, and lower hem. Always check the yarn manufacturer’s care instructions before washing or blocking the finished top.
3. US Crochet Abbreviations and Stitch Guide
All stitch names in this pattern use standard US crochet terminology.
| Abbreviation | Meaning |
|---|---|
| ch | Chain |
| sl st | Slip stitch |
| sc | Single crochet |
| hdc | Half double crochet |
| dc | Double crochet |
| st(s) | Stitch(es) |
| sp(s) | Space(s) |
| rep | Repeat |
| RS | Right side |
| WS | Wrong side |
Stitches used in the pattern
Chain (ch): Yarn over and pull the yarn through the loop on your hook.
Slip stitch (sl st): Insert the hook into the indicated stitch, yarn over, and pull through both the stitch and the loop on the hook.
Single crochet (sc): Insert the hook into the stitch, yarn over and pull up a loop, then yarn over and pull through both loops on the hook.
Half double crochet (hdc): Yarn over, insert the hook into the stitch, yarn over and pull up a loop, then yarn over and pull through all three loops on the hook.
Double crochet (dc): Yarn over, insert the hook into the stitch, yarn over and pull up a loop, yarn over and pull through two loops, then yarn over and pull through the remaining two loops.
Scallop: A decorative curved edge made by working several stitches into the same stitch or space. In this pattern, each scallop is made with 5 dc into one stitch, separated from the next scallop by a slip stitch.
Turning chains
For the main panels, ch 1 does not count as a stitch after a single-crochet row, and ch 2 does not count as a stitch after a half-double-crochet row. Work the first stitch into the first actual stitch of the row.
This pattern is worked from the bottom upward in two separate panels. The neckline is shaped at the top of each panel before the panels are joined.
4. Design and Garment Construction
This top is made from two panels: a front panel with a square neckline and a back panel with a straight upper edge. Both panels use single crochet for a relatively dense fabric with a simple, understated texture.
The construction is straightforward:
- Crochet the front panel from the bottom upward.
- Shape the front neckline by leaving the center stitches unworked and completing each shoulder section separately.
- Crochet the back panel to match the front panel’s width and height.
- Join the panels along the sides, leaving the upper sections open for armholes.
- Add four adjustable shoulder ties, two at the front and two at the back.
- Finish the neckline, armholes, and lower hem with a scalloped edge.
The sample is designed for an approximate 36-inch finished bust circumference. It is a starting size rather than a guaranteed fit; use your gauge and body measurements to adjust it.
5. Measurements and Gauge
Before beginning, measure the following:
- Bust circumference: Measure around the fullest part of your bust.
- Finished bust circumference: Decide how much room you want in the top. A relaxed fit usually requires some positive ease, meaning the garment is slightly larger than your body measurement.
- Body length: Measure from the desired shoulder point to the lower edge.
- Armhole depth: Measure from the top of the shoulder down to the point where you want the armhole to end.
- Neckline width: Decide how wide you want the square opening.
- Strap length: Allow enough length for the straps to meet comfortably at the shoulders.
Gauge swatch
Using the main yarn and hook, crochet a small single-crochet swatch.
For the sample pattern, aim for approximately:
- 2 sc per inch (2.5 cm)
- 2.5 rows per inch (2.5 cm)
To check, measure the middle section of your swatch rather than the edges. If you have more stitches per inch than the target, your stitches are tighter, so try a larger hook. If you have fewer stitches per inch, try a smaller hook.
Gauge matters because it determines the panel width and length. If your measurements differ significantly from the target, adjust your hook or recalculate the number of stitches before making the panels.
6. Complete Step-by-Step Crochet Instructions
Part A: Crochet the Front Panel
Use the main yarn color and a 4.5 mm hook.
The sample panel is approximately 18 inches wide and 18 inches long before edging. It begins as a rectangle and is divided at the top to create a square neckline.
Foundation chain: Ch 37.
Row 1: Sc in the second ch from the hook and in each remaining ch across. (36 sc)
Rows 2–45: Ch 1 and turn. Sc in each st across. (36 sc per row)
The turning chain does not count as a stitch. Place a stitch marker in the first and last stitch if you tend to miss edge stitches.
After Row 45, the panel should measure approximately 18 inches wide and 18 inches long if your gauge matches the target.
Shape the front neckline
The top edge is divided into three sections: 12 stitches for the left shoulder, 12 stitches for the center opening, and 12 stitches for the right shoulder.
- Left shoulder, Row 46: Ch 1, sc in the first 12 sts. (12 sc) Fasten off.
- Skip the next 12 sts in the center. These stitches form the square neckline opening.
- Rejoin yarn to the first stitch of the final 12-stitch section, on the opposite side of the center opening.
- Right shoulder, Row 46: Ch 1, sc in the next 12 sts. (12 sc) Fasten off.
The front now has two equal shoulder sections separated by a 12-stitch neckline opening. Do not crochet across the center opening.
Secure the yarn ends, leaving enough room to weave them in neatly. Both shoulder sections should be the same height and width.
Part B: Crochet the Back Panel
The back panel is a rectangle with a straight upper edge. It uses the same yarn, hook, and stitch pattern as the front.
Foundation chain: Ch 37.
Row 1: Sc in the second ch from the hook and in each remaining ch across. (36 sc)
Rows 2–45: Ch 1 and turn. Sc in each st across. (36 sc per row)
Fasten off, leaving a tail for weaving in.
The back panel should be approximately the same width and height as the front panel. The top edge remains straight, without a neckline opening. This provides a simple back section and keeps the construction beginner-friendly.
Part C: Check the Neckline and Armhole Layout
Before joining the panels, lay the front and back pieces flat.
- Place the front panel with the square neckline at the top.
- Place the back panel behind it, with its straight top edge at the top.
- Align the bottom edges and side edges.
- Check that the front shoulder sections are symmetrical.
- Mark the side-seam stopping points approximately 4 inches (10 cm) below the top edge.
With the sample row gauge of 2.5 rows per inch, 10 rows represent approximately 4 inches. Leaving the upper 10 rows unjoined on each side creates the armholes.
The armhole depth is approximate. Before sewing the side seams, hold the panels against your body or compare them with a top that fits comfortably. Adjust the unjoined section if necessary.
Part D: Join the Front and Back Panels
Use a yarn needle and the main yarn to join the panels. A sewn seam creates a flexible finish and allows you to control the seam tension.
Join the shoulders
The front has two shoulder sections of 12 stitches each. The back has 36 stitches across its upper edge.
For this design, the front shoulder sections align with the outer portions of the back panel. The center of the back remains unjoined to the front’s neckline opening.
- Lay the front and back panels with their right sides facing each other.
- Align the first 12 stitches at the left shoulder of the front with the first 12 stitches at the corresponding outer edge of the back.
- Sew through corresponding stitches using small, even stitches.
- Repeat for the 12 stitches at the right shoulder, aligning the opposite outer edges.
- Secure and weave in the yarn ends.
Keep the shoulder seams flat. Do not pull them so tightly that the neckline becomes distorted.
Part E: Join the Side Seams and Form the Armholes
- Keep the panels with their right sides facing each other.
- Starting at the bottom edge, align the first side edges.
- Sew the side edges together, matching one row end on the front to the corresponding row end on the back.
- Stop approximately 4 inches (10 cm) below the top edge, leaving the upper section open for the armhole.
- Secure the yarn and weave in the end.
- Repeat on the opposite side, using the same seam length.
For the sample, the panels have 45 rows. Leaving the upper 10 rows unjoined means sewing the lower 35 row edges together on each side.
Turn the top right side out and check the fit. The side seams should be even, and the armholes should allow comfortable movement without pulling across the shoulders.
If the armholes feel too small, undo a few rows of the side seams. If they feel too deep, sew a few additional rows together, checking the fit as you go.
Part F: Crochet the Four Adjustable Shoulder Ties
The top uses four narrow ties: one at each upper outer corner of the front and one at each corresponding corner of the back. The front and back ties are tied together over each shoulder, allowing you to adjust the fit.
Make all four ties using the main yarn.
For each tie:
- Ch 51.
- Starting in the second ch from the hook, sl st in each ch across. (50 sl sts)
- Fasten off, leaving a long tail for attachment.
Each tie should measure approximately 10–13 inches (25–33 cm), depending on your tension. Make all four the same length.
Attach the ties
- Place the first tie at the outer corner of the front left shoulder section.
- Use the yarn tail and a yarn needle to sew the end securely to the panel, stitching through several rows and across the width of the tie’s base.
- Attach the second tie at the outer corner of the front right shoulder section.
- Attach the remaining two ties at the corresponding outer corners of the back panel.
- Reinforce each attachment with a second pass of small stitches.
- Weave in the tails and check that the ties are firmly attached.
When dressing, tie the front and back tie on each side together over the shoulder. Keep the ties short enough to avoid excessive dangling, and ensure the knots remain secure during wear.
Part G: Crochet the Decorative Scalloped Edging
The scalloped edging adds a soft boho detail around the neckline, armholes, and lower hem. First, work a foundation round of single crochet to create an even edge for the scallops.
Edge preparation round
Join the edging yarn at the lower hem.
Along the lower hem: Ch 1 and work 1 sc into each stitch across the front panel, then continue across the back panel. At the side seams, work 1 sc into the seam area to bridge the join neatly.
Along the armholes: Work 1 sc evenly around each armhole, placing stitches along row ends. Avoid adding so many stitches that the armhole flares or so few that it pulls inward.
Along the neckline: Work 1 sc around the square neckline, including the top edges of the shoulder sections and the center neckline edges. Place approximately 1 sc per row end where necessary. At each neckline corner, work 2 sc into the corner area to help the edge turn smoothly.
Join the round with a sl st to the first sc and fasten off. If you prefer, use the same yarn for this foundation round and the scallops.
Because the neckline and armholes include both stitches and row ends, the exact number of stitches will depend on your tension. The goal is an even foundation edge that lies flat.
Scallop round
Join the edging yarn at any convenient point along an edge.
- Ch 1.
- Sl st in the next stitch.
- Skip the next stitch, then work 5 dc into the following stitch.
- Skip the next stitch, then sl st into the following stitch.
- Repeat the sequence of skip 1 st, 5 dc in the next st, skip 1 st, sl st in the next st around the edge.
- At tight corners or curves, adjust the spacing slightly by skipping an extra stitch where needed to keep the scallops flat.
- Join with a sl st at the beginning of the round and fasten off.
Work the scallops around the neckline, both armholes, and the lower hem. If an edge has an odd number of stitches, adjust the final repeat slightly rather than forcing an extra scallop into a tight space.
The scallops should lie flat without pulling the fabric inward or making the edge wave. If the edging curls, try a larger hook for the scallop round or loosen your tension.
Part H: Final Assembly and Finishing
- Weave in all remaining yarn ends securely on the wrong side.
- Check each shoulder tie attachment and reinforce any loose stitches.
- Inspect the shoulder seams and side seams for gaps.
- Smooth the neckline and armholes with your hands.
- Check that the lower scallops are evenly spaced and lie flat.
- Measure the bust width and top length.
- Try the top on over an appropriate underlayer to check the fit and strap placement.
If the panels have stretched during joining, gently shape them without pulling the seams. Follow the yarn manufacturer’s care instructions if blocking is appropriate for the fiber.
7. Stitch Counts and Garment Accuracy
Use this summary to check the main construction.
| Component | Stitch count or measurement |
|---|---|
| Front foundation chain | 37 ch |
| Front Row 1 | 36 sc |
| Front Rows 2–45 | 36 sc per row |
| Front left shoulder section | 12 sc |
| Front center neckline opening | 12 unworked stitches |
| Front right shoulder section | 12 sc |
| Back foundation chain | 37 ch |
| Back Row 1 | 36 sc |
| Back Rows 2–45 | 36 sc per row |
| Side seam | 35 row edges per side |
| Unjoined armhole section | Approximately 10 rows per side |
| Shoulder ties | 4 ties, 50 sl sts each |
The turning chain does not count as a stitch. The front and back panels each begin with 36 single crochet stitches across and have 45 rows before neckline shaping.
The front neckline is created by dividing the top edge into 12 stitches, 12 unworked center stitches, and 12 stitches. This gives two equal shoulder sections.
The back remains rectangular. The front shoulder sections are joined to the outer sections of the back, and the four ties are attached at the outer shoulder corners. The side seams stop below the armholes, leaving the upper sections open.
8. Fit Checks and Size Adjustments
The sample is intended for an approximate finished bust circumference of 36 inches, but the actual measurement depends on gauge and the final seam placement.
Adjusting bust width
The sample uses 36 stitches per panel. At a gauge of 2 stitches per inch, each panel is approximately 18 inches wide, giving a combined width of approximately 36 inches before seams.
For a wider or narrower top, adjust the foundation chain while maintaining the same stitch gauge. If you change the panel width, recalculate the front neckline sections so the center opening and two shoulder sections remain balanced.
For example, a wider panel can be divided into two equal shoulder sections with a larger center opening. Keep the left and right sections equal for a symmetrical neckline.
Adjusting body length
The sample uses 45 rows. At a gauge of 2.5 rows per inch, this produces approximately 18 inches of length.
- For a longer top, add rows before shaping the neckline.
- For a shorter top, remove rows before shaping.
- Keep the front and back panels the same length so their side seams align.
Adjusting neckline width
The sample leaves 12 center stitches unworked, creating a square opening. To make the neckline wider, leave more center stitches unworked and reduce the shoulder sections by the same total amount. To make it narrower, leave fewer center stitches unworked.
Keep both shoulder sections equal, and check that they remain wide enough to support the strap attachments.
Adjusting armhole depth
The sample leaves the upper 10 rows unjoined on each side. Leave more rows open for a deeper armhole or sew more rows together for a shallower one.
Try the panels against your body before completing the seams. The ideal depth depends on your measurements and how much coverage you want.
Adjusting strap length
Make each tie longer by adding chains to the foundation, or shorter by using fewer chains. All four ties should be the same length. Check the fit with the ties secured before trimming any yarn ends.
Understanding ease
Positive ease means the finished garment is larger than your body measurement. Negative ease means it is smaller and stretches to fit. For this relaxed boho design, a little positive ease is generally comfortable, but the amount depends on the yarn’s stretch and your preferred fit.
9. Finishing and Care
To keep the top looking neat:
- Weave in all yarn ends securely.
- Reinforce the four strap attachments.
- Check the seams and scalloped edging for loose stitches.
- Shape the neckline and armholes gently.
- Measure the finished top and compare it with your intended size.
- Wash and dry according to the yarn manufacturer’s instructions.
Cotton may relax or stretch after washing, while some blends may require gentler handling. Avoid high heat unless the yarn label specifically allows it. If blocking is appropriate, shape the panels and edging gently and allow them to dry completely.
Store the top folded or hanging in a way that does not put excessive weight on the shoulder ties.
10. Troubleshooting
The fabric is too stiff
Likely cause: Your hook may be too small, or your stitches may be too tight.
Solution: Try a larger hook and crochet a new swatch. Choose a fabric that drapes comfortably without becoming too open.
The panels are wider or narrower than expected
Likely cause: Your stitch gauge differs from the sample gauge.
Solution: Measure the panel after several rows. Adjust the hook size or recalculate the foundation chain before making the full panel.
The front and back panels do not match
Likely cause: Different stitch counts, row counts, or tension may have changed the dimensions.
Solution: Check that both panels have 36 stitches across and 45 rows before shaping. Lay them flat and compare their edges before joining.
The neckline stretches or gapes
Likely cause: The neckline edging may be too loose, or the shoulder ties may be positioned too far apart.
Solution: Check the neckline foundation round and make sure it lies flat. Adjust the ties to bring the shoulder sections into a comfortable position. Avoid pulling the neckline edging so tightly that it puckers.
The armholes are too tight or too deep
Likely cause: The side seams may have been joined too high or stopped too low.
Solution: Undo a few seam stitches to enlarge a tight armhole, or sew additional rows together to reduce an armhole that is too deep. Make both sides match.
The straps stretch or slip
Likely cause: The ties may be too long, the attachment points may be weak, or the yarn may stretch with wear.
Solution: Reinforce the attachments with additional stitches. Adjust the tie length and secure the knots comfortably. If the yarn stretches significantly, consider a firmer yarn or a slightly smaller hook.
The side seams pucker
Likely cause: The seam stitches may be too tight or the panel edges may not be aligned.
Solution: Undo the affected section and sew it again with relaxed, even stitches. Match each row end to the corresponding row end.
The edging curls or flares
Likely cause: Too many or too few stitches may have been worked along the edges, or the scallops may be too tight.
Solution: Check the foundation round for even spacing. Adjust the scallop spacing at corners and curves, and loosen your tension if the edge pulls inward.
The fringe looks uneven
This version of the pattern does not include fringe, so no fringe is needed to complete it. If you choose to add fringe later, measure every strand to the same length and trim the finished fringe evenly. Keep decorative additions modest so they do not interfere with the garment’s fit.
The finished top is shorter or longer than expected
Likely cause: Your row gauge differs from the estimate.
Solution: Measure the panel as you work and add or remove rows before shaping the neckline. Keep the front and back lengths identical.
11. Customization Ideas
You can personalize the top while keeping its basic two-panel construction.
- Different yarn colors: Use one color for the panels and another for the scallops. Reserve enough contrasting yarn for all three edging areas.
- Contrasting edging: Choose a brighter or darker shade to emphasize the square neckline and hem.
- Longer or shorter body: Add or remove rows before shaping the front neckline.
- Different strap length: Adjust the foundation chain for all four ties to achieve a comfortable shoulder fit.
- Modest fringe: Add short fringe along selected sections of the lower hem if desired. This requires additional yarn and careful trimming.
- Textured fabric: A different stitch pattern can change the drape, gauge, and coverage. Make a swatch and recalculate the panel dimensions before replacing the single-crochet pattern.
- Higher or lower neckline: Adjust the number of center stitches left unworked and the width of the shoulder sections. Keep the neckline symmetrical and ensure enough fabric remains for secure strap attachments.
Any change to the stitch pattern, yarn weight, or hook size can affect the finished measurements and yarn consumption. Always measure the panels before assembly.
12. Frequently Asked Questions
1. Is a crochet boho top suitable for beginners?
Yes. The main panels use single crochet, and the neckline is shaped by leaving center stitches unworked. The straps and scalloped edging use basic stitches. Beginners should count carefully and check the fit before completing the seams.
2. Which yarn works best for a summer crochet top?
Cotton and cotton-blend yarns are popular choices because they provide clear stitch definition and can feel comfortable in warm weather. Choose a smooth yarn with suitable drape and check its care instructions.
3. How do I calculate the correct size?
Measure your bust, desired body length, and preferred armhole depth. Use your stitch and row gauge to calculate the panel dimensions. The sample uses 36 stitches across each panel and 45 rows before neckline shaping.
4. How can I prevent the straps from stretching?
Use a suitable yarn, maintain consistent tension, and reinforce the attachment points with several small stitches. Avoid relying on a single knot or one line of sewing stitches.
5. Can I make the top longer or shorter?
Yes. Add or remove rows before shaping the front neckline, and make sure the front and back panels remain the same length. Recheck the yarn requirement if you change the length substantially.
6. How do I keep the neckline from gaping?
Make sure the neckline edging is even and that the straps are adjusted comfortably. If the neckline still gapes, reassess the width of the center opening and the position of the shoulder ties.
7. How much ease should I allow?
A little positive ease generally suits a relaxed boho top, but the amount depends on your body measurements, yarn stretch, and preferred fit. Measure the panels before joining rather than relying only on the estimated finished size.
8. Can I use a different stitch pattern?
Yes, but changing the stitch pattern affects the gauge, texture, drape, and coverage. Make a swatch and recalculate the foundation chain and row count before making both panels.
9. How should I wash and care for the finished top?
Follow the yarn manufacturer’s instructions. Use the recommended washing and drying method for your specific fiber, and avoid high heat unless the label permits it. Shape the top gently after washing if appropriate.
10. Can I adjust the straps for a more comfortable fit?
Yes. Make all four ties longer or shorter by changing the foundation-chain length. Tie the front and back straps together over each shoulder and check the fit before weaving in the final ends.
Final Thoughts
This crochet boho top combines two simple panels, a square neckline, adjustable shoulder ties, and scalloped edging for a relaxed handmade look. Its straightforward construction makes it a useful project for crocheters who want to move from basic stitches into wearable garments.
For the best result, check your gauge before starting, keep the front and back panels consistent, and try on the top before completing the seams. With thoughtful color choices and careful finishing, you can customize the design to suit your own style.
Leave a Comment