
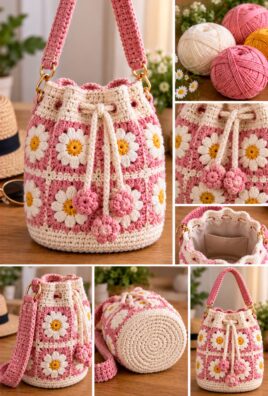
A crochet bucket bag is a practical handmade accessory with a rounded base, softly structured sides, and a roomy opening for everyday essentials. With sturdy cotton yarn, simple stitches, and a drawstring closure, you can create a bag that works for casual outings, shopping, or everyday styling.
This beginner-friendly tutorial walks you through crocheting the circular base, building the bag body, finishing the rim, making a comfortable shoulder strap, and adding a drawstring. The pattern uses a consistent stitch count to help the bag keep its bucket shape.
1. Project Overview
- Skill level: Beginner
- Finished dimensions: Approximately 8 inches (20 cm) tall, with a 6-inch (15 cm) base diameter and an opening around 8–9 inches (20–23 cm) across
- Estimated completion time: Approximately 5–8 hours
- Yarn: Medium-weight cotton yarn, category 4
- Hook: 4.5 mm (US 7), adjusted as needed for a firm but flexible fabric
- Yarn quantity: Approximately 250–350 yards (229–320 m), including the strap and drawstring
- Main stitches: Chain, slip stitch, single crochet, and increases
- Construction: A circular base worked first, followed by sides worked upward in continuous rounds
- Strap: A reinforced, crocheted shoulder strap
- Closure: A crocheted drawstring threaded through evenly spaced openings
The measurements are approximate and will vary with yarn, hook size, and personal tension.
2. Materials and Tools
Gather these supplies before beginning:
- 250–350 yards of sturdy medium-weight cotton yarn
- A 4.5 mm crochet hook, or a suitable size for your yarn
- Scissors
- Yarn needle
- Stitch marker
- Measuring tape
- Optional cotton fabric for a lining
- Optional lightweight, removable base insert
- Optional sewing needle and thread if adding a lining
Choosing the right yarn
Cotton is a good choice for a bucket bag because it provides clear stitch definition and a relatively firm fabric. A cotton blend can feel lighter or softer, depending on its composition. Avoid very fuzzy yarn if you want the stitch pattern to remain visible and the bag to be easy to clean.
A smaller hook can create a denser fabric, helping small items stay inside the bag. However, if your stitches become too tight to work comfortably, move up half a hook size.
Check the yarn label before washing. Cotton, acrylic, and blended yarns can have different care requirements, especially if the bag includes a lining or reinforcement.
3. US Crochet Abbreviations and Stitch Guide
All terms in this tutorial use US crochet terminology.
| Abbreviation | Meaning |
|---|---|
| ch | Chain |
| sl st | Slip stitch |
| sc | Single crochet |
| inc | Increase: work 2 sc into the same stitch |
| st(s) | Stitch(es) |
| sp(s) | Space(s) |
| rep | Repeat |
| rnd(s) | Round(s) |
| BLO | Back loop only |
Stitches used in this pattern
Chain (ch): Yarn over and pull the yarn through the loop on your hook.
Slip stitch (sl st): Insert your hook into the indicated stitch, yarn over, and pull the yarn through both the stitch and the loop on the hook.
Single crochet (sc): Insert the hook into the indicated stitch, yarn over and pull up a loop, then yarn over and pull through both loops on the hook.
Increase (inc): Work 2 sc into the same stitch. This adds one stitch to the round.
Back loop only (BLO): Insert your hook under the back loop of the stitch only, leaving the front loop unworked. This can create a visible ridge that helps define the transition from the base to the sides.
Working in continuous rounds
The circular base and bag body are worked in continuous rounds rather than joined rounds. Do not join with a slip stitch at the end of each round. Instead, move directly into the next stitch and use a stitch marker to identify the first stitch of each round.
Move the marker up as you begin each new round. Count your stitches regularly to avoid accidentally adding or losing stitches.
The starting chain used for the drawstring openings is the only chain sequence that forms deliberate spaces in the bag body.
4. Design and Construction Plan
This bag is crocheted from the bottom upward as one continuous piece until the top rim is complete. The strap and drawstring are made separately and attached afterward.
The construction follows this order:
- Crochet a flat circular base with evenly spaced increases.
- Work one round into the back loops only to create a turning ridge.
- Crochet the body straight upward without additional increases.
- Create a round of drawstring openings.
- Crochet a final round to reinforce the top edge.
- Make and attach a wide shoulder strap.
- Crochet a cord and thread it through the openings.
- Add an optional lining or removable base insert.
The main body uses single crochet, which creates a relatively dense fabric. The base and sides have the same stitch count after the base is finished, helping the bag maintain a recognizable bucket shape instead of flaring outward.
5. Complete Step-by-Step Crochet Instructions
Part A: Crochet the Circular Base
Use the main yarn color and a 4.5 mm hook.
Begin with a magic ring. If you prefer not to use a magic ring, chain 4 and join with a slip stitch to form a ring, then work the first round into its center.
Round 1: Ch 1, work 6 sc into the magic ring. Pull the ring closed. (6 sc)
Round 2: Work 2 sc into each stitch around. (12 sc)
Round 3: *Sc in the next st, inc in the next st; rep from * around. (18 sc)
Round 4: *Sc in the next 2 sts, inc in the next st; rep from * around. (24 sc)
Round 5: *Sc in the next 3 sts, inc in the next st; rep from * around. (30 sc)
Round 6: *Sc in the next 4 sts, inc in the next st; rep from * around. (36 sc)
Round 7: *Sc in the next 5 sts, inc in the next st; rep from * around. (42 sc)
Round 8: *Sc in the next 6 sts, inc in the next st; rep from * around. (48 sc)
Round 9: *Sc in the next 7 sts, inc in the next st; rep from * around. (54 sc)
Round 10: *Sc in the next 8 sts, inc in the next st; rep from * around. (60 sc)
Round 11: *Sc in the next 9 sts, inc in the next st; rep from * around. (66 sc)
Round 12: *Sc in the next 10 sts, inc in the next st; rep from * around. (72 sc)
Place a stitch marker in the first stitch of every round. Move it up as you work, and count the stitches at the end of each round.
With medium-weight cotton and the recommended hook, this base is intended to measure approximately 6 inches (15 cm) across. Measure your actual work because tension can change the diameter.
Check the base: Lay it on a flat surface. It should lie reasonably flat without curling upward or developing ripples. If it curls, your increases may be too few or your tension may be too tight. If it waves, your increases may be too many for your tension.
Part B: Transition from the Base to the Sides
The next round creates a visible turning ridge so the base transitions into upright walls.
Transition round: Work 1 sc in the back loop only of each stitch around. Do not increase. (72 sc)
To work into the back loop only, insert your hook under the back loop of each stitch rather than under both top loops.
This round leaves the front loops of the base round visible as a small ridge. That ridge helps define the bottom edge of the bag.
Part C: Crochet the Bag Body
Continue in continuous rounds. Do not join each round with a slip stitch.
Body Rounds 1–30: Sc in each stitch around. (72 sc per round)
For every round:
- Identify the first stitch using your marker.
- Work 1 sc into each stitch around.
- Move the marker to the first stitch of the next round.
- Check that you still have 72 stitches.
Work 30 rounds for the body. The sides should rise straight upward from the base without extra increases.
With typical tension, these rounds may produce sides approximately 7–8 inches (18–20 cm) tall, measured from the base transition to the top. The final height will depend on your row gauge and the finishing rounds.
To keep the sides straight:
- Do not add increases to the body rounds.
- Do not skip stitches.
- Keep your tension consistent.
- Lay the bag on a table occasionally to check that the sides are rising evenly.
If you want a shorter bag, work fewer body rounds. If you want a taller bag, add rounds before the drawstring-opening round. Changing the number of body rounds changes the height, not the base diameter.
Part D: Create the Drawstring Openings and Finish the Top
The drawstring opening is made with a round of chain spaces. There are 12 evenly spaced openings around the top.
Eyelet round: Repeat the following sequence 12 times:
- Sc in the next 5 sts.
- Ch 1.
- Skip the next st.
At the end of the round, you will have 60 sc and 12 chain spaces, corresponding to all 72 positions around the bag.
The chain spaces form the openings through which the drawstring will pass.
Top-rim round: Sc in each of the next 5 sc, then work 1 sc into the next chain space. Repeat this sequence around, working into each chain space and each single crochet from the previous round. (72 sc)
This round closes the chain spaces into a firm, even rim while preserving the openings beneath it. Do not work into the skipped stitches from the eyelet round; work into the chain spaces instead.
Fasten off and weave in the yarn end securely.
The top edge should be firm but flexible enough for the drawstring to slide through the openings. Avoid pulling the rim so tightly that the opening becomes too narrow.
Part E: Crochet the Shoulder Strap
The strap is a flat, reinforced strip made with single crochet. It is approximately 2 inches (5 cm) wide and 30 inches (76 cm) long before attachment. This length is intended for shoulder carrying, although the final drop depends on how the strap is attached and your body size.
Use the same yarn and hook as the bag.
Row 1: Ch 9. Sc in the second ch from the hook and in each remaining ch. (8 sc)
Rows 2–120: Ch 1 and turn. Sc in each st across. (8 sc per row)
The turning chain does not count as a stitch. After Row 120, you should have 120 rows, each containing 8 sc.
Fasten off, leaving a long tail at each end for attachment. Measure the strap: it should be approximately 28–30 inches (71–76 cm) long, depending on your row gauge. If your strap is shorter than desired, add rows before fastening off.
Attach the strap securely
- Lay the bag flat and identify two opposite points on the body, approximately 1½–2 inches (4–5 cm) below the top rim.
- Position one strap end at the first point, making sure the strap is not twisted.
- Using the long yarn tail and a yarn needle, sew the strap end to the bag with small, close stitches around the entire attachment area.
- Reinforce the attachment by sewing a second pass around the edge and through the strap end and bag fabric.
- Attach the other end directly opposite the first, keeping the strap even.
- Check that the strap lies flat and both attachment points are secure.
For a neat finish, keep the sewing stitches inside the strap’s edges and weave in the tails on the inside of the bag. Avoid relying on a single knot or one line of stitches to hold the strap.
The strap length can be adjusted by adding or removing rows. A shorter strap works for hand carrying or carrying over the forearm; a longer strap is more comfortable for shoulder carrying.
Part F: Make and Attach the Drawstring
Use the main yarn or a contrasting color.
Make the cord
- Ch 121.
- Starting in the second ch from the hook, sl st in each chain across. (120 sl sts)
- Fasten off, leaving a short tail at each end.
- Gently stretch the cord along its length to even out the stitches.
The cord should measure approximately 25–30 inches (64–76 cm), depending on your tension. If your cord is shorter, make a longer starting chain. It should be long enough to pass through the 12 openings and leave enough length to pull the opening closed without excessive tension.
Thread the drawstring
- Lay the bag flat with the top facing you.
- Starting at one opening, thread the cord through a chain space in the eyelet round.
- Continue in and out through the 12 openings, moving around the entire bag.
- Bring both ends out through the same opening.
- Pull the ends gently to test the closure.
The cord should slide through the openings without snagging. If it catches, check for overly tight stitches or yarn tails obstructing the spaces.
You can tie a small bow when closing the bag, but keep the cord ends appropriately short and secured for the intended use. Do not leave long, unsecured cords where they could create a hazard for a child.
Part G: Optional Lining and Base Reinforcement
A lining can help prevent small items from slipping through the crochet stitches and can give the inside a smoother finish. A base insert can help the bottom retain its shape, but both additions are optional.
Measure and prepare a fabric lining
- Measure the inside diameter of the base.
- Measure the inside height from the base to just below the drawstring openings.
- Cut a circular fabric piece for the base, allowing a small seam allowance.
- Cut a rectangular piece for the sides. Its length should match the measured inside circumference plus a seam allowance, and its height should match the measured bag height with allowances for the upper and lower seams.
- Sew the short ends of the rectangle together to form a tube.
- Sew the circular base to the lower edge of the tube.
- Fold the top edge inward and hem it.
- Place the lining inside the bag and hand-sew it to the inside just below the drawstring openings.
Check the fit before sewing the lining permanently. It should sit smoothly without bunching or pulling the crochet fabric inward.
If you do not have sewing equipment, you can leave the bag unlined. Use it for items suited to the density of the crochet fabric.
Add an optional base insert
Measure the base and cut a lightweight, washable or removable insert to fit inside the bottom. It should sit flat without sharp edges and should not protrude beyond the crochet base.
A removable insert is easier to take out for cleaning. Do not assume the insert is washable unless its material allows it.
Part H: Assembly and Final Finishing
Before using your bag, complete these checks:
- Secure the yarn ends. Weave each tail through several stitches on the wrong side, changing direction before trimming.
- Check the strap. Inspect both attachment points for gaps or loose sewing stitches.
- Check the rim. Confirm that the top edge is even and does not pull inward.
- Test the drawstring. Pull it closed and release it several times to check that it moves smoothly.
- Shape the base. Place the bag on a flat surface and gently smooth the base and side walls.
- Inspect the seams. Check for missed stitches, holes, or loose yarn ends.
- Fit the lining or insert, if used. Make sure neither pulls the bag out of shape.
If the sides look uneven, check that the body has the same 72 stitches in every round and that your tension has remained consistent. If the base does not sit flat, review the increase rounds before adding any lining or reinforcement.
6. Stitch Counts, Measurements, and Structural Accuracy
Use this table as a quick reference while crocheting.
| Component | Stitch count or measurement |
|---|---|
| Base Round 1 | 6 sc |
| Base Round 2 | 12 sc |
| Base Round 3 | 18 sc |
| Base Round 4 | 24 sc |
| Base Round 5 | 30 sc |
| Base Round 6 | 36 sc |
| Base Round 7 | 42 sc |
| Base Round 8 | 48 sc |
| Base Round 9 | 54 sc |
| Base Round 10 | 60 sc |
| Base Round 11 | 66 sc |
| Base Round 12 | 72 sc |
| Transition round | 72 sc in BLO |
| Body Rounds 1–30 | 72 sc per round |
| Eyelet round | 60 sc and 12 chain spaces |
| Top-rim round | 72 sc |
| Strap | 8 sc per row, 120 rows |
| Drawstring | 120 slip stitches |
The base increases by six stitches per round, giving it a balanced circular shape. After Round 12, the stitch count remains at 72 throughout the transition and body.
The eyelet round uses 12 repeats of five single crochet stitches followed by one chain space. The final rim round works into the 60 single crochet stitches and 12 chain spaces, restoring a total of 72 single crochet stitches.
All dimensions and yarn quantities are approximate. Your yarn, hook, and tension determine the exact finished size.
7. Gauge and Sizing Adjustments
Gauge affects the bag’s base diameter, height, opening width, and strap length. Before starting, crochet a small sample in single crochet and measure it.
For this pattern, the main sizing measurements are:
- Base diameter: Measure straight across the center of the base.
- Bag height: Measure from the bottom of the base to the top rim.
- Opening width: Measure across the opening when the bag is laid flat and the top is relaxed.
- Strap length: Measure from one end of the finished strap to the other before attaching it.
To make the bag smaller
Stop the base after fewer increase rounds, then work the transition round into the stitches of the final base round. For example, stopping after Round 10 gives you 60 stitches rather than 72.
Because a smaller base has fewer stitches, work the body using that same stitch count. Do not continue with the original 72-stitch body instructions unless you have adjusted the base accordingly.
To make the bag larger
Add balanced increase rounds to the base. Continue the established increase pattern by adding six stitches per round, distributing the increases evenly around the circle. The resulting stitch count becomes the stitch count for the transition round and body.
A larger base has a longer circumference and therefore requires more yarn for each body round. Adding body rounds without changing the base makes the bag taller but does not widen the bottom.
To adjust the strap
Add rows for a longer strap or remove rows for a shorter one. Keep the strap width at eight stitches if you want to preserve the proportions of this design.
Changing yarn weight or hook size
Thicker yarn and a larger hook generally produce a larger bag, while thinner yarn and a smaller hook generally produce a smaller one. The resulting fabric may also be more flexible or more rigid. Make a sample first and measure it before estimating the final yarn quantity.
8. Finishing and Care
A little care during finishing helps the bag retain its shape.
- Weave in all yarn ends securely and trim the excess.
- Smooth the base and side walls by hand.
- Check both strap attachment points for loose stitches.
- Test the drawstring to ensure that it opens and closes without snagging.
- Remove any optional insert before washing if the insert is not washable.
- Follow the yarn manufacturer’s washing and drying instructions.
- If the bag is lined, check that the fabric lining can tolerate the same care method as the crochet fabric.
- Store the bag in a dry place, loosely shaped rather than tightly crushed.
Avoid assuming that every cotton or blended yarn can tolerate high heat. Heat and aggressive washing can affect the yarn, lining, and shape of the finished bag.
Inspect the bag periodically, particularly around the strap and drawstring openings. Repair loose stitches before using it again.
9. Troubleshooting
The base curls upward
Likely cause: The base may not have enough increases, or your tension may be too tight.
Solution: Check the increase sequence and confirm that each round adds six stitches. If the problem persists, try a slightly larger hook and restart the base.
The base becomes wavy
Likely cause: Too many stitches may have been added, or increases may not be evenly distributed.
Solution: Count each round and follow the stated sequence. Each increase round should finish with six more stitches than the previous round.
The sides flare outward
Likely cause: Extra stitches have been added to the body, or the transition round was worked incorrectly.
Solution: Keep the transition and body at 72 stitches for the original size. Do not continue increasing after the base is complete.
The bag body narrows unexpectedly
Likely cause: Stitches may have been missed, especially at the beginning of continuous rounds.
Solution: Use a stitch marker to identify the first stitch and count every round. If a round has fewer than 72 stitches, correct it before continuing.
The opening is too tight
Likely cause: The top stitches may be too tight, or the drawstring may be too thick.
Solution: Check that all 12 chain spaces are open and evenly formed. If necessary, remake the drawstring with a slightly looser tension or a thinner yarn.
The bag stretches too much when filled
Likely cause: The yarn or stitch fabric may be too flexible for the intended contents.
Solution: Try a slightly smaller hook to create a firmer fabric, or add a suitable lining. Avoid carrying heavy objects that could distort the crochet fabric or strain the strap attachments.
The strap becomes too long or narrow
Likely cause: Row gauge or stitch gauge differs from the estimate.
Solution: Measure the strap as you work. Adjust the number of rows to change its length, and use the same eight-stitch width if you want to preserve the original design.
The strap attachment points feel weak
Likely cause: The strap ends may not overlap enough, or the sewing stitches may be too widely spaced.
Solution: Reinforce each end with additional close stitches through both the strap and the bag body. Check for gaps before using the bag.
The drawstring does not slide smoothly
Likely cause: The chain spaces may be too tight, the cord may be too thick, or yarn tails may obstruct the openings.
Solution: Clear the openings and check that the cord passes through all 12 spaces without catching. If necessary, make a thinner cord.
The bag does not sit flat
Likely cause: The base may have uneven increases or inconsistent tension.
Solution: Lay the base flat and review the increase rounds. If it has pronounced ripples or curling, it is usually easier to correct the base before continuing with the body.
The lining is too loose or too tight
Likely cause: The fabric was cut using estimates rather than the actual interior measurements.
Solution: Re-measure the bag and adjust the lining before attaching it. A lining that is too tight may pull the crochet sides inward, while a loose lining may bunch at the base.
10. Customization Ideas
Once you are comfortable with the basic pattern, you can personalize the bag without changing its overall construction.
- Contrasting colors: Use one color for the base and another for the body. Color changes affect yarn quantities but do not alter stitch counts.
- Simple stripes: Change colors every few body rounds. Keep the stitch count at 72 and secure the color changes neatly.
- Textured body: A textured stitch can create a different appearance, but check that it maintains the same stitch count and produces a fabric suitable for a bag.
- Shorter handle: Work fewer strap rows for hand carrying or carrying over the forearm.
- Longer shoulder strap: Add rows to increase the strap length, keeping the attachment points reinforced.
- Contrasting rim: Use a second color for the eyelet and top-rim rounds. Allow extra yarn for the contrasting color.
- Removable lining: Choose a lining that can be taken out for washing or when the bag is used without it.
- Different base size: Add or remove balanced increase rounds. Remember that changing the base circumference also changes the number of stitches required for the body.
For any modification, measure the bag as you work and adjust the yarn quantity to suit the finished size.
11. Frequently Asked Questions
1. Is a crochet bucket bag suitable for beginners?
Yes. This pattern uses single crochet stitches and simple increases. The most important skills are counting stitches, working in continuous rounds, and attaching the strap securely. Beginners may find it helpful to use a stitch marker throughout the body.
2. Which yarn works best for a structured bucket bag?
Medium-weight cotton yarn is a practical choice because it provides good stitch definition and can produce a firm fabric. Cotton blends are also an option. The final structure depends on the yarn, hook, tension, and whether you add a lining or base insert.
3. How can I keep the base flat?
Follow the six-increase-per-round sequence and check your stitch count after every round. If the base curls, check your tension and increase placement. If it becomes wavy, confirm that you have not added extra stitches.
4. How do I stop the sides from flaring?
After completing the base, work the transition round and keep the body at the same stitch count. For the original size, that means 72 stitches throughout the body rounds.
5. Can I make the bag larger or smaller?
Yes. Adjust the number of base increase rounds, then use the resulting stitch count for the transition and body. Change the number of body rounds to adjust the height independently of the base diameter.
6. How can I prevent the strap from stretching?
Use a firm single-crochet fabric, keep the strap width consistent, and reinforce both attachment points with close sewing stitches. A lining may help the bag hold its shape, but it does not eliminate the possibility of stretching.
7. Do I need to line the bag?
No. The bag can be used without a lining. A lining is useful if you want a smoother interior or need to reduce the chance of small items slipping through the stitches. A removable lining is convenient when washing requirements differ.
8. How do I add a drawstring closure?
Work the eyelet round using 12 repeats of five single crochet stitches, one chain, and one skipped stitch. Crochet the cord separately, thread it through the chain spaces, and test that it slides smoothly.
9. How much yarn should I buy?
Plan for approximately 250–350 yards of medium-weight cotton yarn for the original bag, including the body, strap, and drawstring. This is an estimate; larger bases, taller bodies, and longer straps require additional yarn.
10. How should I wash and store the finished bag?
Follow the yarn manufacturer’s care instructions and account for any lining or reinforcement. Remove a non-washable insert before cleaning. Allow the bag to dry as directed and store it loosely shaped in a dry place.
Final Thoughts
This crochet bucket bag combines a flat circular base, straight single-crochet sides, a reinforced rim, and a practical drawstring closure. Its simple construction makes it a useful beginner project, while the strap, color, and lining options allow you to personalize the finished design.
Take your time counting stitches, check the shape as you work, and reinforce the strap attachments carefully. With thoughtful finishing and suitable care, you can create a handmade bag for carrying lightweight everyday essentials.
Leave a Comment