
Learning how to crochet into the foundation chain correctly is one of the most important milestones for a beginner. Working into the chain correctly determines whether your first row has a clean, professional edge or a wavy, uneven look.
Based on the provided tutorial guide, here are the step-by-step instructions:
1. Project Overview
- Skill level: Absolute Beginner
- Completion time: 5 to 10 minutes of practice
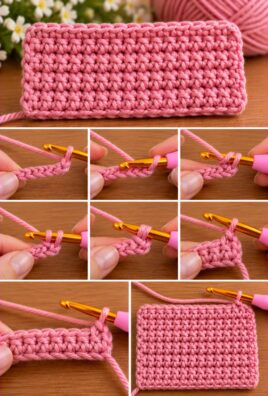
- Main technique: Working into the back bumps of a foundation chain to create a neat first row of single crochet stitches.
2. Materials and Supplies
- Yarn: Scrap medium worsted weight yarn (Category 4) in a light, solid color so your stitches are easy to see.
- Crochet hook: An appropriately sized hook matching your yarn (such as a 5.0 mm or 5.5 mm hook).
- Scissors: Small craft scissors for trimming practice yarn.
3. US Crochet Abbreviations & Stitch Meanings
- ch: Chain stitch
- sc: Single crochet
- yo: Yarn over
- st(s): Stitch or stitches
4. Complete Step-by-Step Tutorial
Step 1: Find the Back Bump
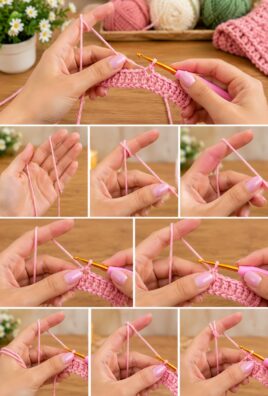
- Identify the sturdy “Back Bumps” on the reverse side of your chain. When you flip a chain over, you will see a horizontal ridge running down the back of each loop.
Step 2: Insert Hook
- Skip the first chain closest to your hook.
- Insert your hook directly into the back bump of the 2nd chain from the hook. Working into the back bump leaves the top two loops free to form a neat edge along the bottom of your work.
Step 3: Yarn Over & Pull Up Loop
- Yarn over (yo) and draw up a loop through the back bump. You will now have 2 loops on your hook.
Step 4: Complete Stitch
- Yarn over again and pull through both loops on your hook to complete your first single crochet stitch.
- Repeat this entire process for every chain across the row until your first row is finished!
5. Frequently Asked Questions
1. Why should I crochet into the back bump instead of the top loop?
Working into the back bump leaves the unused top loop of the chain exposed along the bottom edge, mirroring the neat “V” shape found at the top of your stitches and giving your project a reversible, professional finish.
2. What happens if I skip the turning chain?
Make sure you skip the very first chain from the hook (which acts as your turning chain height) so your stitch count matches your intended pattern length.
Leave a Comment