
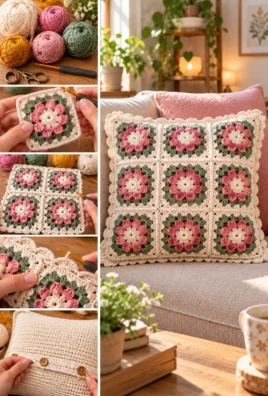
A crochet decorative pillow adds handmade texture and personality to a living room, bedroom, reading nook, or cozy seating area. With the right yarn and stitch pattern, you can create a cushion cover that looks thoughtfully crafted while remaining practical for everyday home décor.
In this tutorial, you will make a 16 × 16-inch textured crochet pillow cover with a raised front, a simple back, a neat single-crochet border, and a removable envelope-style closure. The front uses alternating single crochet and double crochet stitches to create a subtle woven texture. The back consists of two overlapping panels, so you can remove the cushion insert without installing a zipper.
The construction is beginner-friendly: crochet the front, make the two back pieces, finish the edges, and join the panels around a cushion insert. You will learn how to measure the fabric, keep the stitch count consistent, create a neat border, and assemble the cover with even seams.
Pattern note: The dimensions, gauge, and yarn quantities are design estimates, not physically tested results. Make a gauge swatch before starting the full cover, and adjust the measurements to your chosen insert and yarn.
1. Project overview
Textured Crochet Cushion Cover
Square cover · Raised stitch texture · Removable envelope back
Finished cover target
16 × 16 in
40.6 × 40.6 cm
Cushion insert
16 × 16 in
40.6 × 40.6 cm
Skill level
Beginner to intermediate
Estimated working time
8–14 hours
Varies with experience and finishing
| Project detail | Specification |
|---|---|
| Shape | Square decorative cushion cover |
| Front | Textured single-crochet and double-crochet pattern |
| Back | Two overlapping rectangular panels |
| Closure | Removable envelope opening |
| Yarn | Medium-weight category 4 |
| Fiber recommendation | Acrylic, cotton blend, or washable wool blend |
| Hook | 5 mm (US H-8), adjusted to match gauge |
| Main stitches | Chain, single crochet, double crochet, slip stitch |
| Joining method | Single-crochet seam or whip stitch |
| Border | One round of single crochet |
| Yarn estimate | Approximately 350–500 g, depending on yarn and tension |
The cover is designed to fit a 16-inch insert. A snug fit can help the cushion look full, but the fabric should not be stretched so tightly that the seams strain or the texture becomes distorted.
2. Materials and tools
Essential materials
- Medium-weight category 4 yarn in one main color.
- Approximately 350–500 g of yarn as a planning estimate.
- A 5 mm crochet hook.
- Scissors.
- Tapestry needle.
- Measuring tape or ruler.
- A 16 × 16-inch cushion insert.
- Stitch markers, if helpful for marking panel edges and corners.
Optional supplies
- A second yarn color for the border or back.
- Fabric lining if you want to reduce the chance of the insert showing through the crochet fabric.
- Sewing needle and matching thread for attaching a lining.
- Blocking mat and rustproof pins, if appropriate for the yarn.
Choosing yarn for a decorative pillow
Acrylic yarn is often easy to find in a wide range of colors and may be machine washable, depending on the label. It is a practical option for many decorative covers.
Cotton yarn provides clear stitch definition and can create a firm, structured cover. It may feel heavier than some acrylic yarns and has less elasticity.
Washable wool blends can create a soft fabric, but their care requirements depend on the fiber content.
For this project, choose a yarn that produces a sturdy fabric without making the cover excessively stiff. A yarn that is too thin may make the cushion insert visible; a very thick yarn can make the cover bulky and may require more space at the seams.
Estimating yarn quantities
The 350–500 g estimate is a planning range, not a measured requirement. Actual use depends on yarn length per skein, hook size, tension, and the texture of the fabric.
For example, if a skein contains 100 g and 200 m, then 400 g represents approximately 800 m. Check the actual meterage on your yarn label and consider purchasing an extra skein if you are uncertain.
3. Crochet terminology and abbreviations
This tutorial uses US crochet terminology.
| Abbreviation | Meaning | Beginner explanation |
|---|---|---|
| ch | Chain | A basic stitch used to start a row |
| sl st | Slip stitch | A short stitch used to join yarn or rounds |
| sc | Single crochet | A compact stitch used in the texture and border |
| dc | Double crochet | A taller stitch used in the texture pattern |
| st / sts | Stitch / stitches | Individual crochet stitches |
| sk | Skip | Pass over a stitch without working into it |
| rep | Repeat | Work a sequence again |
| FO | Fasten off | Secure the yarn at the end of the work |
The panels are worked flat in rows. At the end of each row, ch 1 and turn. The turning chain does not count as a stitch. The first actual stitch of each new row is worked into the first stitch of the previous row.
The envelope back consists of two separate pieces that overlap when assembled. No buttons or zipper are required for the main design.
4. Beginner-friendly crochet techniques
4.1 Making a foundation chain
- Make a slip knot and place it on the hook.
- Yarn over by wrapping the yarn over the hook.
- Draw the yarn through the loop already on the hook.
- Repeat until you have the required number of chains.
- Count each completed chain, excluding the loop on the hook.
Keep the foundation chain relaxed. If it is too tight, the lower edge may be narrower than the rest of the panel.
4.2 Making a single crochet
- Insert the hook into the specified stitch.
- Yarn over and pull up a loop. You now have two loops on the hook.
- Yarn over again and draw through both loops.
One single crochet is complete.
4.3 Making a double crochet
- Yarn over.
- Insert the hook into the specified stitch.
- Yarn over and pull up a loop. Three loops are now on the hook.
- Yarn over and draw through the first two loops.
- Yarn over again and draw through the remaining two loops.
One double crochet is complete.
4.4 Working the textured pattern
The front panel alternates single crochet and double crochet stitches across each row. On the next row, work the opposite stitch type into each stitch. This alternating structure creates a subtle texture.
To maintain the pattern, count stitches across each row and check that the stitch type changes consistently. Do not work into the turning chain.
4.5 Keeping straight edges
At the end of a row, count the stitches before turning. Ch 1, turn, and work the first stitch into the first actual stitch. Work the last stitch into the final actual stitch, not the turning chain.
Missing the first or last stitch gradually narrows the panel. Working into the turning chain by mistake can add extra stitches.
4.6 Changing colors
For the main pattern, one color is used throughout. If you choose a contrasting border, finish the panel first, fasten off, and join the new color at a corner. Leave a tail long enough to weave in securely.
4.7 Sewing panels together
Align the corresponding edges of the front and back panels. Use a tapestry needle and whip stitch or mattress stitch, working through matching edge stitches. Keep the seam firm enough to hold but not so tight that the fabric puckers.
4.8 Working a single-crochet border
Join yarn at a corner, ch 1, and work single crochet stitches evenly around the panel. At each corner, work three single crochet stitches into the corner stitch or corner space to allow the fabric to turn.
4.9 Inserting the cushion
Open the envelope back and insert one corner of the cushion first. Work the cushion gently into the cover, then guide the remaining corners into place. Avoid pulling hard on the crochet edges.
4.10 Weaving in yarn ends
Thread the yarn tail onto a tapestry needle. Weave it through several stitches on the wrong side, change direction once or twice, and trim the excess after securing it. Do not pull the tail so tightly that the fabric gathers.
5. Design specifications and finished dimensions
This pillow cover has three crocheted pieces:
- One textured front panel.
- One upper back panel.
- One lower back panel.
The two back panels overlap to form an envelope opening. The cover can be removed from the cushion insert without undoing any seams.
| Component | Target dimensions |
|---|---|
| Finished cover | 16 × 16 in (40.6 × 40.6 cm) |
| Cushion insert | 16 × 16 in (40.6 × 40.6 cm) |
| Front panel before edging | Approximately 16 × 16 in |
| Upper back panel before edging | Approximately 16 × 10.5 in |
| Lower back panel before edging | Approximately 16 × 10.5 in |
| Back overlap | Approximately 5 in (12.7 cm) |
| Border | Approximately 0.25–0.5 in (0.6–1.3 cm) |
| Target gauge | 12 stitches and 8 rows per 4 in (10 cm) |
The dimensions are design targets. Since the border and seams can increase or reduce the final measurements, measure the panels before assembly and check that the cover will fit your insert without excessive stretching.
How the envelope closure works
Each back panel spans the full width of the cushion. One panel covers the upper part of the back, and the other covers the lower part. Their inner edges overlap by approximately 5 inches (12.7 cm), creating an opening through which the cushion insert can be removed.
The overlap is important: too little may allow the insert to show or push through, while too much can make insertion difficult. The finished overlap should be checked with the actual cushion insert.
6. Gauge and swatching
Gauge matters because the cover needs to fit the cushion insert without stretching the seams or leaving excess fabric.
The target gauge for this pattern is:
- 12 stitches across 4 inches (10 cm).
- 8 rows across 4 inches (10 cm).
These are planning targets for the alternating single-crochet and double-crochet texture, not physically verified measurements.
Making a gauge swatch
- Chain 25.
- Work the alternating stitch pattern across the row, beginning in the second chain from the hook. This gives 24 stitches.
- Ch 1 and turn.
- Alternate the stitch type in each stitch on the following row.
- Continue until the swatch is large enough to measure.
- Fasten off and, if appropriate for your yarn, wash and dry the swatch according to the care label.
- Measure a central 4-inch (10 cm) section and count the stitches and rows.
If you have more than 12 stitches across 4 inches, your stitches are smaller than the target; try a larger hook. If you have fewer than 12, try a smaller hook.
Recalculating the foundation chain
At 12 stitches per 4 inches, the target is 3 stitches per inch. A 16-inch panel therefore requires approximately 48 stitches.
The foundation chain is one chain longer than the desired first-row stitch count because the first stitch is worked into the second chain from the hook.
If your measured gauge differs, calculate a new stitch count using your actual stitches per inch. Round to an even number so the alternating single-crochet and double-crochet pattern can be repeated evenly.
7. Complete construction overview
Follow this sequence for the main design:
- Make a gauge swatch and adjust your hook if needed.
- Crochet the textured front panel.
- Crochet two plain-texture back panels.
- Measure all three panels and check their dimensions.
- Add a single-crochet border to the panel edges.
- Position the back panels behind the front panel with the right sides facing outward and the overlap centered.
- Join the layers around all four outer edges.
- Insert the cushion through the envelope opening.
- Check the corners, seams, overlap, and finished dimensions.
The front panel uses the decorative stitch pattern, while the back panels use the same stitch sequence for a consistent fabric thickness. The difference is the number of rows: each back piece is shorter to create the envelope overlap.
8. Complete step-by-step crochet pillow pattern
A. Textured front panel
The front is worked flat in rows using alternating single crochet and double crochet stitches.
For the main design, the stitch count is 48, and the target height is 32 rows.
Foundation
- Make a slip knot.
- Ch 49.
Row 1
- Sc in the second ch from the hook.
- Dc in the next ch.
- Repeat
sc in the next ch, dc in the next chacross the row. - You should have 48 stitches, ending with a dc.
Row 2
- Ch 1 and turn. The turning chain does not count as a stitch.
- Sc in the first stitch.
- Dc in the next stitch.
- Repeat
sc in the next st, dc in the next stacross. - You should have 48 stitches.
Rows 3–32
Repeat Row 2, maintaining 48 stitches in each row.
This repetition keeps the stitch sequence the same in every row. If you want the stitches to alternate vertically as well as horizontally, use the opposite stitch type at the beginning of every second row instead: Row 1 begins with sc, Row 2 begins with dc, and continue alternating. For this tutorial’s main pattern, use that alternating-row approach to create the intended textured fabric.
To follow the main alternating-row version precisely:
- Odd-numbered rows (1, 3, 5, and so on): Begin with sc, then dc, repeating across 48 stitches.
- Even-numbered rows (2, 4, 6, and so on): Begin with dc, then sc, repeating across 48 stitches.
For every row, ch 1 and turn before starting. The turning chain does not count as a stitch.
After Row 32, fasten off and weave in the yarn ends. The target panel size is approximately 16 × 16 inches (40.6 × 40.6 cm), before the border.
B. Back panels
Make two matching back panels. Each panel is the full width of the cover but approximately 10.5 inches tall.
For each panel:
- Ch 49.
- Row 1: Sc in the second ch from the hook, dc in the next ch, and repeat the alternating sequence across. You should have 48 stitches.
- Ch 1 and turn.
- Row 2: Begin with dc, then sc, alternating across the row.
- Row 3: Begin with sc, then dc, alternating across the row.
- Continue alternating the starting stitch type on every row until you have completed approximately 21 rows.
- Fasten off and weave in the ends.
Each back panel should measure approximately 16 × 10.5 inches (40.6 × 26.7 cm) before edging.
The two pieces overlap by approximately 5 inches when assembled. Their combined height is 21 inches; subtracting the 5-inch overlap gives the intended 16-inch cover height.
C. Decorative stitch pattern
The front and back use an alternating single-crochet and double-crochet sequence.
The pattern repeat is two stitches:
- One single crochet.
- One double crochet.
On the next row, reverse the order so the first stitch is a double crochet and the second is a single crochet. This places the shorter and taller stitches in alternating positions across successive rows.
Keep the same stitch count in every row. If the stitch pattern begins to shift, check whether you have accidentally worked into the turning chain or missed the first or last stitch.
D. Color changes
The main pattern uses one color throughout. If you want a contrasting border, complete the panels in the main color and join the second color only for the border.
To change colors neatly:
- Finish the last stitch of the panel.
- Cut the yarn, leaving a tail long enough to weave in.
- Pull the tail through the loop and tighten gently.
- Join the contrasting color at a corner.
- Work the border as described below.
- Weave in all ends securely.
You can also use a different color for each back panel, but the yarn thickness and stitch gauge should remain compatible.
E. Single-crochet border
Add one round of single crochet around each panel before assembly. This helps stabilize the edges and gives the seams a more finished appearance.
Border Round 1
- Join yarn at a corner.
- Ch 1; this chain does not count as a stitch.
- Work 3 sc into the corner stitch or corner space.
- Along the horizontal edges, work 1 sc into each stitch.
- Along the vertical row ends, distribute the stitches evenly. With the target gauge of 8 rows per 4 inches, aim for approximately 1.5 sc per row end on average; alternate between 1 and 2 sc along successive row ends as needed to keep the edge flat.
- At each corner, work 3 sc into the corner stitch or corner space.
- Continue around the panel and sl st into the first sc to join.
- Fasten off and weave in the ends.
The exact border count depends on the actual row gauge and panel dimensions. The key is to distribute the stitches evenly without stretching the edge or adding so many stitches that it waves.
F. Envelope closure and assembly
Once all three panels have been bordered, arrange them to form the removable cover.
- Lay the textured front panel with its right side facing outward.
- Place the first back panel behind it, with the right side facing outward and its outer edges aligned with the front.
- Place the second back panel behind the front, also with its right side facing outward.
- Arrange the two back panels so their inner edges overlap by approximately 5 inches (12.7 cm).
- Align the outer edges of all layers.
- Use stitch markers to hold the corners and edges in place.
- Join the panels around the full outer perimeter using a whip stitch or single-crochet seam.
- At the corners, work carefully through the corresponding edge stitches so the cover remains square.
- Secure the seam and weave in the yarn ends.
The inner edges of the back panels remain unjoined. This is the opening for inserting and removing the cushion.
For a whip-stitch seam, use a tapestry needle and matching yarn, picking up corresponding edge loops on each layer. For a single-crochet seam, insert the hook through the matching edge stitches of the layers and work sc evenly around. Keep the seam tension consistent.
G. Inserting the cushion and shaping the cover
After joining the outer edges, check that the envelope opening is wide enough for the cushion insert.
- Hold the cover with the envelope opening facing you.
- Insert one corner of the cushion through the opening.
- Gently guide the remaining corners into the cover.
- Adjust the cushion so each corner reaches the corresponding cover corner.
- Smooth the front panel and distribute the cushion filling evenly.
- Check that the overlap stays closed and that the seams are not under excessive tension.
If the cushion is difficult to insert, do not force it through the opening. Recheck the overlap and the cover dimensions. If the cover is too tight, a larger opening or a slightly larger cover may be needed.
9. Stitch counts and mathematical validation
The main design uses an even number of stitches so the two-stitch repeat can be completed without interruption.
| Piece | Foundation chain | Stitches per row | Approximate rows |
|---|---|---|---|
| Front panel | 49 | 48 | 32 |
| Upper back panel | 49 | 48 | 21 |
| Lower back panel | 49 | 48 | 21 |
The first row has one fewer stitch than the foundation-chain count because the first stitch is worked into the second chain from the hook.
At the target gauge of 3 stitches per inch and 2 rows per inch:
- 48 stitches produce a panel approximately 16 inches wide.
- 32 rows produce a panel approximately 16 inches tall.
- 21 rows produce a back panel approximately 10.5 inches tall.
The two back panels together measure approximately 21 inches in height. An overlap of 5 inches gives a combined coverage of approximately 16 inches.
These calculations assume the stated gauge and do not include all effects of edging and joining. Measure the actual panels after crocheting and before assembly. The stitch counts are mathematically consistent with the specified repeat, but the pattern has not been established as physically tested.
10. Panel joining and pillow assembly
Use the same joining method around the entire outer edge. A whip stitch is a practical option because it allows you to align the panels and control seam tension.
Preparing the panels
- Fasten off and weave in the yarn ends.
- Measure each panel and check that its width is consistent.
- Confirm that the back panels overlap by the planned amount.
- Place the front panel with the right side facing outward.
- Position the two back panels behind it, with their right sides also facing outward.
Joining the edges
- Align the top edge of the cover.
- Start at one corner and sew or crochet through the corresponding edge stitches of the front and back layers.
- Keep the joining stitches evenly spaced.
- At each corner, make sure the edges meet cleanly before turning.
- Continue around all four sides.
- Secure the final seam and weave in the tail.
If you use a single-crochet seam, insert the hook through the corresponding edge stitches of the layers and work one sc at a time. Keep the tension relaxed so the seam does not pull the cover inward.
The inner edges of the two back panels should remain open. Do not accidentally join the overlapping edges to each other or to the front panel; doing so would prevent the cushion insert from being removed.
11. Cushion insert, stuffing, and shaping
Choose a cushion insert that matches the intended finished cover size. A 16 × 16-inch insert is the target for this design, but the actual fit depends on how the cover behaves after edging and joining.
Checking the insert fit
- The insert should fill the corners without excessive pressure.
- The front panel should lie reasonably flat.
- The seams should not stretch visibly.
- The envelope overlap should remain closed when the cushion is in place.
- The cushion should not create large gaps or bulging along the back opening.
If the insert is too bulky, try a less overfilled insert of the same dimensions. If it is too small, the cover may look loose, and the corners may not fill fully.
Shaping the pillow
After inserting the cushion, guide each corner into place and smooth the fabric from the center toward the edges. Distribute the filling evenly, and make sure the envelope opening lies flat.
Avoid pulling the crochet fabric aggressively to shape the corners. Excessive stretching can change the panel dimensions and put strain on the seams.
12. Finishing and final inspection
Before using the pillow, inspect the entire cover.
- Check that the seams are secure and evenly tensioned.
- Make sure all four corners are neatly aligned.
- Confirm that the envelope opening overlaps properly.
- Weave in all yarn ends.
- Check that the border lies flat.
- Insert the cushion and verify that it fits without overstretching the fabric.
- Measure the finished cover and note any difference from the target size.
Blocking may help panels lie flatter, but it is optional and depends on the yarn. Follow the manufacturer’s care instructions and avoid excessive heat or stretching.
Care guidance
If the cover is removable, remove it from the cushion before washing. Follow the yarn manufacturer’s instructions for the cover, and check the care label on the cushion insert separately.
Dry the cover flat when recommended, reshape the corners gently, and allow it to dry completely before replacing the insert. Store the cover clean and dry, and inspect the seams periodically for loose ends.
13. Common mistakes and troubleshooting
| Problem | Likely cause | Solution | Prevention |
|---|---|---|---|
| Front and back panels are different sizes | Gauge or row counts differ | Recheck the stitch count and dimensions; correct the smaller or larger panel | Measure each piece before assembly |
| Incorrect stitch counts | First or last stitch was missed or duplicated | Undo the incorrect section and recount | Count after each row |
| Panel curls or waves | Tension is uneven or the border is improperly spaced | Check the stitch pattern and adjust the border distribution | Keep a consistent hook and tension |
| Border ruffles | Too many stitches were worked along the row ends | Undo the affected section and reduce the stitch distribution | Check that each edge lies flat |
| Border pulls inward | Too few stitches or tight tension | Redo the edge with more evenly spaced stitches | Avoid pulling the yarn tight |
| Cover is too tight | Panel dimensions are smaller than the insert | Recheck gauge and panel size; make a larger cover if necessary | Swatch before starting |
| Cover is too loose | Panel dimensions are too large | Adjust the stitch count or choose a slightly smaller insert if appropriate | Measure before assembly |
| Seams look bulky | Joining stitches are too tight or catch too many strands | Undo the seam and work through corresponding edge loops | Keep joining tension consistent |
| Corners do not align | Edges were joined without matching the corners | Undo the corner section and align the edge stitches | Use stitch markers at corners |
| Zipper distorts the fabric | A zipper was added without stabilizing the edge | For a zipper variation, stabilize the edge and sew gradually | Test the zipper on a swatch first |
| Buttonholes stretch | Buttonholes are too large or edges are weak | Reinforce the opening or choose a different closure | Test button size and spacing before assembly |
| Yarn ends come loose | Tails were too short or not woven in securely | Reweave the tail through several stitches in different directions | Leave enough length for finishing |
| Cushion looks uneven | Insert is not distributed evenly | Adjust the corners and smooth the filling | Insert the cushion carefully |
| Texture does not align across rows | The starting stitch sequence was not alternated correctly | Check whether the row should begin with sc or dc | Follow the odd-row/even-row instructions |
14. Customization and design variations
Changing pillow dimensions
To make a wider cover, calculate the stitch count from your desired width and actual gauge. To make a taller cover, increase the number of rows.
For example, at 3 stitches per inch, a 18-inch-wide panel requires approximately 54 stitches. Since the texture uses a two-stitch repeat, 54 stitches can be used without breaking the pattern.
For a different height, use the row gauge. At 2 rows per inch, a 18-inch panel requires approximately 36 rows.
These calculations apply to the main fabric before edging. Measure the finished panels after the border to check that they suit your insert.
Changing yarn weight
A thicker yarn will usually produce a bulkier fabric and may increase the cover dimensions. A thinner yarn may produce a more flexible or open fabric. Make a new swatch and recalculate the stitch count and row count whenever you change yarn weight or hook size.
Changing the texture
The alternating sc/dc pattern can be replaced with a simple single-crochet fabric, a half-double-crochet fabric, or a more advanced textured stitch. Each substitution may change the gauge and thickness, so recalculate the panels rather than using the original stitch counts automatically.
Changing colors
You can use a single color for a minimalist look, a contrasting border, or separate colors for the front and back panels. If using different yarns, make sure they have compatible thickness and care requirements.
Adding buttons or a zipper
The envelope opening is the primary closure for this tutorial. If you prefer buttons, add reinforced buttonholes to one back panel and sew buttons to the overlapping panel. If you prefer a zipper, stabilize the opening edge and sew the zipper in carefully so the crochet fabric does not stretch.
These changes require a separate closure plan and may alter the back-panel dimensions. Test the closure before completing the assembly.
15. Care and maintenance
Follow the yarn manufacturer’s care instructions for washing and drying.
- Remove the cover from the insert before washing.
- Wash using the recommended method and temperature.
- Avoid twisting or wringing the crochet fabric.
- Dry flat when recommended, reshaping the corners gently.
- Allow the cover to dry fully before inserting the cushion again.
- Store the cover clean and dry.
- Check the seams and envelope opening periodically, and repair loose ends before they unravel.
The cushion insert may have different care requirements from the cover. Follow its label separately, and do not assume that the insert can be washed in the same way as the crochet fabric.
16. Beginner and advanced tips
Beginner tips
- Count every row. Keep a simple tally so the front and back pieces match the planned dimensions.
- Watch the first and last stitch. These are the most common places to lose or add stitches.
- Measure early. Check the front panel before making both back pieces.
- Keep the repeat consistent. Odd rows begin with sc, and even rows begin with dc.
- Use stitch markers. Mark the corners and hold the overlapping back panels in place during assembly.
- Check the insert before closing. Make sure the opening is practical and the cover does not stretch excessively.
Advanced tips
- Refine the texture. Experiment with stitch patterns only after checking their gauge and thickness.
- Improve the closure. A zipper or button closure can be added, but it requires careful edge stabilization.
- Create a contrast border. Use a compatible yarn in a complementary color to frame the cover.
- Adjust the fit precisely. Calculate the panel size from the actual swatch and the cushion insert rather than relying on nominal dimensions.
- Align seams carefully. Match corresponding edge stitches and distribute the border stitches evenly for a professional finish.
17. Final project checklist
- Correct yarn, hook, and cushion insert selected.
- Gauge swatch measured.
- Front panel completed and measured.
- Both back panels completed and measured.
- Stitch counts checked across all rows.
- Border completed on each panel.
- Envelope overlap measured and centered.
- Outer seams secure and evenly tensioned.
- All corners aligned.
- Cushion insert fits without overstretching the cover.
- Yarn ends woven in securely.
- Finished dimensions checked.
- Care instructions confirmed for both cover and insert.
18. Frequently asked questions
1. Is this crochet pillow suitable for beginners?
Yes. The pattern uses basic single crochet and double crochet stitches, worked in rows. The main challenge is keeping the panel dimensions consistent and joining the back pieces with an even overlap.
2. What yarn is best for a decorative pillow?
Medium-weight acrylic, cotton blends, and suitable washable wool blends can work well. Choose yarn that creates a sturdy fabric and check its care requirements before making the cover.
3. How much yarn is needed?
The estimate is approximately 350–500 g for this design. Actual consumption depends on the yarn length per skein, hook size, tension, and border. A gauge swatch will help refine the estimate.
4. Can I use a different cushion insert size?
Yes. Recalculate the panel width and height from the insert size and your measured gauge. Adjust the back-panel dimensions and overlap accordingly.
5. How do I prevent the cover from stretching?
Choose yarn with suitable structure, use consistent tension, and avoid forcing an oversized insert into the cover. Support the fabric when wet and follow the yarn’s care instructions.
6. Which joining method is best?
A whip stitch is simple and flexible, while a single-crochet seam creates a more visible ridge. Either can work if the edge stitches are aligned and the seam tension is consistent.
7. Should the cover be removable?
A removable cover is practical when you want to clean it separately from the cushion insert. This design uses an envelope closure so the cushion can be removed without a zipper or buttons.
8. Can I add a zipper or buttons?
Yes, but the closure needs to be planned into the back construction. Stabilize the edge and test the closure before assembly to prevent stretching or distortion.
9. How do I make the pillow larger or smaller?
Calculate the stitch count from the desired width and the actual stitches-per-inch gauge. Calculate the row count from the desired height and rows-per-inch gauge. Recalculate the back-panel overlap for the new dimensions.
10. How should I wash the finished cover?
Remove the cover from the insert and follow the yarn manufacturer’s washing instructions. Dry it flat when recommended, reshape the corners, and make sure it is completely dry before replacing the cushion.

Leave a Comment