
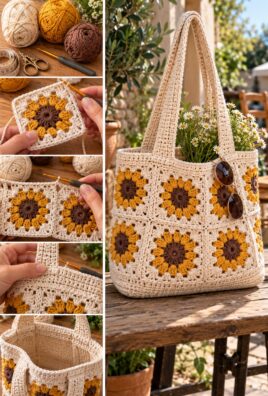
Make a practical, stylish crochet tote bag with a rectangular base, textured sides, a neat top edge, and two matching handles. This tutorial explains the complete construction process, from the foundation chain to the final finishing details, using US crochet terminology and written instructions.
The design uses dense single crochet stitches to create a relatively firm fabric suitable for everyday personal items, such as a notebook, a small water bottle, or lightweight shopping essentials. Reinforced handle attachments and an optional fabric lining can help improve the bag’s structure.
This pattern is intended for beginners who understand basic crochet stitches and for experienced crocheters who want a straightforward project with opportunities for customization.
1. Project Overview
| Feature | Design specification |
|---|---|
| Skill level | Advanced beginner |
| Finished width | Approximately 12 inches (30.5 cm) |
| Body height | Approximately 13 inches (33 cm), excluding handles |
| Base depth | Approximately 3 inches (7.5 cm) |
| Handle length | Approximately 20 inches (51 cm) per handle |
| Handle width | Approximately 1.25 inches (3.2 cm) |
| Yarn | Medium-weight category 4 cotton or sturdy blend |
| Recommended hook | 4.5 mm, adjusted to gauge |
| Main stitch | Single crochet |
| Construction | Rectangular base worked in rows, followed by sides worked around the perimeter |
| Estimated yarn | Approximately 600–800 g, depending on gauge and handles |
| Estimated completion time | Approximately 12–22 hours |
| Handle style | Two separately crocheted flat straps |
| Optional additions | Fabric lining, reinforced base, closure, contrasting border |
The dimensions, yarn quantity, and completion time are estimates, not physically verified measurements. The actual finished size depends on yarn thickness, hook size, tension, and finishing.
The bag is designed for lightweight everyday items. Its weight capacity has not been tested, so do not assume that the crochet fabric or handles are suitable for heavy loads.
2. Materials and Tools
Essential supplies
- Main yarn: Approximately 600–800 g of medium-weight cotton or a sturdy cotton blend.
- Crochet hook: A 4.5 mm hook as a starting point.
- Scissors: For cutting yarn.
- Tapestry needle: For joining the handles and weaving in yarn ends.
- Measuring tape: To check the base, body, and handles.
- Stitch markers: To identify the four corners of the base and the beginning of each round.
Optional supplies
- Contrast yarn: A small amount for stripes or a decorative border.
- Fabric lining: Woven cotton or another suitable lining fabric.
- Sewing needle and thread: To attach the lining.
- Interfacing: Optional reinforcement for the lining or base, chosen to suit the fabric.
- Closure: A button, zipper, or magnetic snap, if desired.
- Base insert: A suitable flexible or semi-rigid insert that can be covered and secured safely.
Choosing suitable yarn
Cotton yarn is a practical choice for a tote bag because it often provides good stitch definition and less elastic stretch than many wool-based yarns. However, cotton can still stretch under sustained weight, and the finished fabric’s behavior depends on the yarn construction and crochet tension.
Sturdy blends may offer a different balance of flexibility, weight, and care requirements. Select yarn that produces a dense fabric and is comfortable to work with.
Avoid choosing yarn solely by its label weight. Two yarns in the same category can produce different dimensions and fabric density.
Yarn quantity estimate
The estimate of 600–800 g is a planning range for the selected bag size, including the base, body, and two handles. It has not been established through a completed physical sample.
To estimate skeins, divide the required weight by the weight of one skein. For example, if each skein contains 100 g, the planning allowance corresponds to approximately 6–8 skeins. Check the meterage per skein as well, since yarns of the same weight may have different lengths.
3. Crochet Terminology and Abbreviations
This pattern uses US crochet terminology.
| Abbreviation | Meaning | Explanation |
|---|---|---|
| ch | Chain | A foundation stitch |
| sc | Single crochet | A short, compact crochet stitch |
| sl st | Slip stitch | A joining or finishing stitch |
| st | Stitch | One crochet stitch |
| sts | Stitches | More than one stitch |
| sk | Skip | Leave a stitch unworked |
| rep | Repeat | Work the specified sequence again |
| inc | Increase | Work two single crochets into one stitch |
| BLO | Back loop only | Work under the back loop of a stitch |
| FO | Fasten off | Cut and secure the yarn |
| RS | Right side | The intended outside of the bag |
| WS | Wrong side | The inside of the bag |
The main body is worked in joined rounds after the rectangular base is completed. Each round is joined with a slip stitch, followed by a chain 1 that does not count as a stitch.
4. Beginner-Friendly Crochet Techniques
Making a foundation chain
- Make a slip knot and place it on the hook.
- Yarn over and pull through the loop on the hook.
- Repeat until you have the required number of chains.
- Count the V-shaped chain links carefully.
- Keep the chain relaxed so the base does not pull inward.
Single crochet
- Insert the hook into the indicated stitch.
- Yarn over and pull up a loop.
- Yarn over again.
- Pull through both loops on the hook.
One completed single crochet creates one stitch.
Working into both sides of a rectangular base
The base in this pattern is worked in rows. After completing the rectangle, crochet around all four edges to create the sides.
You will work into ordinary stitch tops along the two short edges and into row ends along the two long edges. The corner stitches help the fabric turn from one edge to the next.
Increasing at corners
Work three single crochets into the designated corner stitch or corner space when instructed. This provides room for the fabric to turn without pulling tightly.
Too many stitches can make the base wavy; too few can make it curl.
Working in joined rounds
- Complete the stitches around the current round.
- Insert the hook into the first single crochet.
- Make a slip stitch to join.
- Chain 1.
- Begin the next round in the first actual stitch, not in the chain.
The chain 1 does not count as a stitch in this pattern.
Working into the back loop only
Each crochet stitch has two loops at the top. The back loop is the loop farther from you when the stitch is viewed from above.
Insert the hook beneath the back loop only and work the specified stitch. This can create a defined ridge at the base-to-body transition.
Maintaining straight edges
When working flat:
- Count every row.
- Identify the first and last stitches.
- Avoid working into the turning chain unless instructed.
- Measure the base periodically.
- Use stitch markers to identify the corners.
Fastening off and weaving in ends
Cut the yarn, leaving a tail long enough for the required seam or finishing. Pull the tail through the final loop and secure it.
Thread the tail onto a tapestry needle and weave it through several stitches, changing direction before trimming. For handles and other high-stress areas, do not rely on a short woven tail alone; secure the seam with additional stitches.
Reinforcing handle attachments
The handle ends experience repeated pulling. Position them symmetrically, sew through several rows of the bag fabric, and use multiple passes of yarn or a suitable sewing thread. An optional lining can provide additional support, but it does not guarantee a particular weight capacity.
5. Design Specifications and Gauge
The tote bag is designed with a rectangular base, straight sides, and two flat crochet handles. The main fabric uses single crochet throughout, creating a dense surface with relatively little space between stitches.
| Component | Approximate design target |
|---|---|
| Bag width | 12 inches (30.5 cm) |
| Body height | 13 inches (33 cm) |
| Base depth | 3 inches (7.5 cm) |
| Handle length | 20 inches (51 cm) before attachment |
| Handle width | About 1.25 inches (3.2 cm) |
| Main body stitch count | 132 stitches around the base perimeter |
| Target stitch gauge | About 4 sc per inch |
| Target row gauge | About 4 rows per inch |
| Base dimensions | Approximately 12 × 3 inches |
| Main body rounds | Approximately 52, depending on row height |
These are design targets, not verified measurements. The base perimeter determines the initial body stitch count, while the actual height depends on the row gauge.
Making a gauge swatch
- Chain 21.
- Work sc in the second chain from the hook and in every remaining chain. You should have 20 stitches.
- Chain 1, turn, and work 20 sc.
- Repeat until the swatch measures approximately 5 inches tall.
- Measure the central 4-inch section without stretching the fabric.
- Count the stitches across and the rows vertically.
The target is approximately 16 sc across 4 inches and 16 rows across 4 inches. Treat this as a starting estimate.
If you have more than 16 stitches across 4 inches, try a larger hook. If you have fewer, try a smaller hook. Check the fabric’s firmness as well as its measurements: a very loose fabric may stretch more under load, while an excessively stiff fabric can make the bag heavy and difficult to shape.
6. Complete Construction Overview
The bag is constructed in four main stages.
- Rectangular base: Crochet a flat rectangle in rows.
- Bag body: Work around the entire perimeter of the base, then continue upward in joined rounds.
- Handles: Crochet two identical flat straps and sew them to opposite sides of the opening.
- Finishing: Reinforce the handle attachments, weave in yarn ends, and optionally add a lining or closure.
This construction method avoids a complicated separate gusset. The rectangular base creates the bottom, while the rounds worked around its perimeter form the front, back, and sides.
The base and first body round must be counted carefully because all later body rounds use the same stitch count.
7. Complete Step-by-Step Crochet Tote Bag Pattern
A. Rectangular Base
Use the main yarn and recommended hook.
Foundation chain: Ch 49.
This creates 48 single-crochet stitches across the first row because the first sc is worked in the second chain from the hook.
| Row | Instructions | Stitch count |
|---|---|---|
| 1 | Sc in the second ch from the hook and in every remaining ch | 48 |
| 2 | Ch 1, turn; sc in each st across | 48 |
| 3 | Ch 1, turn; sc in each st across | 48 |
| 4 | Ch 1, turn; sc in each st across | 48 |
| 5 | Ch 1, turn; sc in each st across | 48 |
| 6 | Ch 1, turn; sc in each st across | 48 |
| 7 | Ch 1, turn; sc in each st across | 48 |
| 8 | Ch 1, turn; sc in each st across | 48 |
| 9 | Ch 1, turn; sc in each st across | 48 |
| 10 | Ch 1, turn; sc in each st across | 48 |
| 11 | Ch 1, turn; sc in each st across | 48 |
| 12 | Ch 1, turn; sc in each st across | 48 |
The base contains 12 rows of 48 stitches. At the target gauge, it should measure approximately 12 inches long and 3 inches wide.
Measure the rectangle before beginning the body. If the width is significantly different from the target, adjust the hook or the number of foundation chains before continuing. If the depth is too small or large, adjust the number of rows.
B. Transition Round: Working Around the Base
The first body round is worked around all four edges of the rectangular base. This creates the perimeter for the bag’s sides.
The base has two long edges containing 48 stitches each and two short edges containing 12 row ends each.
To create a consistent perimeter, use the following edge distribution:
- Start at one corner of the rectangle.
- Work 1 sc into each of the 48 stitches along the first long edge.
- At the corner, work 3 sc into the corner space beyond the last edge stitch.
- Work 1 sc into each of the 12 row ends along the short edge.
- At the next corner, work 3 sc into the corner space.
- Work 1 sc into each of the 48 stitches along the opposite long edge.
- At the third corner, work 3 sc into the corner space.
- Work 1 sc into each of the 12 row ends along the remaining short edge.
- At the final corner, work 3 sc into the corner space.
- Join with a sl st to the first sc.
Expected total:
- Long edges: 48 + 48 = 96 stitches.
- Short edges: 12 + 12 = 24 stitches.
- Four corners: 3 × 4 = 12 stitches.
Total: 132 stitches.
The corner spaces are separate turning spaces and are not included in the 48-stitch or 12-row-end counts. This convention produces a 132-stitch perimeter.
Lay the base flat and check that the corners are not pulling inward or forming waves. If the corners look distorted, check that the three stitches are placed in the corner spaces rather than into neighboring stitches.
C. Main Bag Body
The bag body is worked in joined rounds of single crochet. The 132-stitch perimeter remains unchanged throughout the body.
Round 1: This is the transition round described above. It establishes the 132-stitch perimeter.
Round 2: Ch 1, then sc in each of the 132 stitches around. Join with sl st to the first sc. Total: 132 stitches.
Round 3: Ch 1, sc in each stitch around, and join. Total: 132 stitches.
Round 4: Ch 1, sc in each stitch around, and join. Total: 132 stitches.
Round 5: Ch 1, sc in each stitch around, and join. Total: 132 stitches.
Continue using the same sequence for every subsequent round:
- Ch 1.
- Work 1 sc into each stitch around.
- Join with a sl st to the first sc.
- Count 132 stitches before beginning the next round.
The chain 1 does not count as a stitch.
D. Main Body Round Schedule
Use the following schedule to track progress. Every round has 132 stitches.
| Round range | Instructions | Total per round |
|---|---|---|
| 1 | Work around the base, including corner stitches | 132 |
| 2–10 | Ch 1, sc in each st around, join | 132 |
| 11–20 | Ch 1, sc in each st around, join | 132 |
| 21–30 | Ch 1, sc in each st around, join | 132 |
| 31–40 | Ch 1, sc in each st around, join | 132 |
| 41–50 | Ch 1, sc in each st around, join | 132 |
| 51–52 | Ch 1, sc in each st around, join | 132 |
This schedule gives a clear round count for planning, but the final height must be checked by measuring the actual fabric. At approximately 4 rows per inch, 52 body rounds would be about 13 inches tall if the transition round is included in the measurement. Your actual height may vary.
Measurement checkpoints: Measure after Rounds 10, 20, 30, 40, and 50. Keep the bag upright without stretching it. Stop when the body reaches approximately 13 inches above the base, provided the top edge is level and the round count is consistent.
If your row gauge differs substantially from the target, use the measured height to determine how many additional rounds are needed. Keep the stitch count at 132.
E. Finishing the Top Edge
Once the body reaches the desired height:
- Complete the final round.
- Join with a slip stitch.
- Check that the top edge is level.
- Count the stitches and confirm that the round contains 132.
- Fasten off, leaving a tail long enough to secure.
- Weave in the yarn end on the inside of the bag.
The top edge should remain firm enough to hold its shape but not so tight that the opening narrows.
For extra reinforcement, work one additional round of single crochet through both loops before fastening off. This is optional and will add a small amount of height.
8. Complete Handle Pattern
The bag uses two separately crocheted flat straps. Each handle is approximately 20 inches long and 1.25 inches wide before attachment.
These measurements are design targets. Crochet straps may stretch during use, particularly if the yarn is flexible or the bag is loaded heavily.
A. Make the First Handle
Use the same yarn as the bag body.
- Ch 6.
- Row 1: Sc in the second ch from the hook and in each remaining ch. Total: 5 sc.
- Ch 1 and turn.
- Row 2: Sc in each of the 5 stitches. Total: 5 sc.
- Repeat Row 2 through Row 80, maintaining 5 sc in every row.
- Fasten off, leaving a long sewing tail.
At a target row gauge of 4 rows per inch, 80 rows produce approximately 20 inches of handle length.
The handle width should be approximately 1.25 inches at a stitch gauge of 4 sc per inch. Measure the strap before attaching it. If it is too short or long, adjust the row count rather than stretching it to fit.
B. Make the Second Handle
Repeat the first handle’s instructions exactly:
- Foundation: 6 chains.
- Row 1: 5 sc.
- Rows 2–80: 5 sc in every row.
- Final width: approximately 1.25 inches.
- Target length: approximately 20 inches.
Measure both handles side by side before sewing them onto the bag. Their lengths and widths should match.
C. Attach the Handles
The handles are attached to the two opposite long sides of the bag opening.
- Lay the bag flat and identify the center of the first 48-stitch long edge of the top round.
- Mark the five stitches centered around that midpoint.
- Place one end of the handle against the outside of the bag, with the strap extending upward.
- Position the end so it covers the marked five-stitch area.
- Use the long sewing tail to stitch through the handle and the bag fabric.
- Sew around the handle end, then make additional passes through the attachment area.
- Extend some of the reinforcing stitches through the next few rounds of the bag body where accessible.
- Secure the yarn on the inside.
- Attach the other end of the same handle to the corresponding five-stitch area on the opposite side.
- Repeat for the second handle.
For the second long edge, identify the center of that edge rather than counting from the first handle’s attachment point. The two handles should be aligned across the bag.
Use multiple small stitches to distribute tension. A fabric lining can cover the inside of the attachment area and provide additional support, but it does not replace secure sewing.
9. Stitch Count and Construction Validation
The base and body use the following mathematical structure.
| Component | Calculation | Total |
|---|---|---|
| Foundation chain | 48 stitches plus 1 turning chain | 49 chains |
| Base rows | 12 rows × 48 stitches | 48 stitches per row |
| First long edge | 48 stitches | 48 |
| Opposite long edge | 48 stitches | 48 |
| Two short edges | 12 row ends × 2 | 24 |
| Four corner spaces | 3 sc × 4 | 12 |
| Body perimeter | 48 + 48 + 24 + 12 | 132 stitches |
| Each handle | 5 sc across every row | 5 stitches per row |
| Handle length target | 80 rows at 4 rows per inch | About 20 inches |
Every body round after the transition round contains 132 single crochets. The handles each contain five stitches across and are worked for the same number of rows.
The final dimensions remain dependent on gauge. The pattern’s arithmetic has been checked, but the bag has not been physically tested. The base transition, actual height, and handle fit should be checked as you crochet.
10. Decorative Variations
The basic tote bag uses one color and a simple single-crochet texture. You can personalize it without changing the main construction.
Striped tote bag
Change colors at the start of a selected body round. For example, work ten rounds in the main color, ten rounds in a contrasting color, and repeat.
Keep every round at 132 stitches. Secure color-change tails on the inside of the bag.
Contrasting handles
Make both handles in a different color from the body. Use the same hook, stitch count, and row count for both straps so they remain consistent.
Decorative top border
Work an additional round of single crochet in a contrasting color. Keep the stitch count consistent and check that the opening remains flat.
Small crochet pocket
A small rectangular pocket can be worked separately using single crochet rows.
- Chain a number appropriate for the desired pocket width.
- Work sc rows until the pocket reaches the intended height.
- Fasten off and leave a sewing tail.
- Center the pocket on the front of the bag.
- Sew the two sides and bottom edge securely, leaving the top open.
The pocket dimensions depend on your gauge and intended use. Keep the pocket small enough not to distort the bag body.
11. Handle Reinforcement and Structural Stability
Crochet fabric can stretch under repeated tension. Several construction choices can help reduce unnecessary stretching.
Dense stitches
Single crochet creates a compact fabric compared with many taller, open stitch patterns. The dense fabric is a useful starting point for an everyday tote, but it does not make the bag immune to stretching.
Reinforced handle attachments
Sew each handle end securely through multiple stitches of the bag body. Use several passes rather than relying on one seam around the edge of the strap.
Reinforced upper edge
An extra single-crochet round can make the top edge feel firmer. Avoid adding so many stitches that the opening becomes tight or distorted.
Optional base reinforcement
A suitably sized base insert can help the bottom maintain its shape. It should be compatible with the yarn and lining, securely contained, and removable if required for cleaning.
Optional lining
A fabric lining can help the bag retain its shape, cover the interior seams, and reduce stretching. Its effectiveness depends on the fabric, stitching, and attachment method.
None of these methods establishes a verified load capacity. Test the finished bag cautiously with lightweight items before regular use, and inspect the handles and seams periodically.
12. Optional Fabric Lining and Closure
A lining is not required to complete the crochet tote bag. If you choose to add one, measure the finished bag rather than relying solely on the planned dimensions.
Measuring and preparing the lining
- Measure the width and height of the inside of the bag.
- Measure the depth of the base.
- Add suitable seam allowances to the fabric measurements.
- Cut the lining fabric according to the measured bag dimensions.
- Sew the fabric pieces together to form a bag-shaped lining.
- Press the seams as appropriate for the fabric.
- Place the lining inside the crochet bag and check that it fits without pulling the sides inward.
- Fold the top edge of the lining inward and align it with the crochet opening.
- Sew the lining to the inside of the top edge with small, even stitches.
Avoid making the lining significantly smaller than the crochet bag, because this can pull the opening inward. An oversized lining can bunch inside the bag.
Optional closure
A zipper, button, or magnetic snap may be added if appropriate.
- A zipper requires a lining or a carefully prepared attachment edge.
- A button requires a corresponding loop or buttonhole.
- A magnetic snap should be installed according to its manufacturer’s instructions, with the attachment area reinforced appropriately.
Keep the closure optional so the main crochet pattern remains complete without additional sewing materials.
13. Finishing and Final Inspection
After attaching both handles, complete the following finishing steps.
- Weave in all remaining yarn ends securely.
- Check that the base corners are well formed.
- Inspect the transition between the base and body for gaps.
- Compare the two handles and adjust their alignment if necessary.
- Check every handle attachment for loose stitches.
- Measure the bag’s width, height, and base depth.
- Shape the bag gently by hand.
- Add the optional lining or closure if desired.
- Trim excess yarn only after confirming that all ends are secured.
Care and maintenance
Follow the yarn manufacturer’s washing and drying instructions. Cotton, acrylic, and blended yarns may have different care requirements.
If the bag is washable, remove any insert that is not intended to be washed with the fabric. Dry the bag thoroughly before storing it, and reshape the base and sides as needed.
Avoid hanging a heavily loaded bag by its handles for long periods. Inspect the handle attachments, upper edge, and base regularly for stretching or loose stitches.
14. Common Mistakes and Troubleshooting
| Problem | Likely cause | Solution | Prevention |
|---|---|---|---|
| Base curls | Foundation chain or row tension is too tight | Rework the base with more even tension | Make a gauge swatch and measure the rectangle |
| Base becomes wavy | Too many stitches at corners or edges | Remove excess stitches and correct the corner placement | Follow the specified edge and corner counts |
| Corners are uneven | Corner stitches are not placed consistently | Rework the affected corner | Mark all four corners before beginning the body |
| Body widens unintentionally | Extra stitches are added in joined rounds | Correct the round and restore 132 stitches | Count each round before joining |
| Stitch count is incorrect | Stitches are missed or worked twice | Undo the affected section and recount | Use stitch markers and check every round |
| Bag is too floppy | Fabric is too loose or yarn stretches easily | Consider a smaller hook or suitable lining | Test the fabric before making the full bag |
| Bag is too stiff | Hook is too small or yarn is very rigid | Try a larger hook and reassess the drape | Make and measure a swatch |
| Handles have different lengths | Different row counts or tension | Adjust the shorter or longer strap before attaching | Compare both straps side by side |
| Handles stretch excessively | Flexible fabric or insufficient reinforcement | Reinforce the attachment points and consider a lining | Use dense stitches and inspect the fabric |
| Handle attachment is loose | Too few sewing passes | Re-sew through multiple stitches and secure the tail | Leave a long sewing tail and reinforce the ends |
| Top edge stretches | The edge lacks sufficient stability | Add a suitable reinforcement round | Keep the edge stitches even and secure |
| Gaps appear in the fabric | Loose tension or missed stitches | Correct the affected section | Maintain consistent tension and count stitches |
| Seams are uneven | Components were misaligned during sewing | Reposition and resew the affected area | Pin handles and lining before attachment |
| Lining distorts the bag | Lining is too small or tightly attached | Remove and resize the lining | Measure the finished bag before cutting fabric |
15. Customization and Size Adjustments
Making the bag wider
The body circumference depends on the rectangular base perimeter. To make a wider bag, increase the number of stitches across the base rows while keeping the same number of base rows if you want to preserve the depth.
At a target gauge of four stitches per inch, each additional four base stitches adds approximately one inch to the length of each long edge. Because the perimeter includes both long edges, the overall body circumference increases by approximately eight stitches for every four additional base stitches.
Recalculate the perimeter and the handle placement after changing the base width.
Making the bag deeper
Add rows to the rectangular base. At a target row gauge of four rows per inch, four additional base rows add approximately one inch of depth.
A deeper base also changes the side proportions and the overall bag capacity, so check that the handles remain appropriately positioned.
Increasing the bag height
Work additional body rounds. At approximately four rounds per inch, four additional rounds add about one inch of height.
This is an estimate; measure your actual body rather than relying exclusively on the planned round count.
Adjusting handle dimensions
To make the handles wider, increase the number of foundation chains and the number of stitches in each row. To make them longer, add rows.
Keep both handles identical. Wider or longer handles use more yarn and may behave differently under tension.
Changing yarn weight or hook size
A heavier yarn or larger hook may create a larger bag. A finer yarn or smaller hook may produce a smaller, more compact fabric.
Changing the yarn or hook can affect the base perimeter, bag height, handle width, and amount of yarn required. Make a new swatch and recheck the dimensions before starting.
Beginner and advanced modifications
For a simpler project, use one color and omit the lining and closure. For a more advanced version, add stripes, a contrasting border, a lining, or a reinforced base.
Structural changes require careful checking of dimensions and attachment points. Decorative changes usually require less recalculation, but they can still affect yarn consumption and finishing.
16. Beginner and Advanced Tips
Beginner tips
- Count the base stitches after every row.
- Mark the four corners before working the first body round.
- Check the 132-stitch perimeter before beginning the sides.
- Keep the chain 1 separate from the stitch count.
- Measure the bag after every ten body rounds.
- Crochet both handles with identical row counts.
- Pin the handles in position before sewing.
- Practice sewing through several layers of crochet fabric on a small sample if needed.
Advanced tips
- Adjust hook size to balance density, flexibility, and weight.
- Use consistent corner placement to maintain a rectangular base.
- Reinforce handle attachments through multiple rounds of the body.
- Consider a suitable lining if the bag needs additional structure.
- Recalculate the base perimeter when modifying the width or depth.
- Measure the finished bag before cutting lining fabric.
- Test the completed bag with lightweight items and inspect its seams before regular use.
17. Final Project Checklist
- Base dimensions have been checked.
- Base stitch counts are consistent.
- All four corners are shaped evenly.
- The body maintains 132 stitches per round.
- Bag height and depth have been measured.
- The top edge is neat and stable.
- Both handles match in length and width.
- Handle attachment points are secure.
- All yarn ends are woven in.
- The optional lining or closure is correctly installed.
- Finished dimensions have been recorded.
- Care instructions are appropriate for the chosen materials.
18. Frequently Asked Questions
1. Is this crochet tote bag suitable for beginners?
Yes, it is suitable for advanced beginners who know how to make chains and single crochet stitches. The main challenges are working around the rectangular base, maintaining the perimeter count, and reinforcing the handles.
2. What yarn is best for a sturdy crochet tote bag?
Cotton and suitable sturdy blends are practical choices. The best option depends on the desired fabric density, flexibility, weight, and care requirements.
3. How much yarn do I need?
The estimated quantity is approximately 600–800 g for the specified design. Actual consumption depends on yarn thickness, gauge, handle construction, and optional additions.
4. How do I prevent the bag from stretching?
Use a suitably dense fabric, reinforce the handle attachments, and consider a lining if appropriate. Avoid assuming that any crochet bag has a particular load capacity without testing.
5. How can I make the base larger?
Increase the number of stitches across the base rows to increase its length, or add rows to increase its depth. Recalculate the perimeter and body stitch count after making changes.
6. How do I keep the sides straight?
Maintain the same stitch count in every body round and avoid accidentally crocheting into the joining slip stitch or turning chain. Check the bag’s shape regularly.
7. How can I reinforce the handles?
Sew each handle through multiple stitches of the bag body, make several securing passes, and consider an appropriate lining. Inspect the attachment points regularly.
8. Is a fabric lining necessary?
No. The bag can be completed without a lining. A suitable lining may help retain shape and cover interior seams, depending on the fabric and construction.
9. Can I use a different crochet stitch?
Yes, but a different stitch can change the fabric density, dimensions, yarn consumption, and stretch. Make a swatch and recalculate the pattern before replacing the main stitch.
10. How should I wash and maintain the bag?
Follow the yarn manufacturer’s care instructions. Remove any non-washable insert before cleaning, dry the bag thoroughly, reshape it as needed, and inspect the handles and seams for signs of wear.
Leave a Comment